Sometimes, you need to create tests that use one or more files as test data. But to make sure the files are available in the test, some additional effort is needed.
More specifically, you need to look out for the following issues:
- The build output of the test project might not always be created in the same location relative to the files.
- The working directory of the test runner might change depending on the tool that is executing it.
In this blog post, we’ll show you how you can overcome both issues and prevent them from messing up your unit tests!
This blog post is part of a series on unit testing:
1. Introduction to unit testing
2. Creating unit tests using the MSTestv2 framework in Visual Studio
3. Using isolation frameworks
4. Writing testable code
5. FluentAssertions
6. Data-driven tests
7. Test life cycle attributes
8. Using files in unit tests
Preventing issue 1: ensure that the files are copied to the build output directory
Issue 1: The build output of the test project might not always be created in the same location relative to the files.
You can solve the first problem by ensuring that the files are copied to the build output directory:
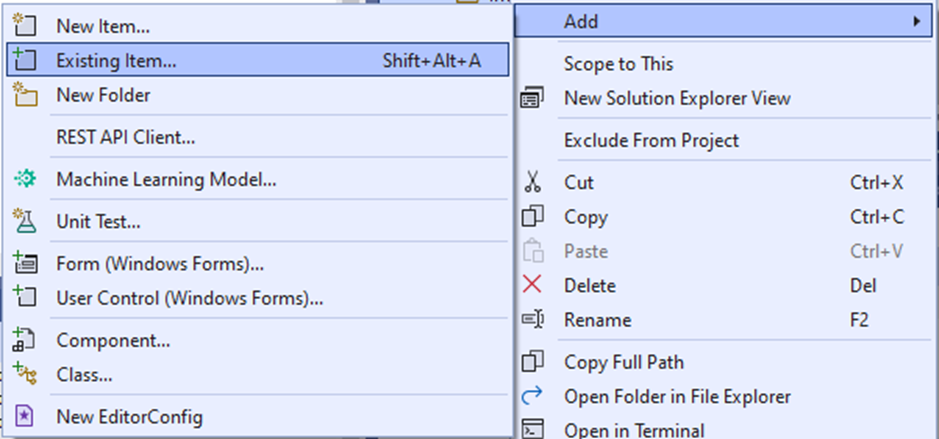
1) Put the files in the directory of the test project and add them to the project via the “Add Existing Item” context menu action in the Solution Explorer.
You can also organize the files by adding folders to the project. To avoid confusion, it is advised that you use the same folder structure in the project directory as in the Solution Explorer.
2) Right-click a file in the Solution Explorer and select “Properties”.
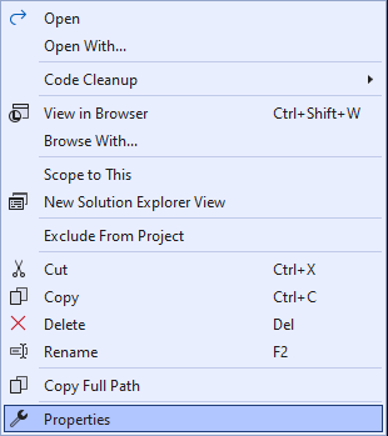
3) Modify the properties as shown in the image below:

Setting these properties will cause the file to be copied to the build output directory. The file will now always have the same location relative to the test assembly.
4) Repeat the steps above for any other files that need to be available.
Preventing issue 2: ensure that the files are copied to the correct location for each test
Issue 2: The working directory of the test runner might change depending on the tool that is executing it.
To deal with the second issue, the source code of the test must be modified a little. MSTestv2 provides the DeploymentItemAttribute specifically for this problem.
Let’s have a look at an example for the test class:
    [TestClass]
    public class ImportTests
    {
        [TestMethod]
        [DeploymentItem(@"Import Test Files\default.json")]
        public void NormalConfigTest()
        {
            // Arrange
            var expected = ...

            // Act
            QAction_1.KpiConfig.ImportFromFile("default.json");

            // Assert
            actual.Should().BeEquivalentTo(expected);
        }

        [TestMethod]
        [DeploymentItem(@"Import Test Files\unexpected whitespace.json")]
        public void ModifiedWithWhitespaceTest()
        {
            // Arrange
            var expected = ...

            // Act
            QAction_1.KpiConfig.ImportFromFile("unexpected whitespace.json");

            // Assert
            actual.Should().BeEquivalentTo(expected);
        }
    }
The attribute ensures that the files are copied to the correct location before each test starts. You can add this attribute multiple times if your test needs multiple files.
If you need the same files for multiple tests, you can also add the attribute to the class instead:
    [TestClass]
    [DeploymentItem(@"Import Test Files\default.json", "Import Test Files")]
    [DeploymentItem(@"Import Test Files\unexpected whitespace.json", "Import Test Files")]
    public class ImportTests
    {
        [TestMethod]
        public void NormalConfigTest()
        {
            // Arrange
            var expected = ...

            // Act
            var actual = QAction_1.KpiConfig.ImportFromFile(@"Import Test Files\default.json");

            // Assert
            actual.Should().BeEquivalentTo(expected);
        }

        [TestMethod]
        public void ModifiedWithWhitespaceTest()
        {
            // Arrange
            var expected = ...

            // Act
            var actual = QAction_1.KpiConfig.ImportFromFile(@"Import Test Files\unexpected whitespace.json");

            // Assert
            actual.Should().BeEquivalentTo(expected);
        }
    }
Note the second parameter that was added to the attribute: it creates a directory with that name and puts the file inside it. Use this when you want to separate the files in different folders in case they have the same name.