If we could choose a motto for the latest release of DataMiner IDP, we would probably go for “Little things that make a big difference”. That’s because this version contains a lot of smaller items that make it more convenient to work with IDP on a daily basis.
Not familiar yet with the DataMiner Infrastructure Discovery and Provisioning (IDP) app? You can learn all about it on the IDP app page.
Start discovery faster
We understand all too well: when you get your hands on IDP, you want to start a discovery as soon as possible. And that’s exactly why we’ve made some changes to the user interface that will make this process faster (and easier).
- Firstly, when launching discovery, you can immediately start providing IP addresses. You no longer need to explicitly add an ‘Included IP Range’ because IDP now automatically adds the necessary input fields.
- Secondly, because it’s very common to run a scan with SNMPv2, we have made the discovery profile ‘SNMP_MIB_II’ the default selection.
- And finally, if you want to save these settings as a scan range, you can supply the name on the same screen.
All these changes will save you a lot of time, and we’ve got the proof right here. Ready, set, go!
Which connections still need to provisioned?
When discovering the connectivity, IDP will now only show the discovered connections that still need to be provisioned. The connections that are already provisioned are hidden by default. Don’t worry, you can use the toggle button ‘Include Managed’ to show these again.
This gives you an immediate overview of the discovered connections that still need to be provisioned.
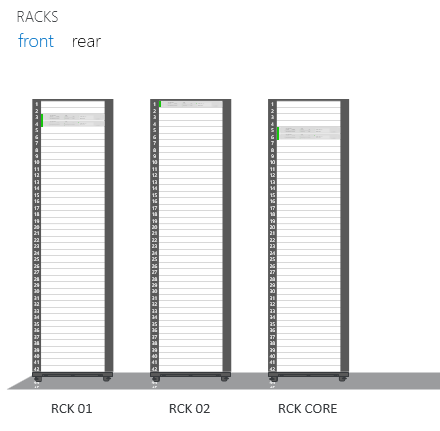
Which rack is this?
For each aisle, the names of the racks are now displayed. So, no more guessing which racks you’re looking at!
Pop-up for software compliance check
With the DataMiner IDP Software Update Manager, you can perform a software upgrade and check if the software version on the equipment is running the expected version. Both activities can be separately enabled or disabled per CI Type.
Let’s revisit the most important concepts of the software compliance check:
- The expected software version is configured on the CI Type. Optionally, IDP can also set the expected version as the baseline value in the alarm template of the element.
- When the Software Compliancy activity is enabled for the CI Type,
- IDP will immediately have an alarm generated in case the expected version is not found in the software version reported by the element. This requires that the expected version is set as the baseline value in the alarm template and that the element’s alarm template has dynamic alarm thresholds assigned.
- IDP will automatically check the software compliance with a 2-hour multithreaded timer and after a software upgrade has been run.
- a user can perform a manual software compliance check by clicking the button Check Compliancy.
Now, what’s new in IDP 1.1.19? In the case of a manual compliance check, we’ve introduced a pop-up window where you have to confirm you want to run a compliance check. Now you will also receive a notification if the compliance check can’t be executed because of elements where the Software Compliancy activity is disabled. Previously, there wouldn’t be any feedback and you might have been clueless why the compliance check wasn’t executed.
Can you think of other little things that can have a big impact on how you use IDP? Don’t hesitate to drop them in the comments below, add them as a feature suggestion, or talk to your account manager directly.
A complete overview of all features and enhancements is available in the DataMiner IDP 1.1.19 Release Notes.