solution Use Case
Production Event Management (2) – ingest production data from third-party systems (DataMiner user-definable APIs / webhooks)
This is the second use case in an 8-part series on Production Event Management. As we have seen in the previous example, administrative data to schedule productions can be entered directly via the DataMiner Jobs app HTML5 user interface. Many media organizations, however, are using third-party scheduling systems. And often, they have even developed their own in-house solutions to manage such data.
So far, DataMiner’s Web API has been the default way to send job data from a third-party scheduling system to DataMiner. There are, however, some limitations: multiple API calls are required to achieve full integration, and the level of customization is limited.
But all of this is about to change! This use case shows how easy it is to import job data from any third-party scheduling system into DataMiner using the upcoming DataMiner user-definable APIs.
Basically, any DataMiner Automation script with any logic you can imagine can be made available as RESTful API, in just a few clicks. You can design, validate and deploy your APIs at runtime; API keys are used to secure communication. (We also have a demo video available on this topic: “Ingesting jobs with user-definable API“.)
Let’s have a look at how we can create a new job with a single “HTTP POST” command.
USE CASE DETAILS
 This is a screenshot of the DataMiner Jobs app: an easy and fully customizable HTML5 interface where you can enter all administrative data required to schedule a production—or any other job—manually.
 Previously, our default method to create new jobs through third-party scheduling systems was using the DataMiner Web API (e.g. to create, update or delete a job).
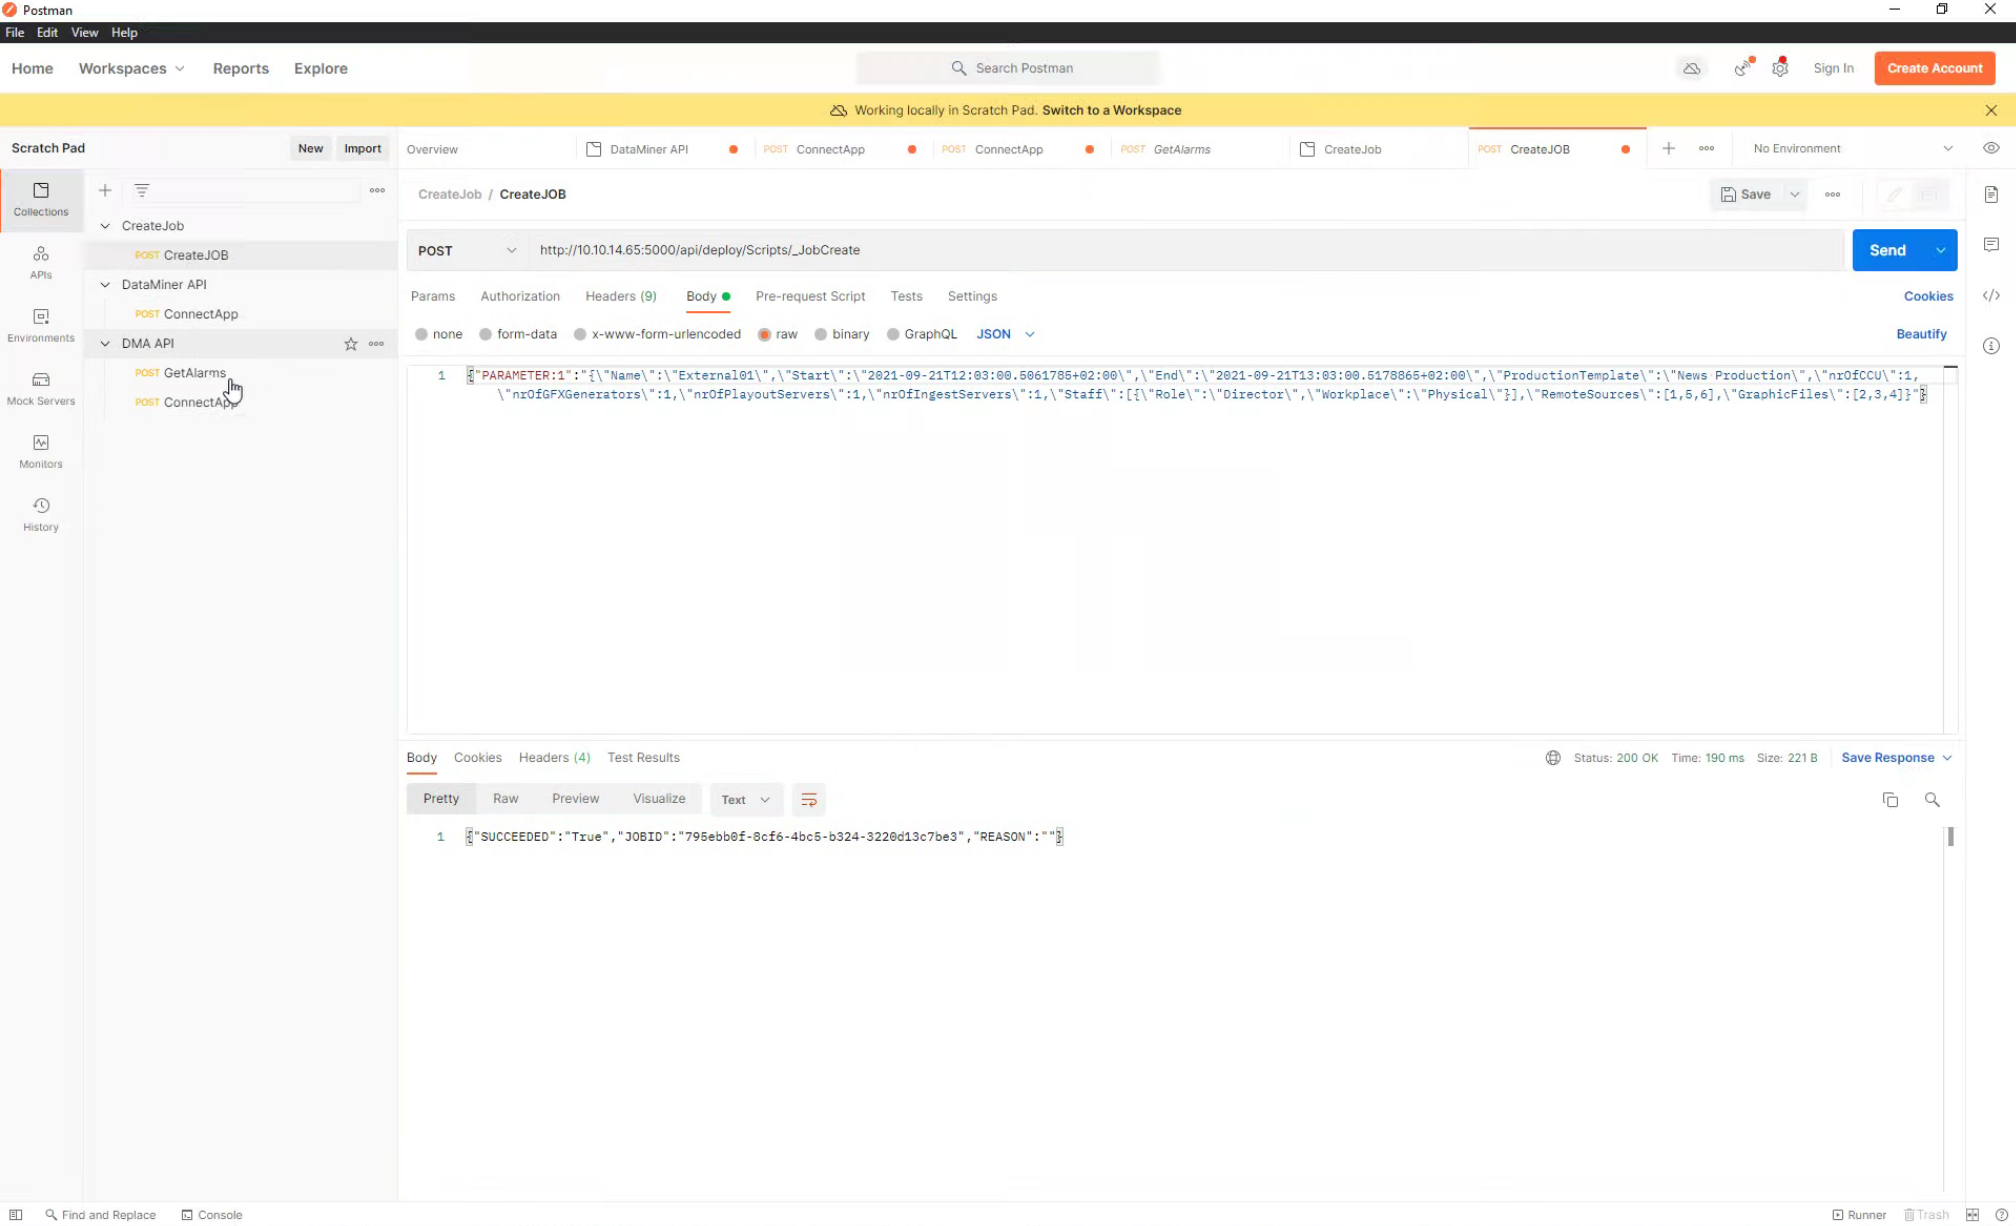 But with the DataMiner user-definable RESTful APIs, it has never been easier to define exactly what you need and expose it via a custom API. In this example, our third-party scheduling system is represented by Postman, a widely used platform to test APIs.
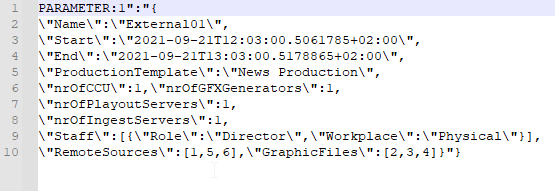 To create a new job, all you need to send to DataMiner is a single JSON string, which includes the exact job data for your production: production name, number of required production resources, roles, signals, etc. (We copied the string into Notepad++ to make it easier to read.)
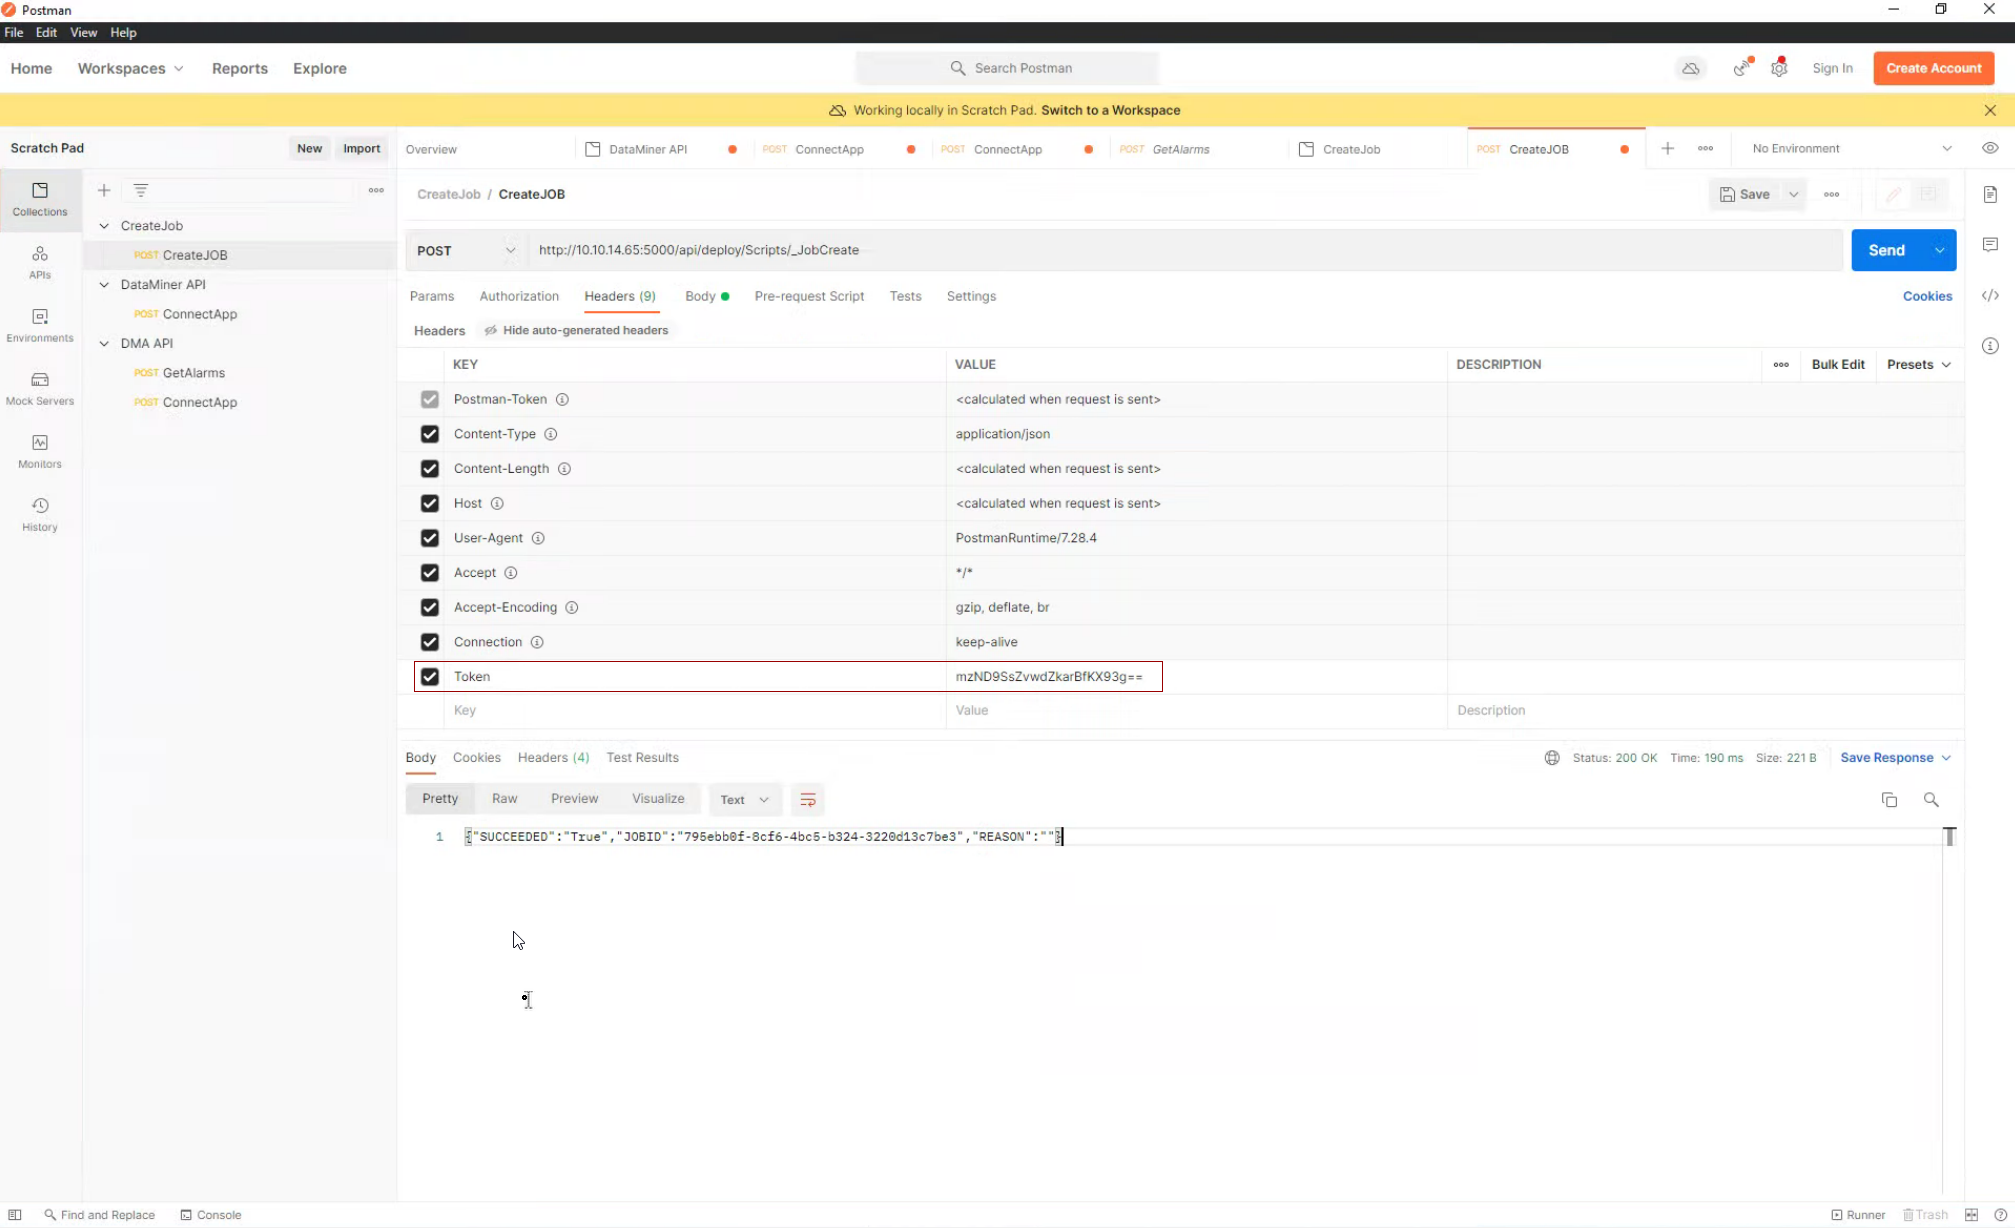 To authenticate, DataMiner creates a static API key. Here you can see the token provided by DataMiner and used in Postman.
 This screenshot shows the HTTP endpoint to which we will send our job data: just click on the "Send" button and you are done!
 When the job is successfully created in DataMiner, the API will send back an "HTTP 200 OK" message and also hand over the ID of the job to the scheduling system.
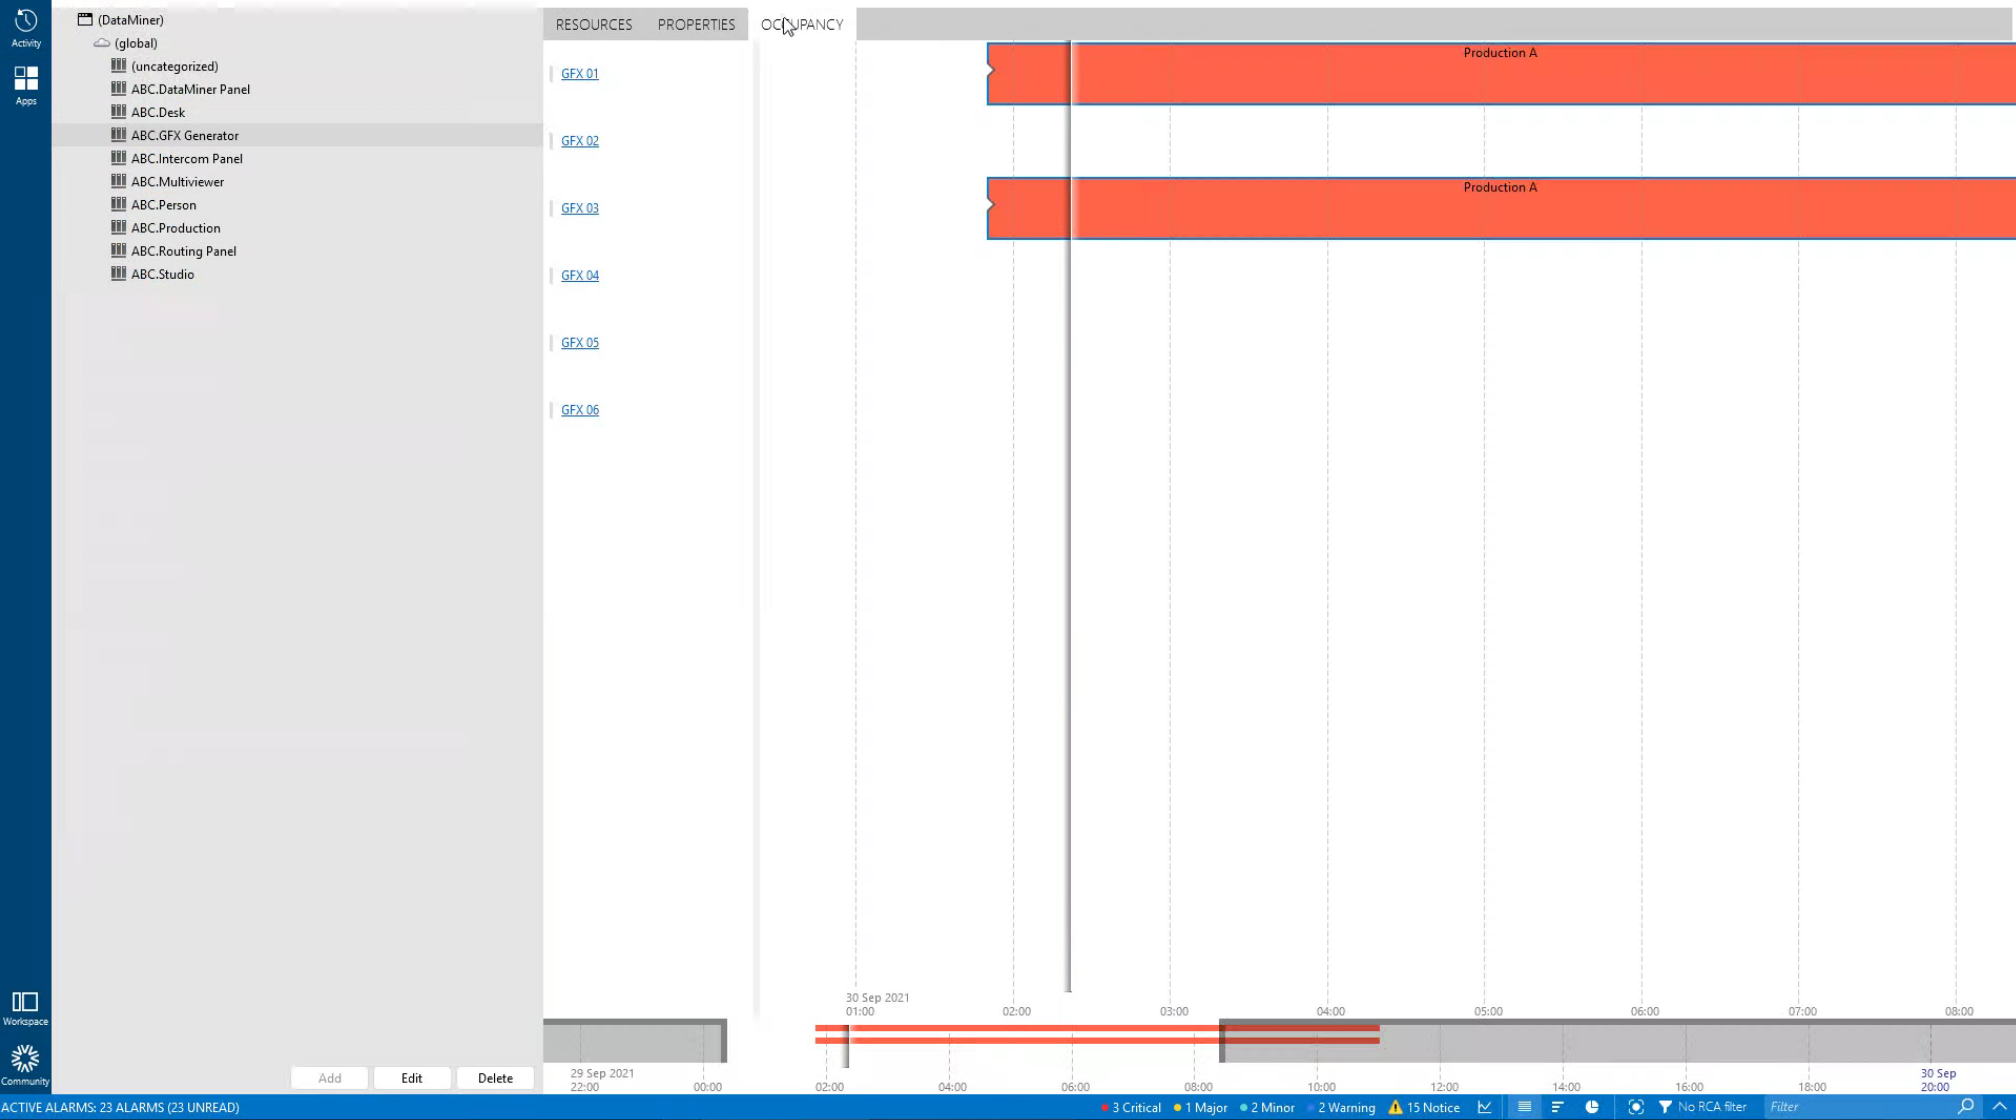
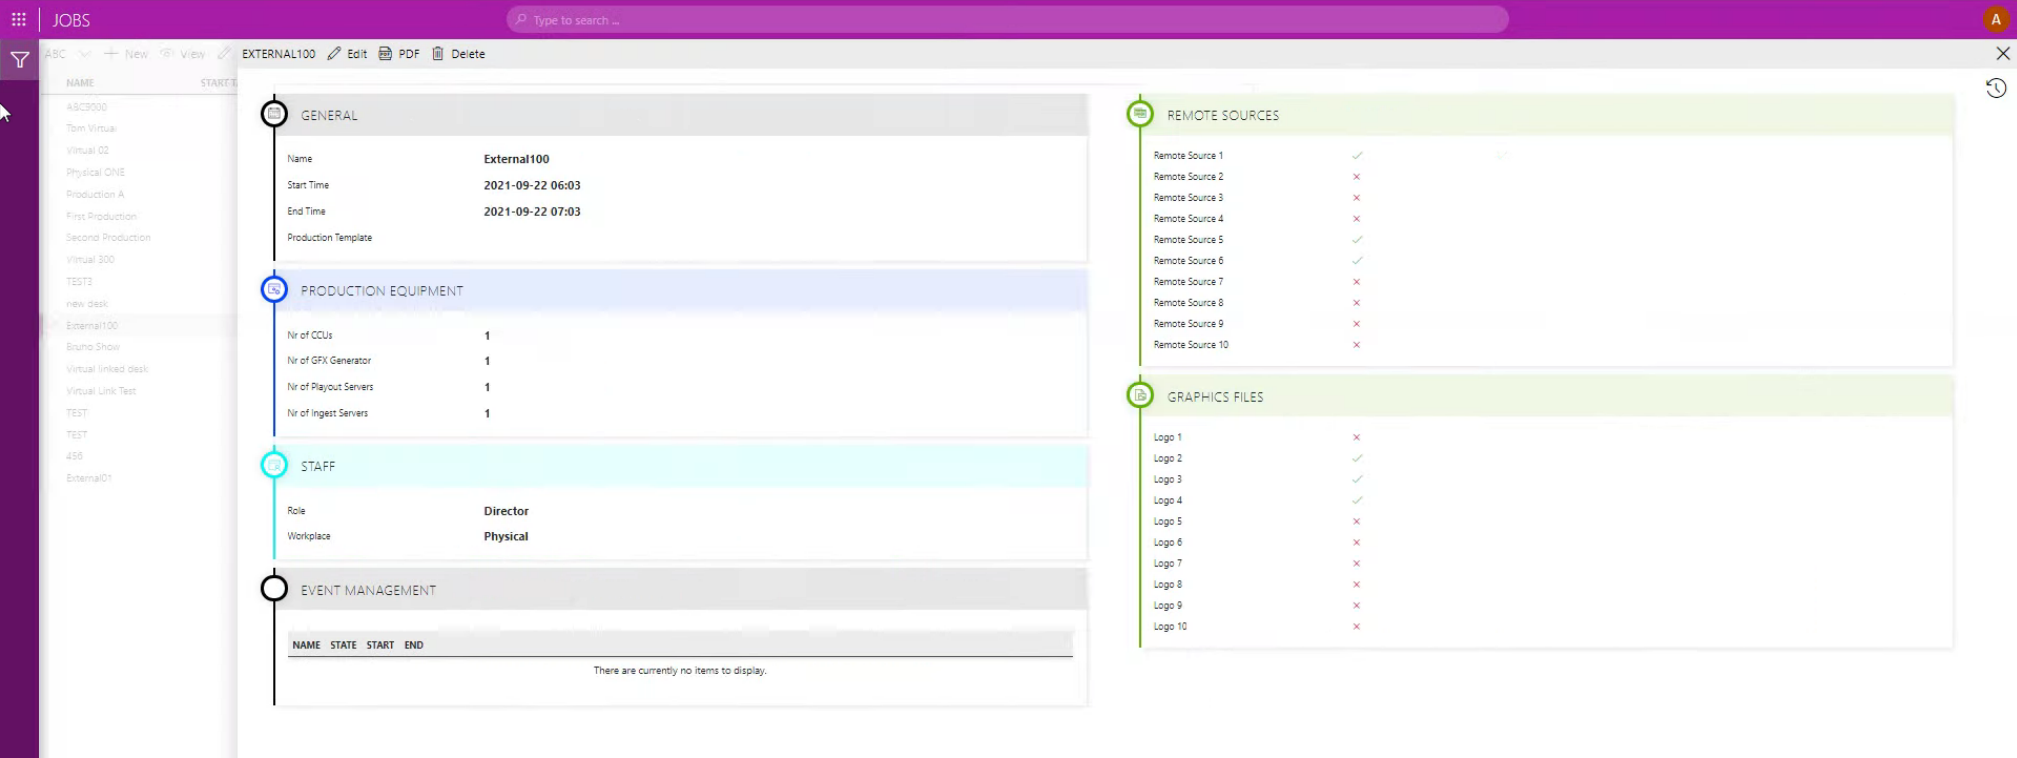 If required, the new job can be double-checked and fine-tuned in the DataMiner Jobs app again before the job gets converted into a booking ("production") and DataMiner starts adding resources to it.
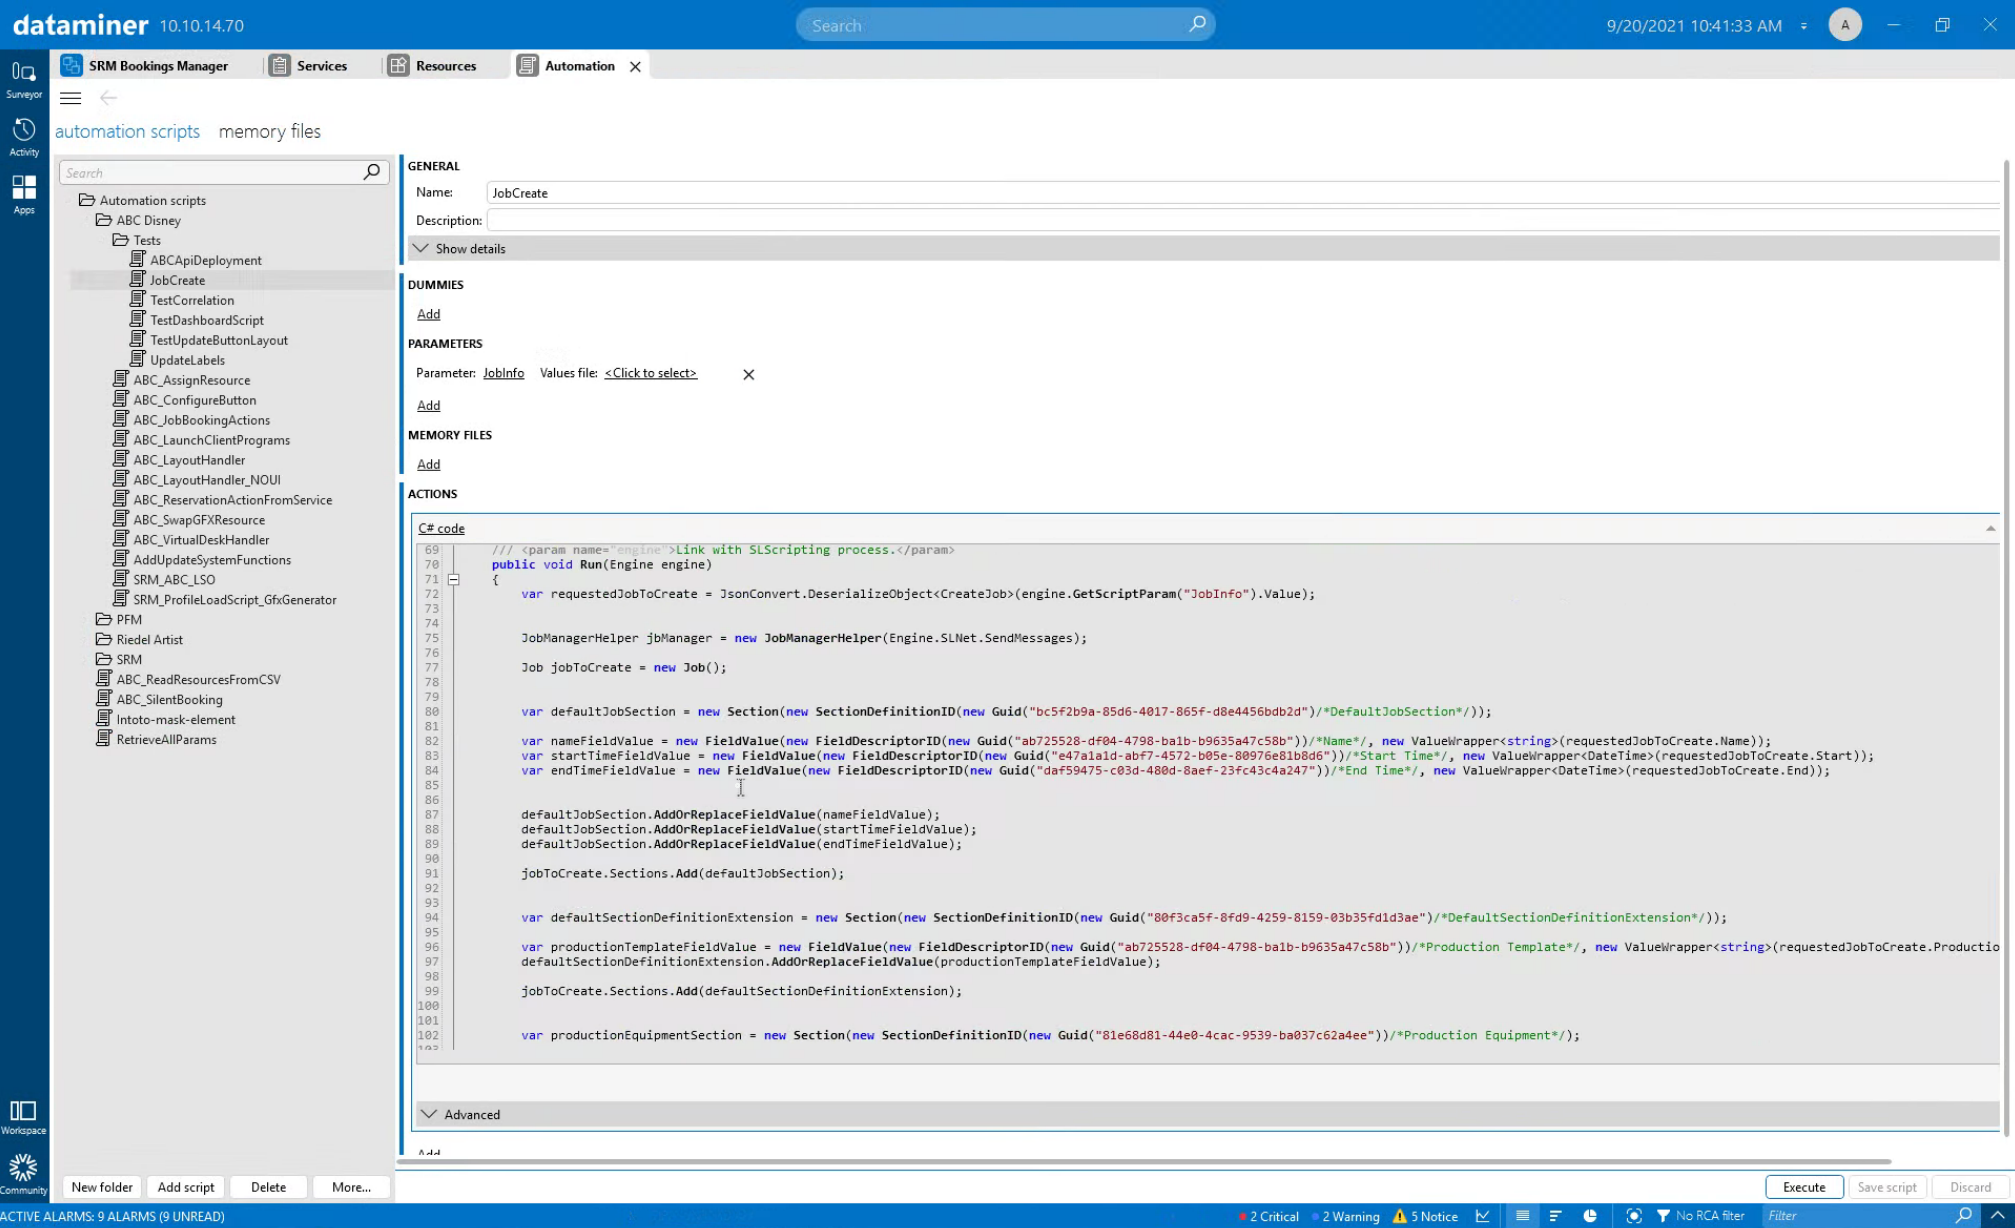 Let's have a look at how this is done under the hood. This screenshot shows the Automation script ("JobCreate") that was created by the engineering team. It defines the exact data that is required from the third-party scheduling system.
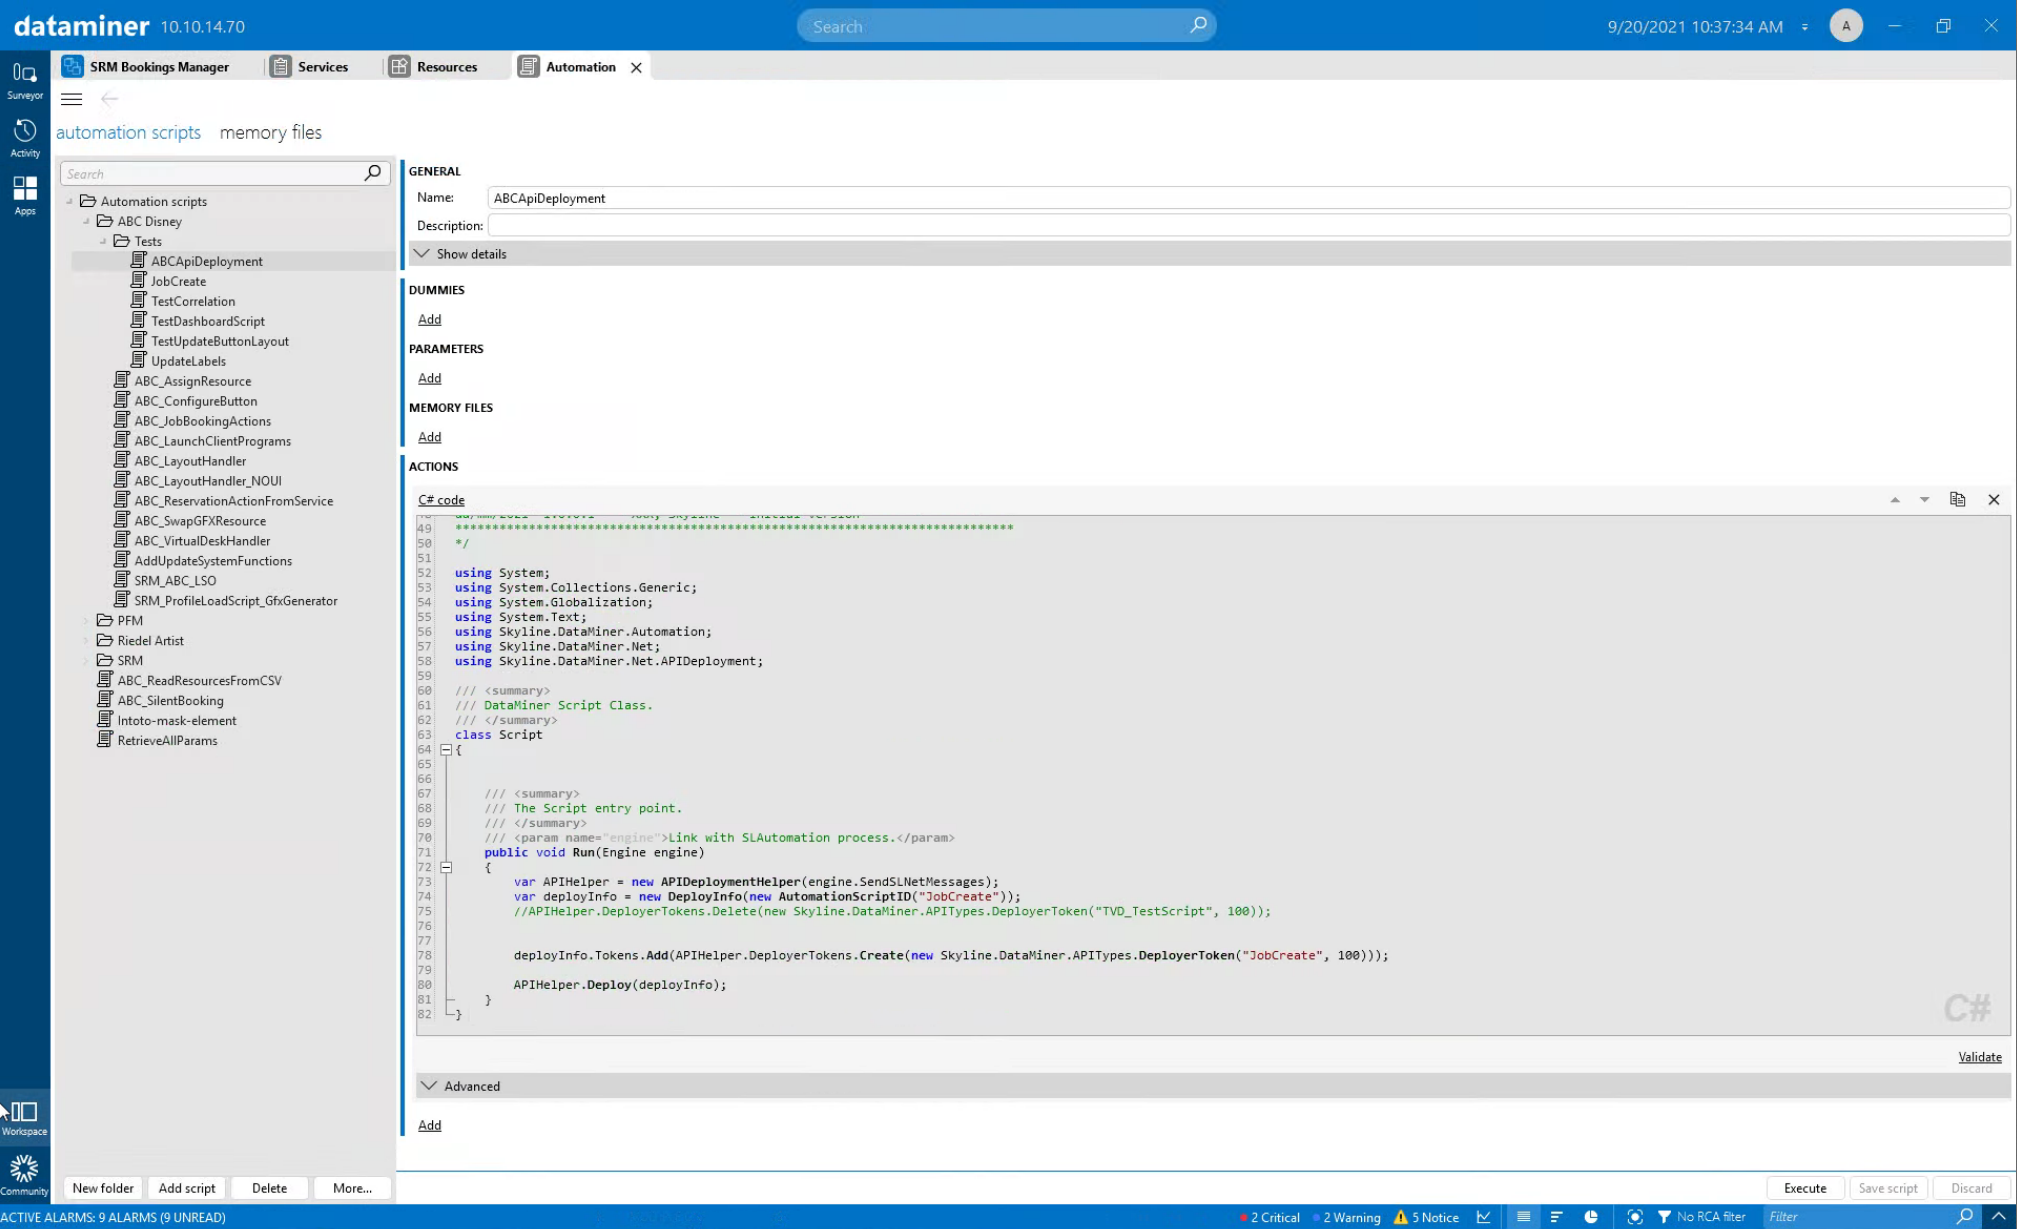 A second script is currently used to actually make the "JobCreate" script available as RESTful API. A user interface will be added in a future version of DataMiner.
 Let's wrap it up with this short video showing the complete workflow.
 In the next part of this use case series on production management, you will learn how DataMiner assigns resources to your production.