example Use Case
DataMiner Button Panels
This use case illustrates how you can create highly customizable DataMiner button panels on the fly. Button panels are typically used for XY-like signal switching, but there can be many other use cases such as loading templates on multiviewers in your MCR or assigning RCPs to CCUs in your studio.
For signal switching, button panels provide an easy way to control any of your existing SDI, ASI, or RF routers, third-party SDN controllers, or even cloud-based content delivery platforms supporting common protocols like RIST, SRT, ZIXI, RTP, or RTMP. And DataMiner can engineer your IP flows directly as well as through any network infrastructure.
The button panels are HTML5-based and can run in any browser. With DataMiner Dashboard Sharing, you can even give people outside your company secure and real-time access to a panel. In this example, a simple button panel is created to control NetInsight’s Nimbra Edge cloud-based media platform.
USE CASE DETAILS
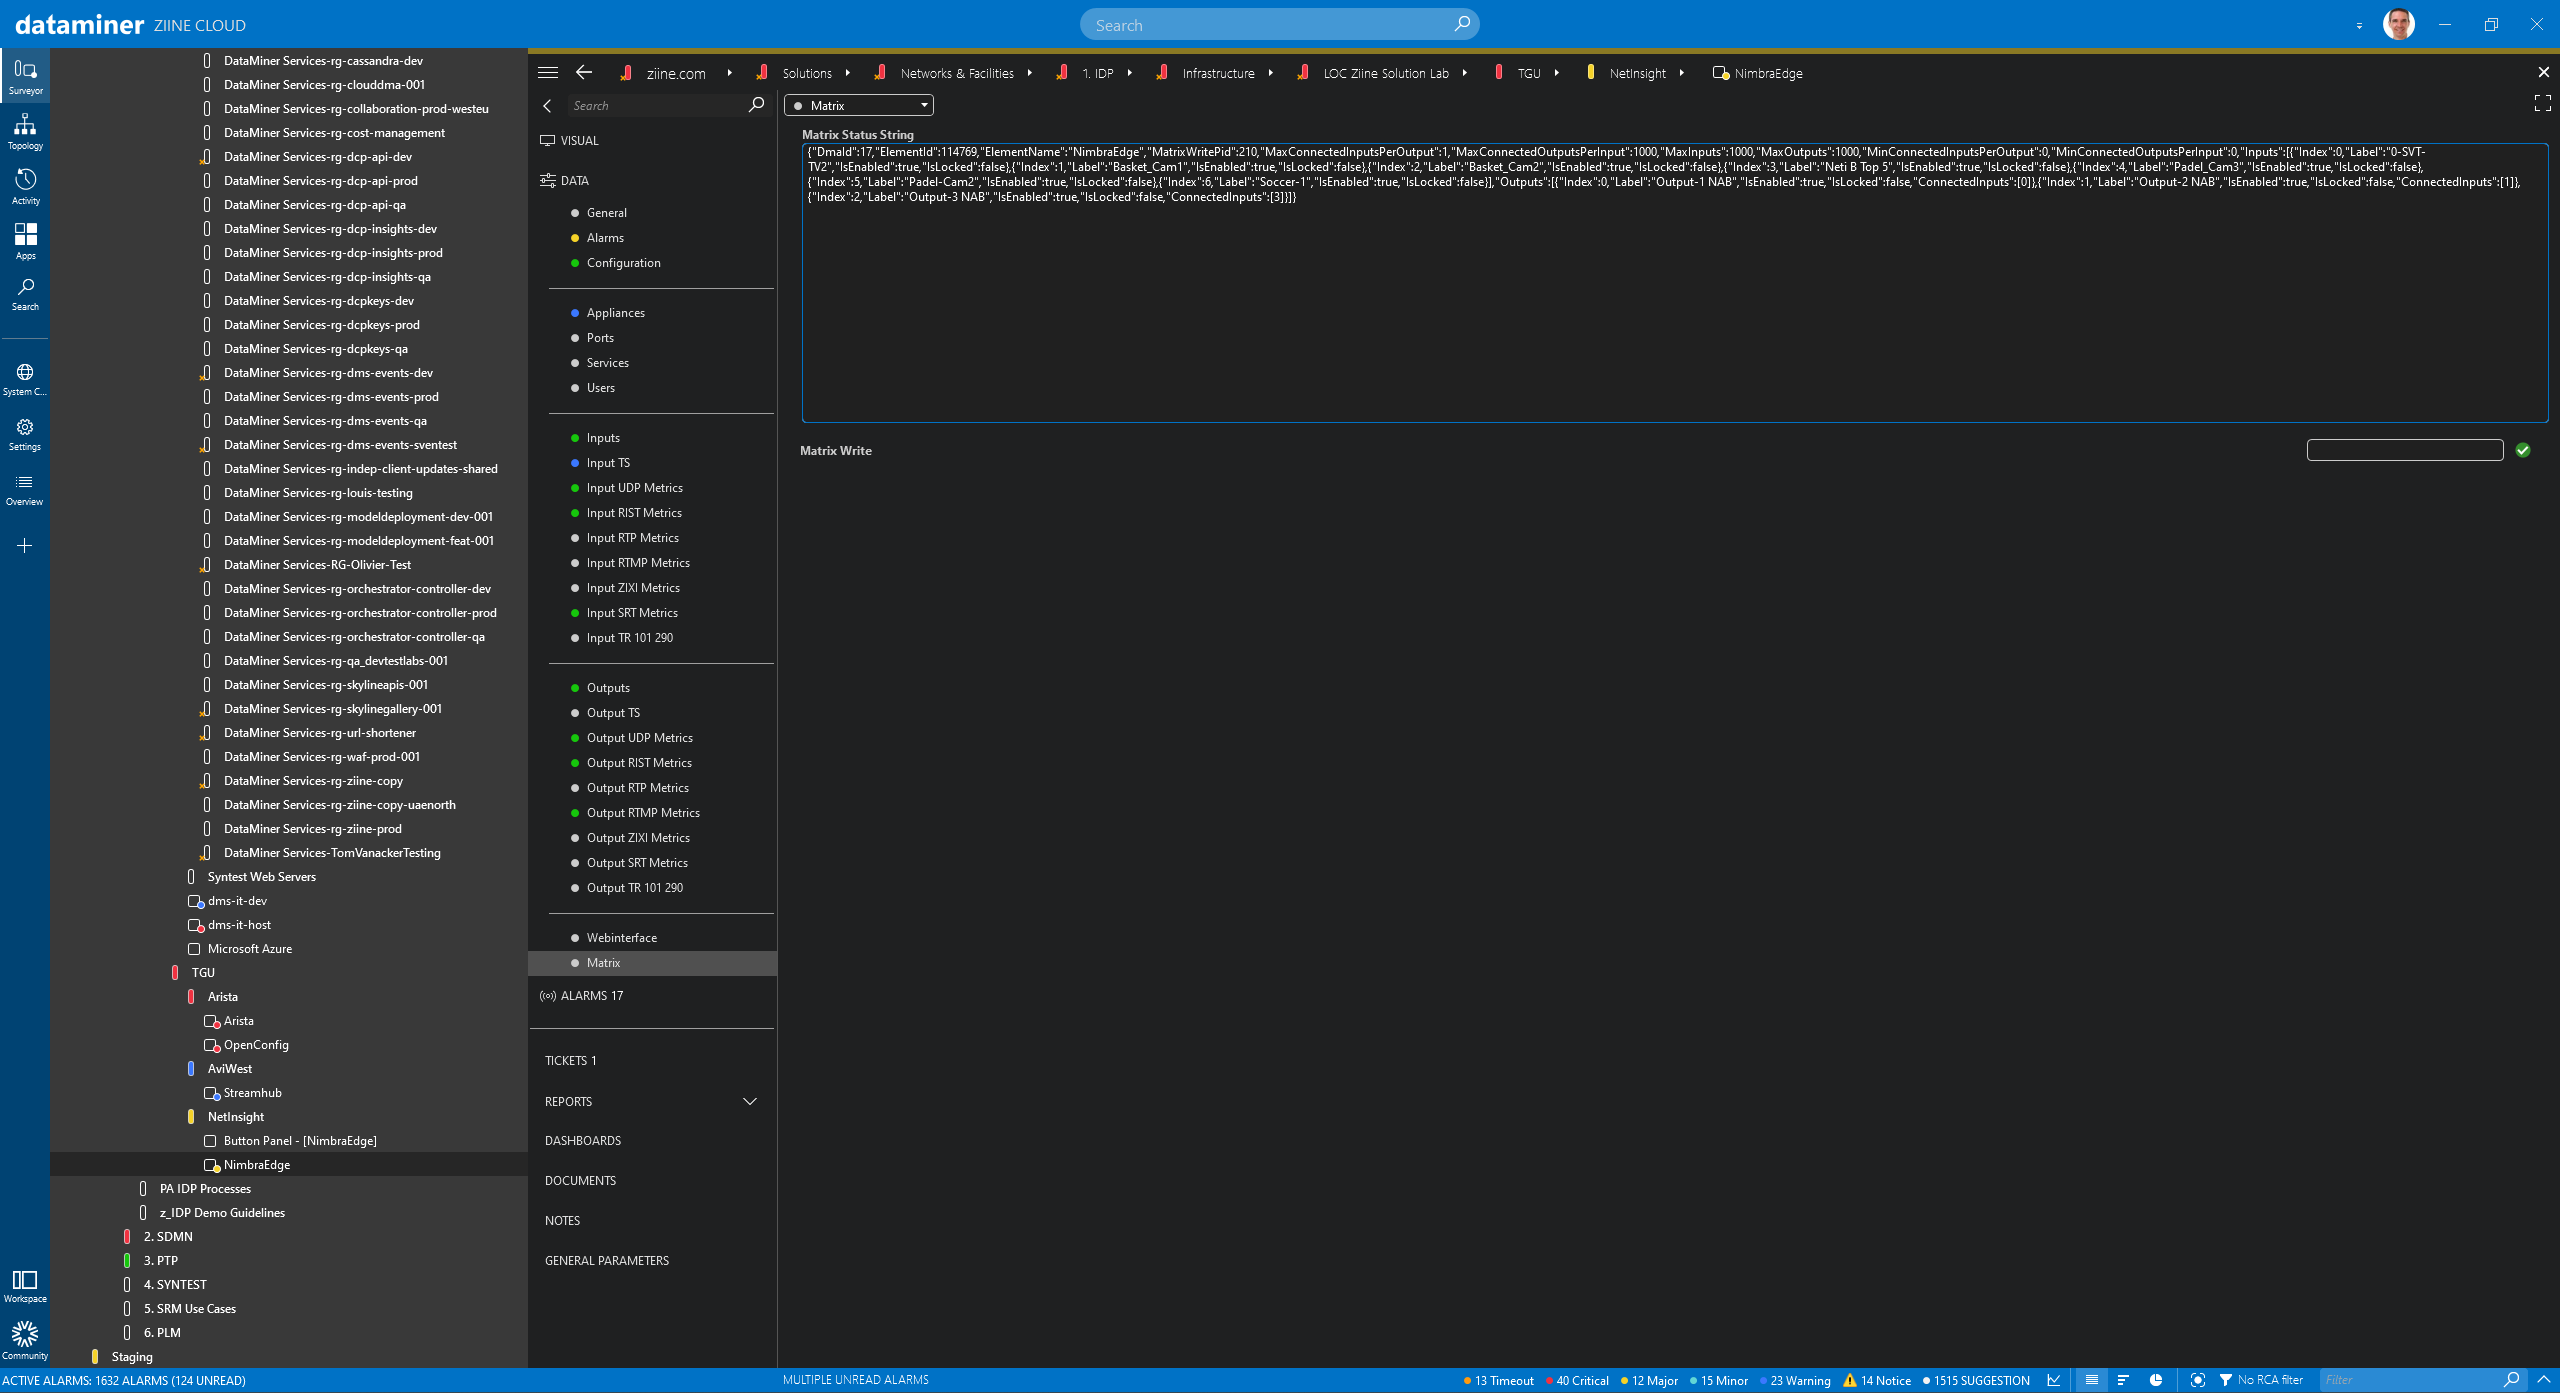 To start with, the element you want to control via a button panel (Nimbra Edge in this example) needs to expose a "Matrix Status String".
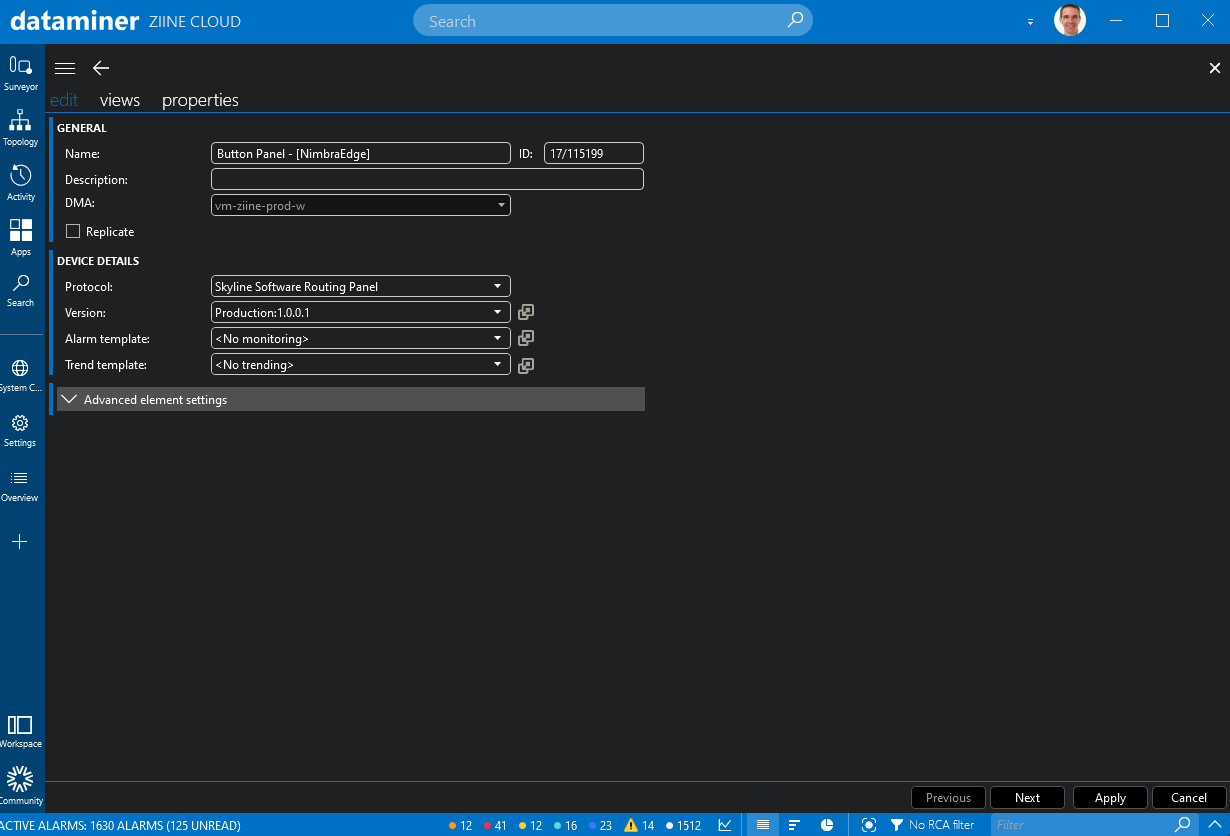 Next, install the "Skyline Software Routing Panel" connector.
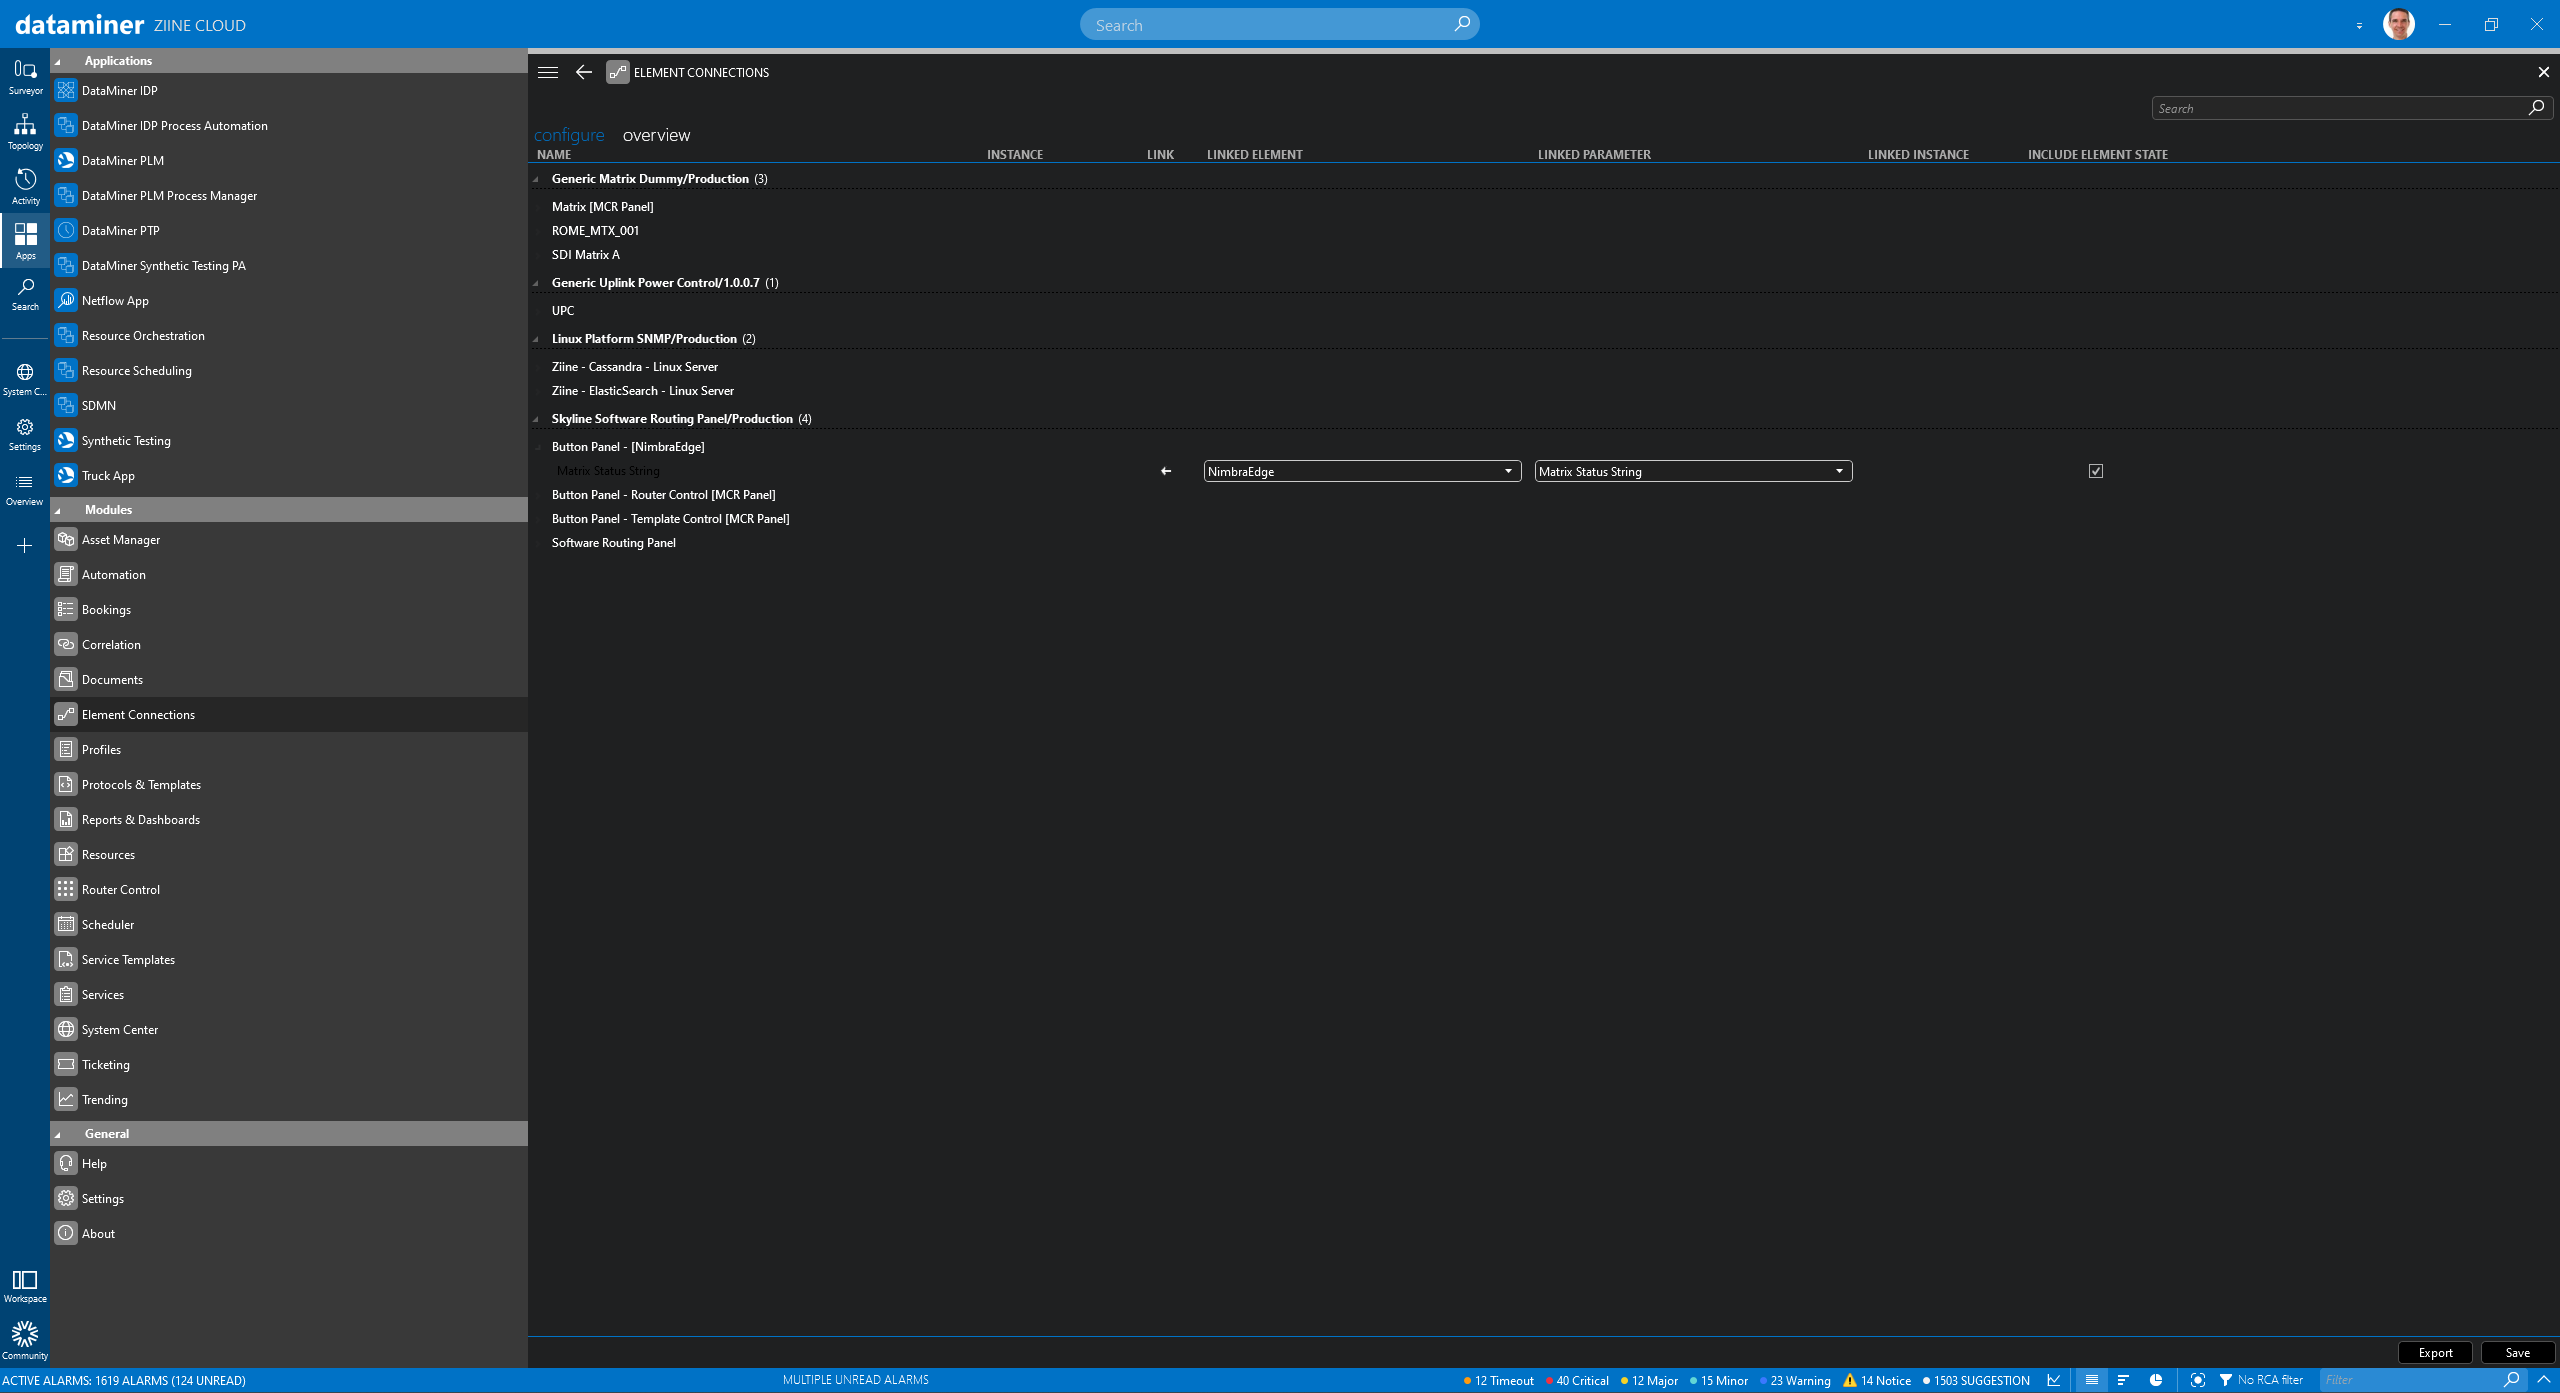 Now go to go the "Element Connections" module and link your "Button Panel" element to the "NimbraEdge" element and its "Matrix Status String" parameter. These elements will then share data in real time.
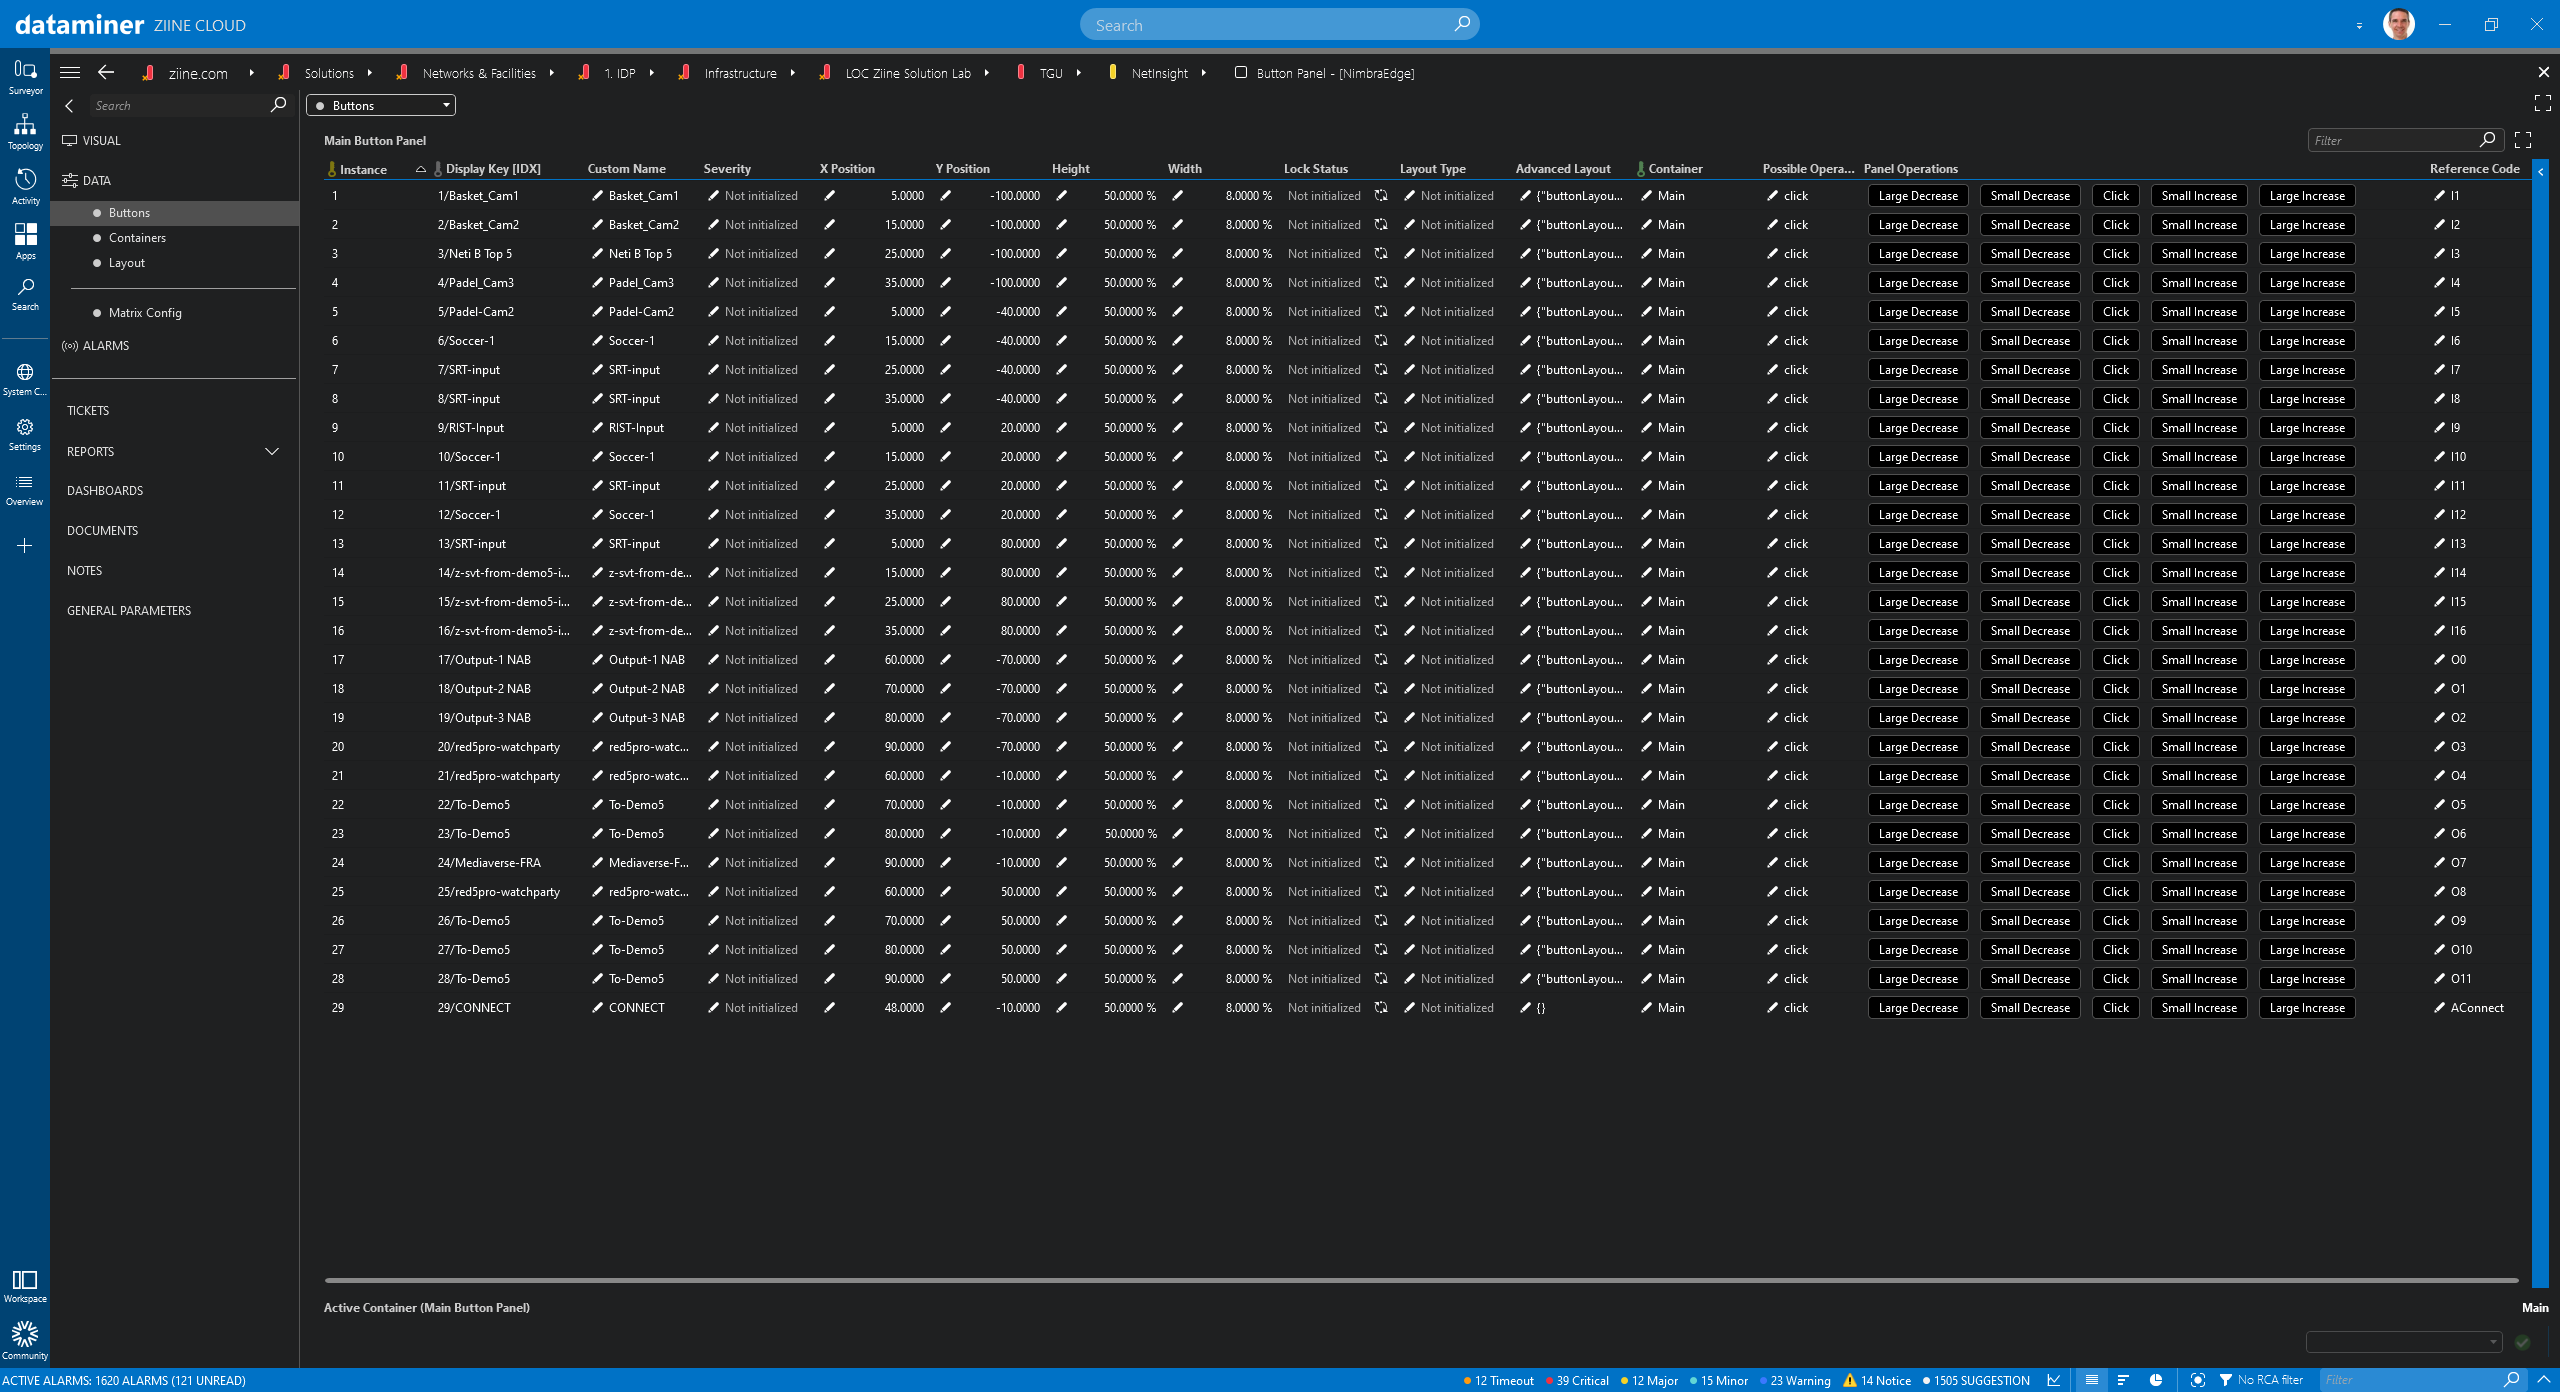 Then start adding rows for all the buttons you need. These can be input, output, or connect buttons. Select a button size and the X & Y position. You can also assign a fully customizable layout to each button.
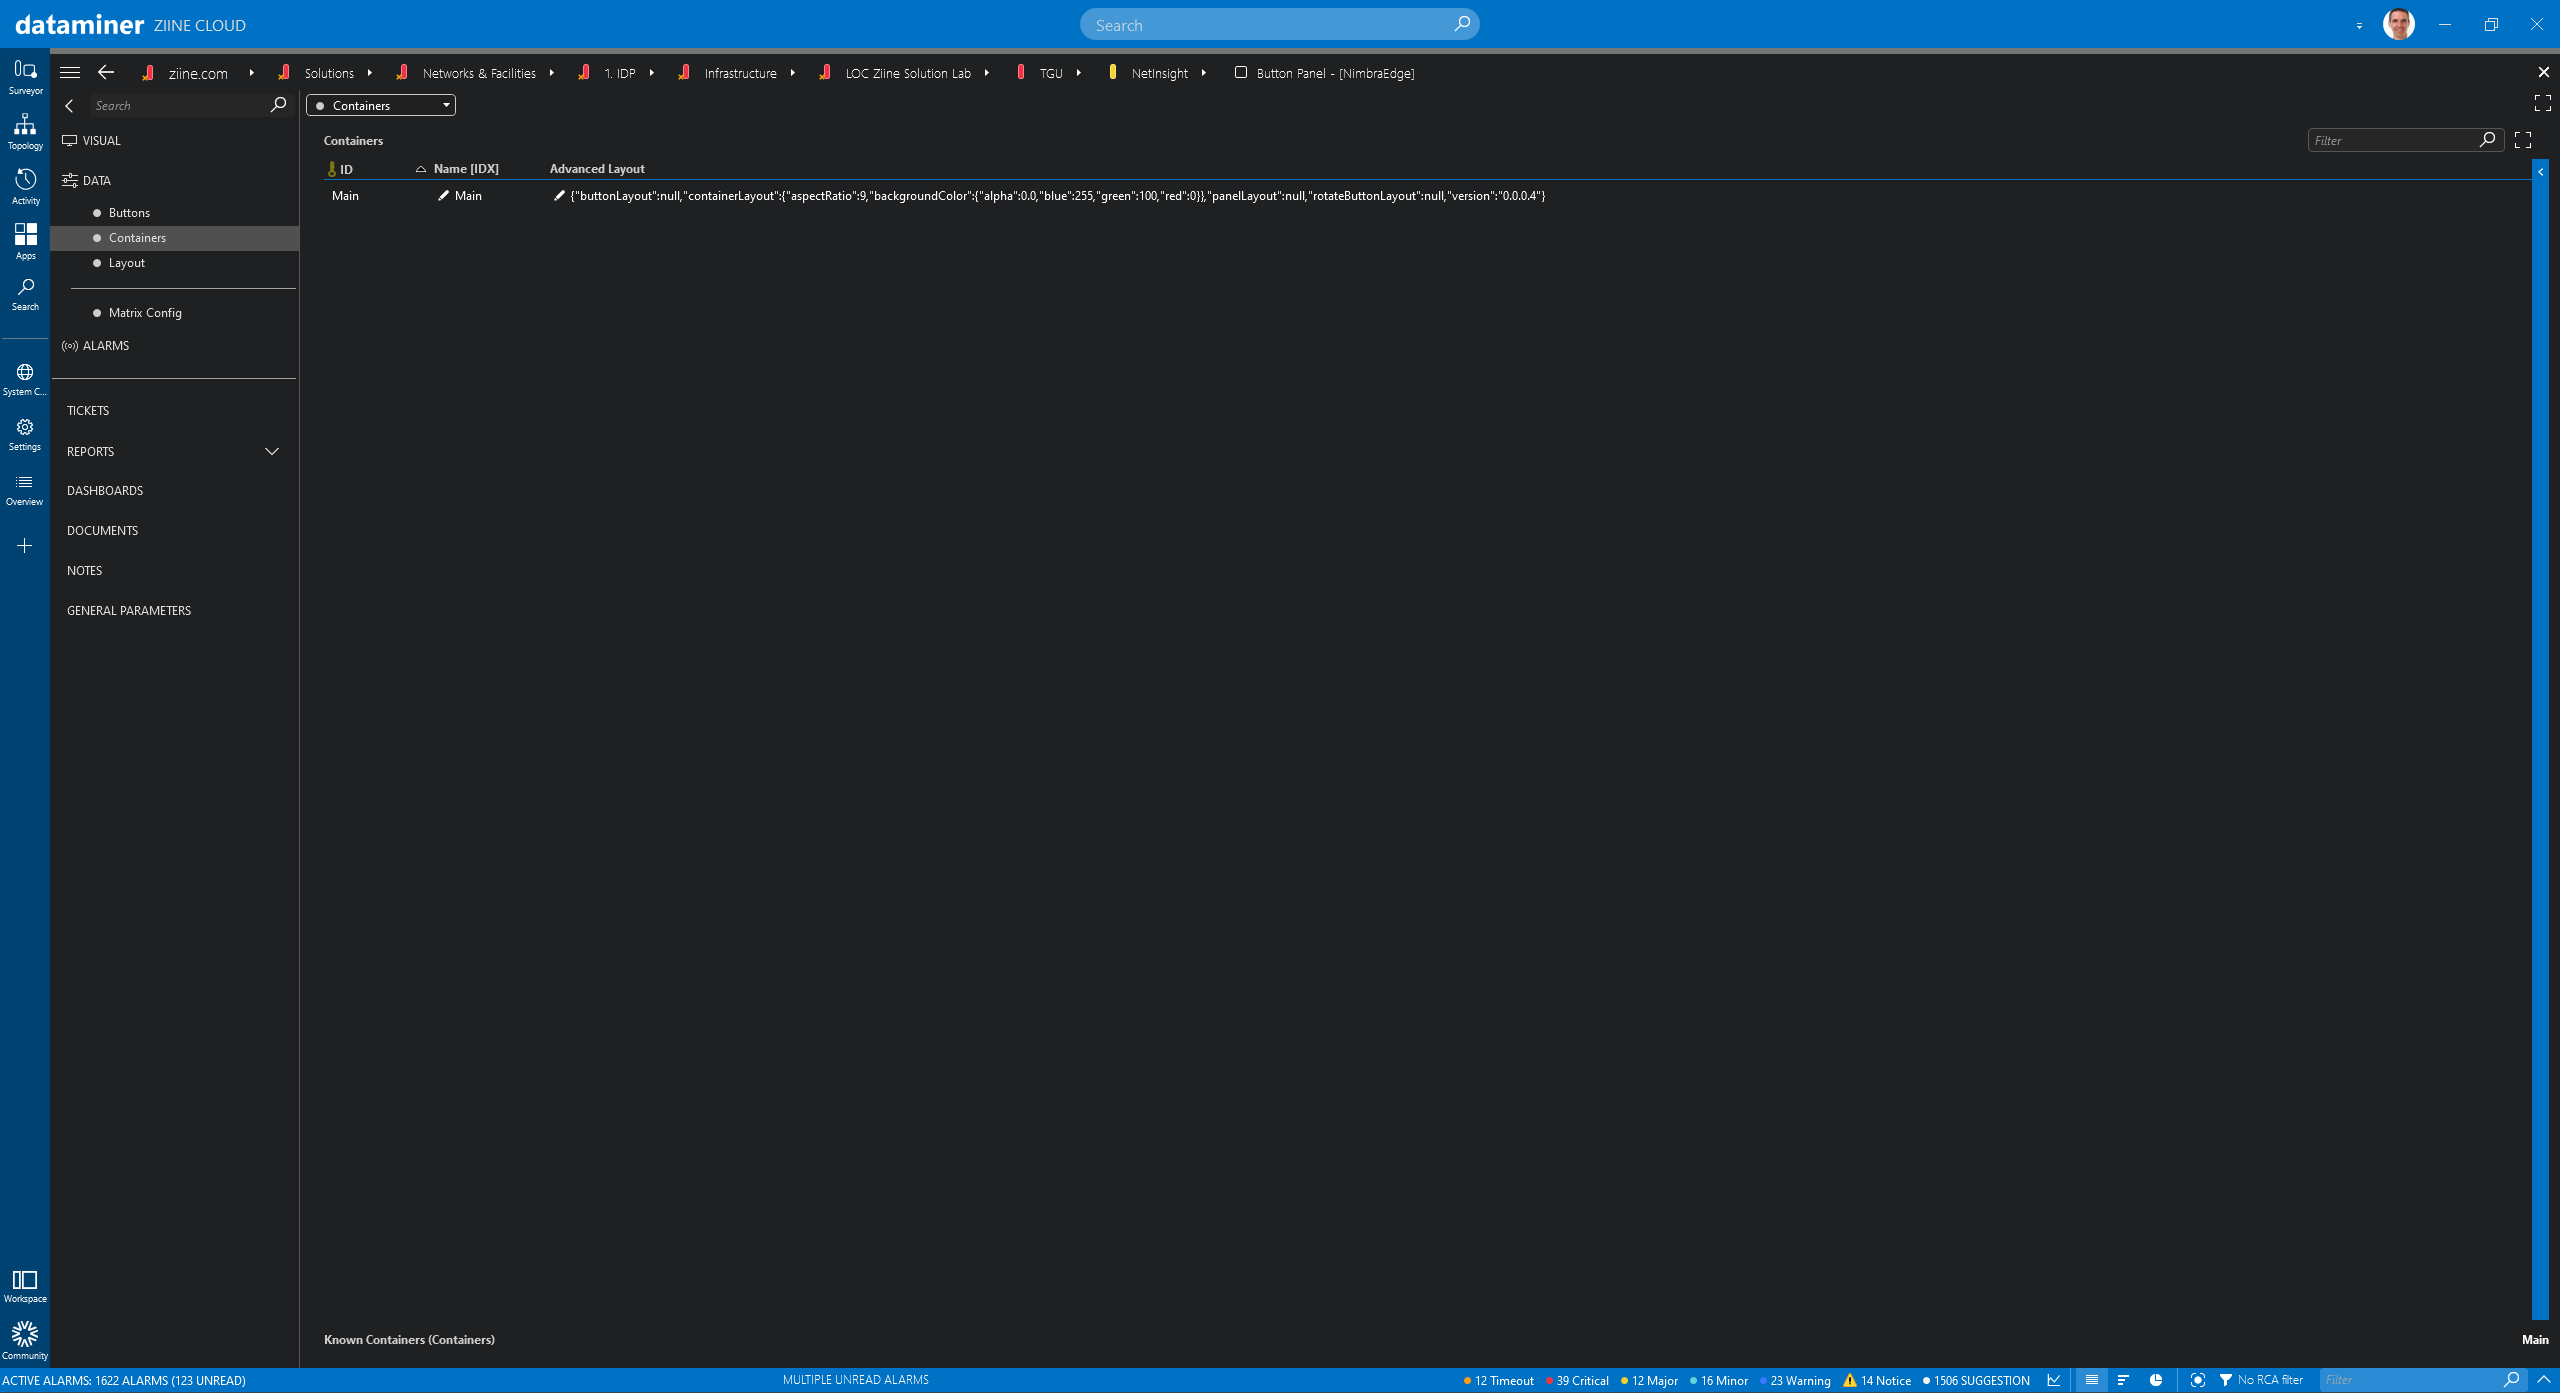 The container defines the basic layout for your buttons.
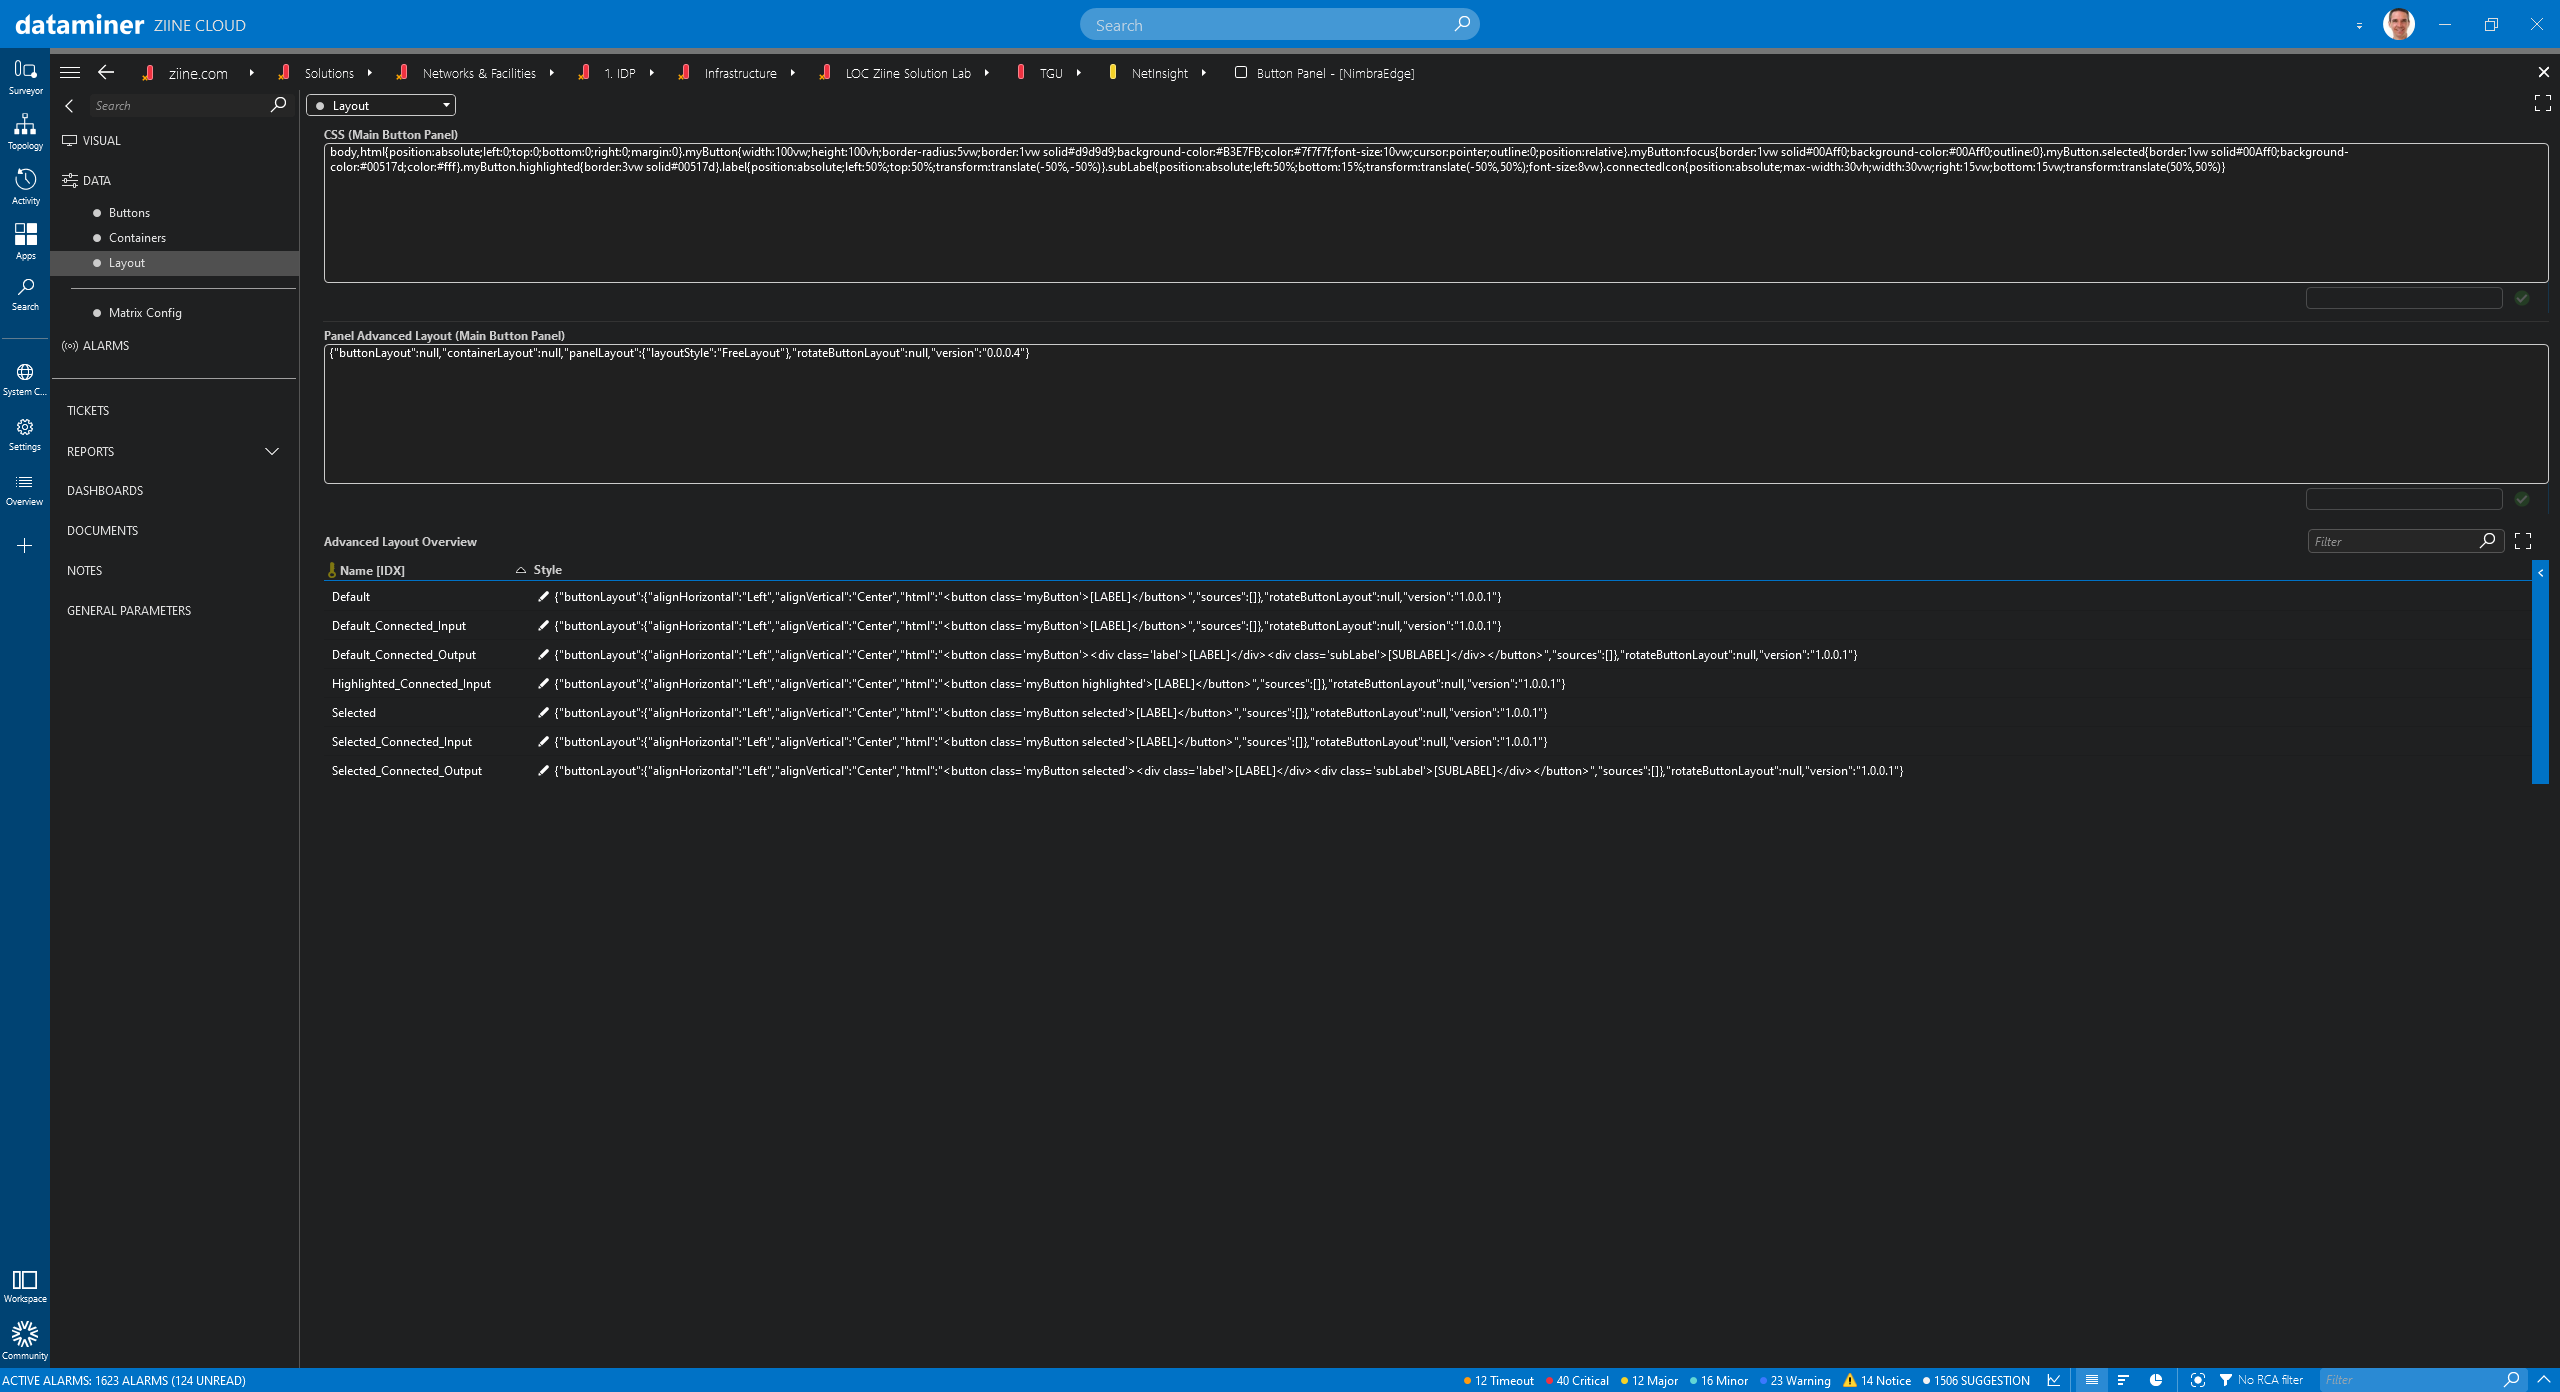 CSS style sheets are used to customize the look of your buttons and the style for each status of a button, e.g. connected, selected, etc.
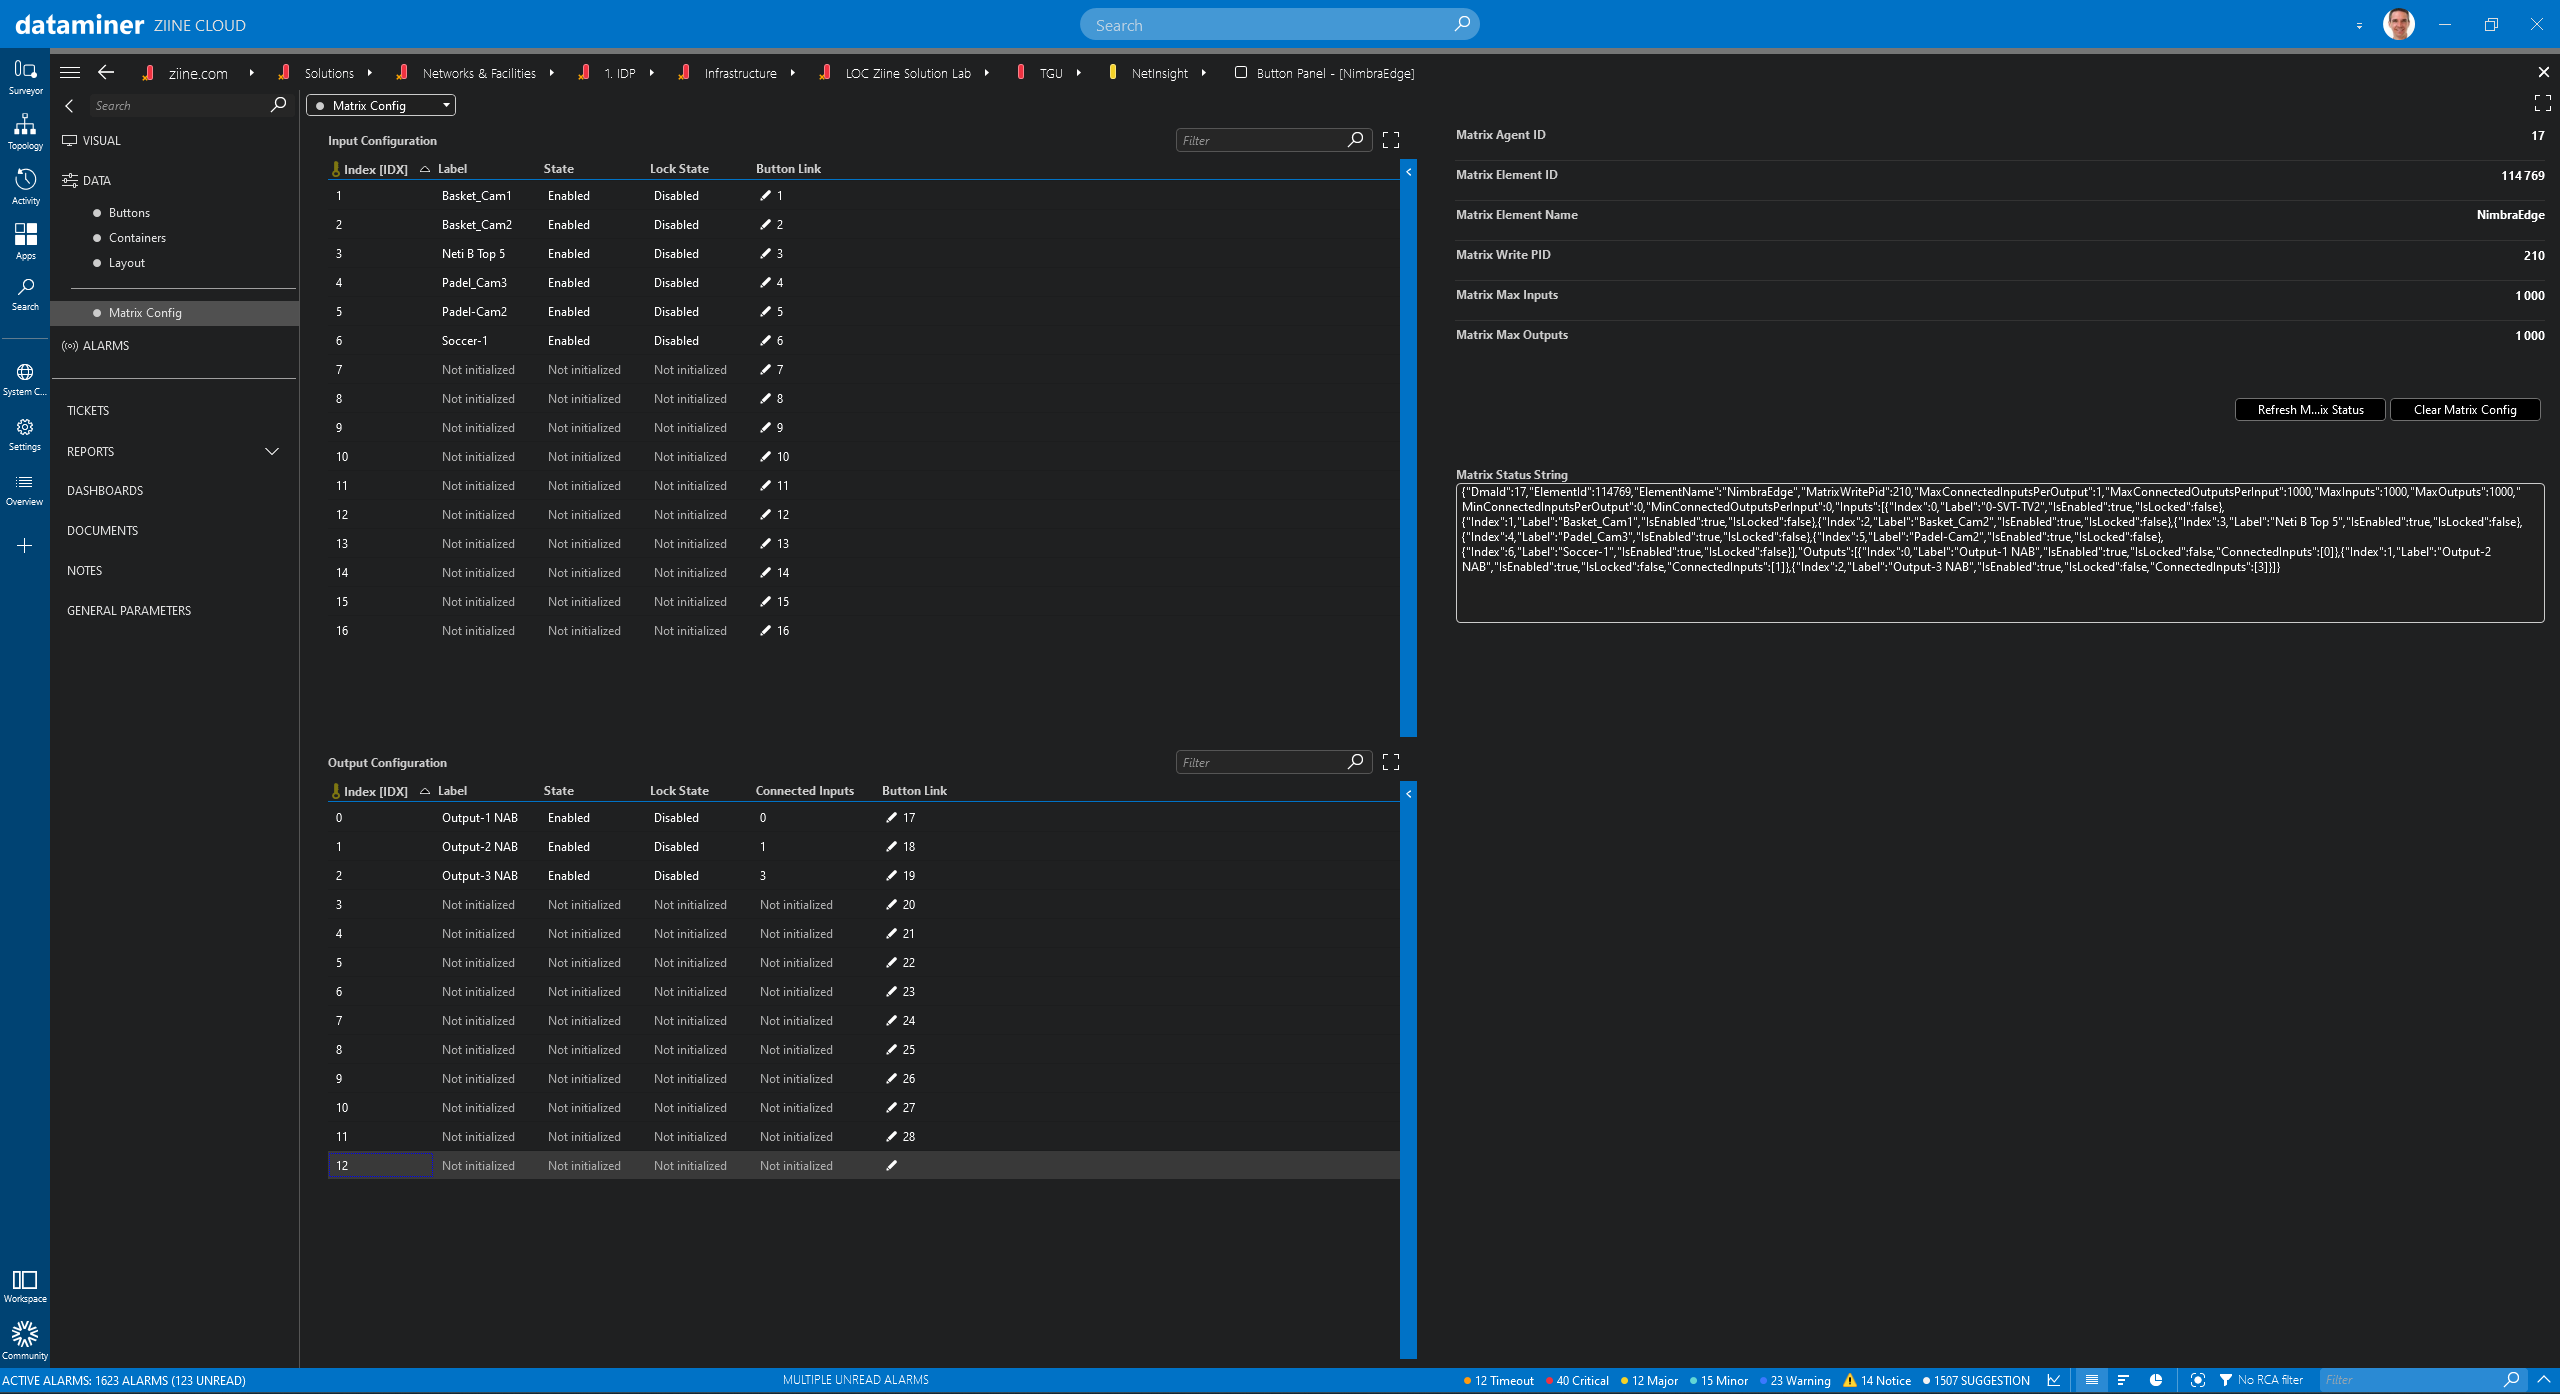 Finally, you need to map the inputs & outputs coming from the Nimbra Edge element in the panel. Just add as many rows as you need for your inputs and outputs and make sure the button link column matches the instance number of the buttons you defined on the "buttons" data page earlier.
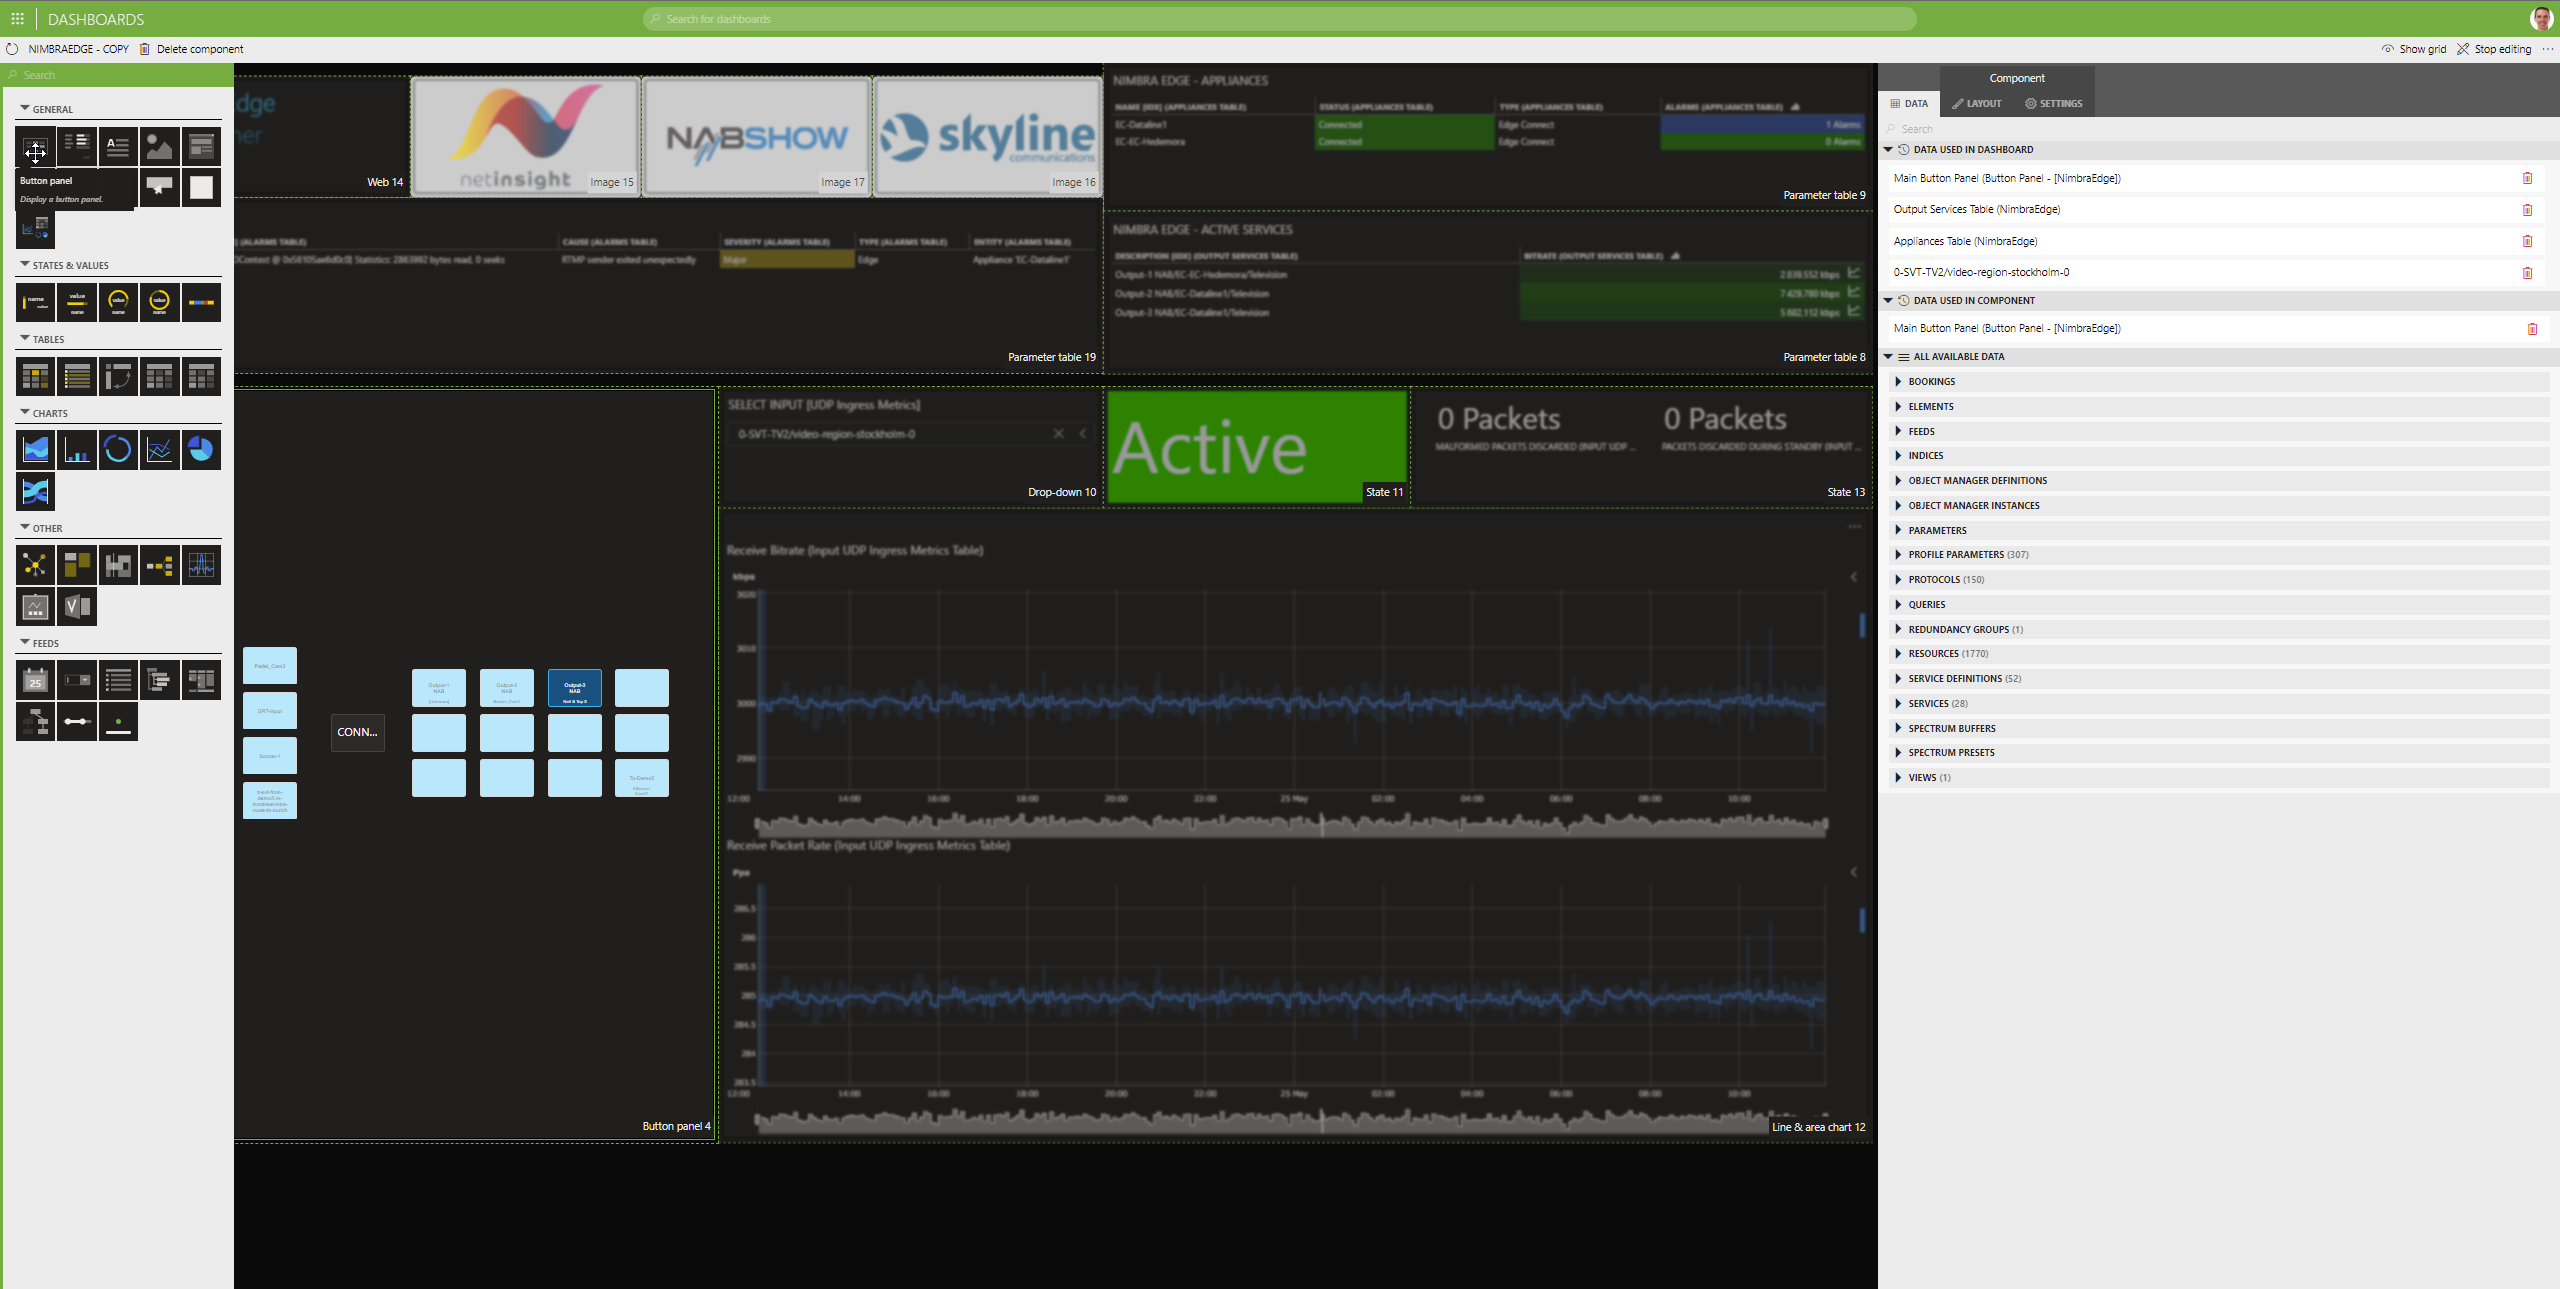 As a last step, add a "Button panel" component to a DataMiner dashboard and link it to your "button panel" element.
 Now your panel is ready to be used and to be shared via DataMiner Dashboard Sharing.