workflow Use Case
DataMiner Low-Code Apps & Telestream Vantage – Media Asset Workflow Automation
Telestream
Have a look at this use case to learn how DataMiner’s Media Asset Workflow Automation interfaces with the Telestream Vantage Media Processing Platform and how our new DataMiner Low-Code Apps help you build easy-to-use web interfaces to keep control over all ongoing workflows. The DataMiner System running this demo is also connected to the DataMiner Cloud Platform, which means that with our new “remote access” feature it is possible to access the app from just about anywhere via a secure and encrypted connection.
USE CASE DETAILS
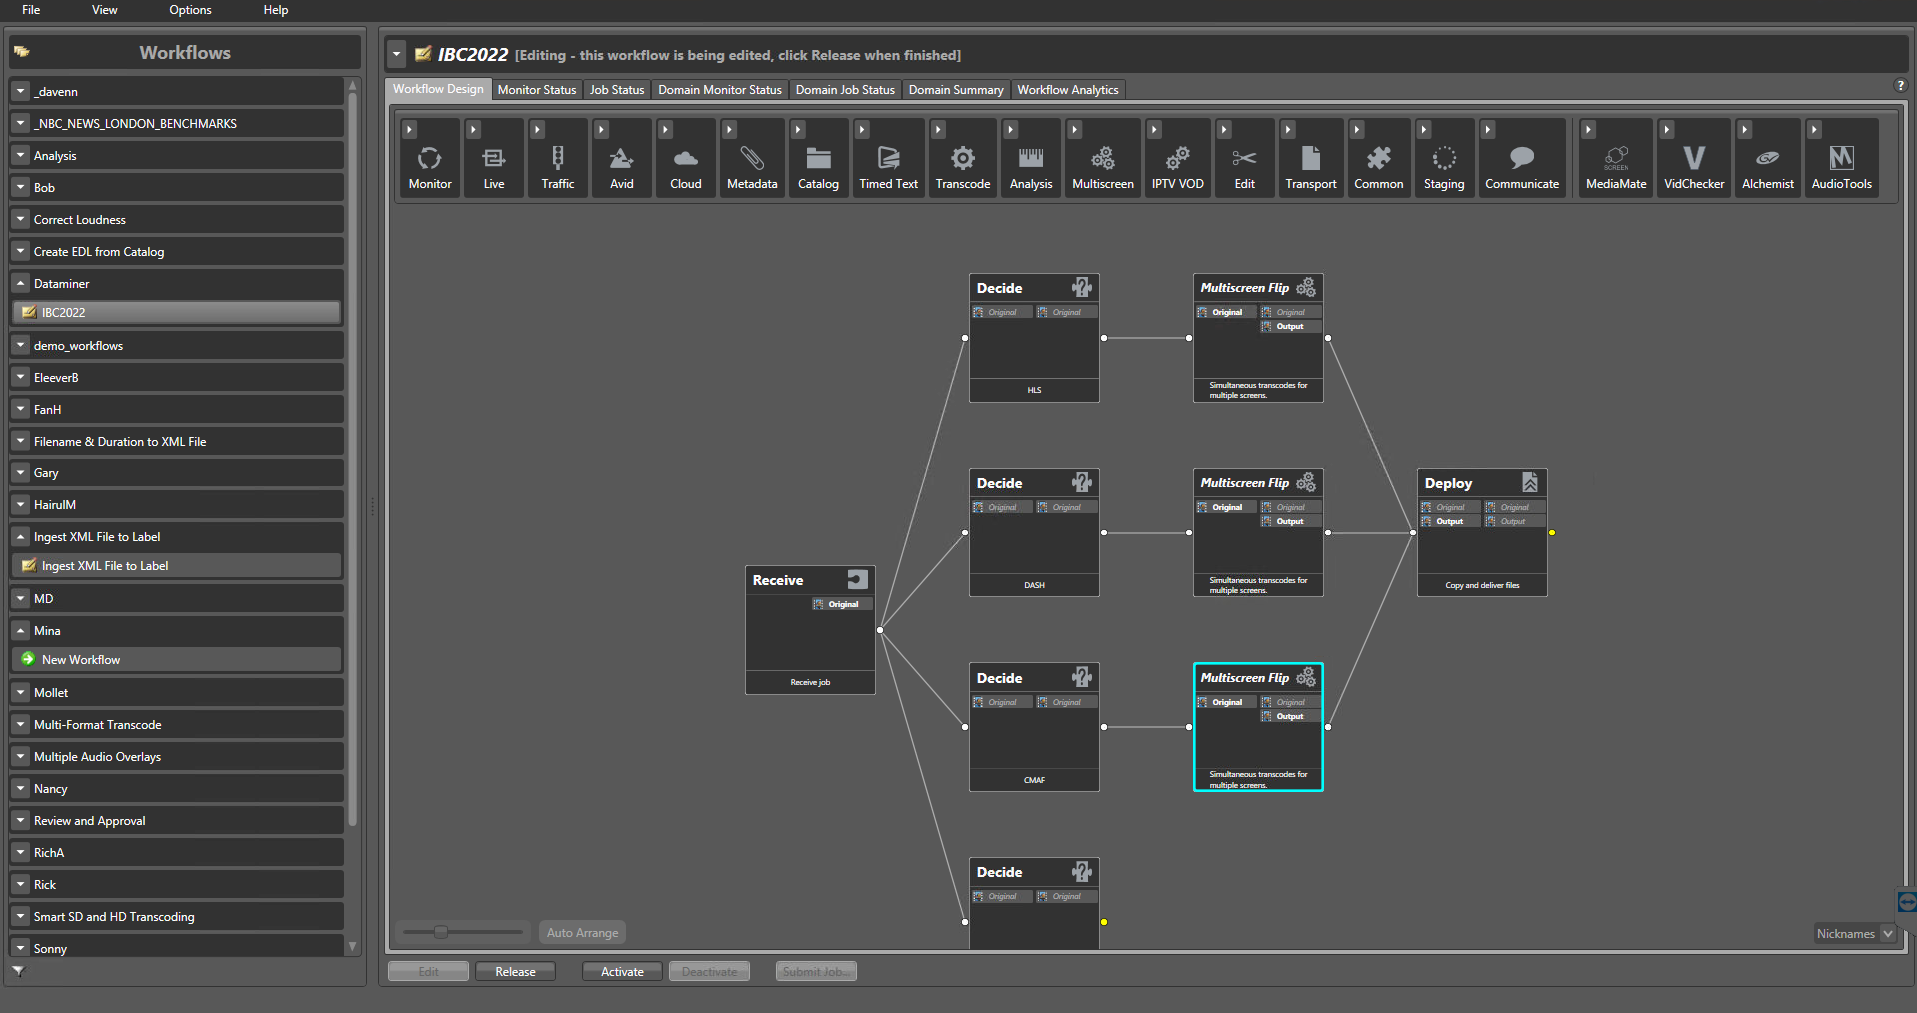 Use Telestream "Vantage Workflow Designer" to create a set of workflows. In this case, a simple transcode workflow was built, which receives a single file and can transcode it in HLS, DASH, or CMAF. It then deploys an ABR package that can be decoded by any video player. These workflows are stored in Vantage, and after activation they can be triggered by DataMiner through the Telestream REST API. Using a set of variables, DataMiner tells Vantage which encoder to use (HLS, DASH or CMAF).
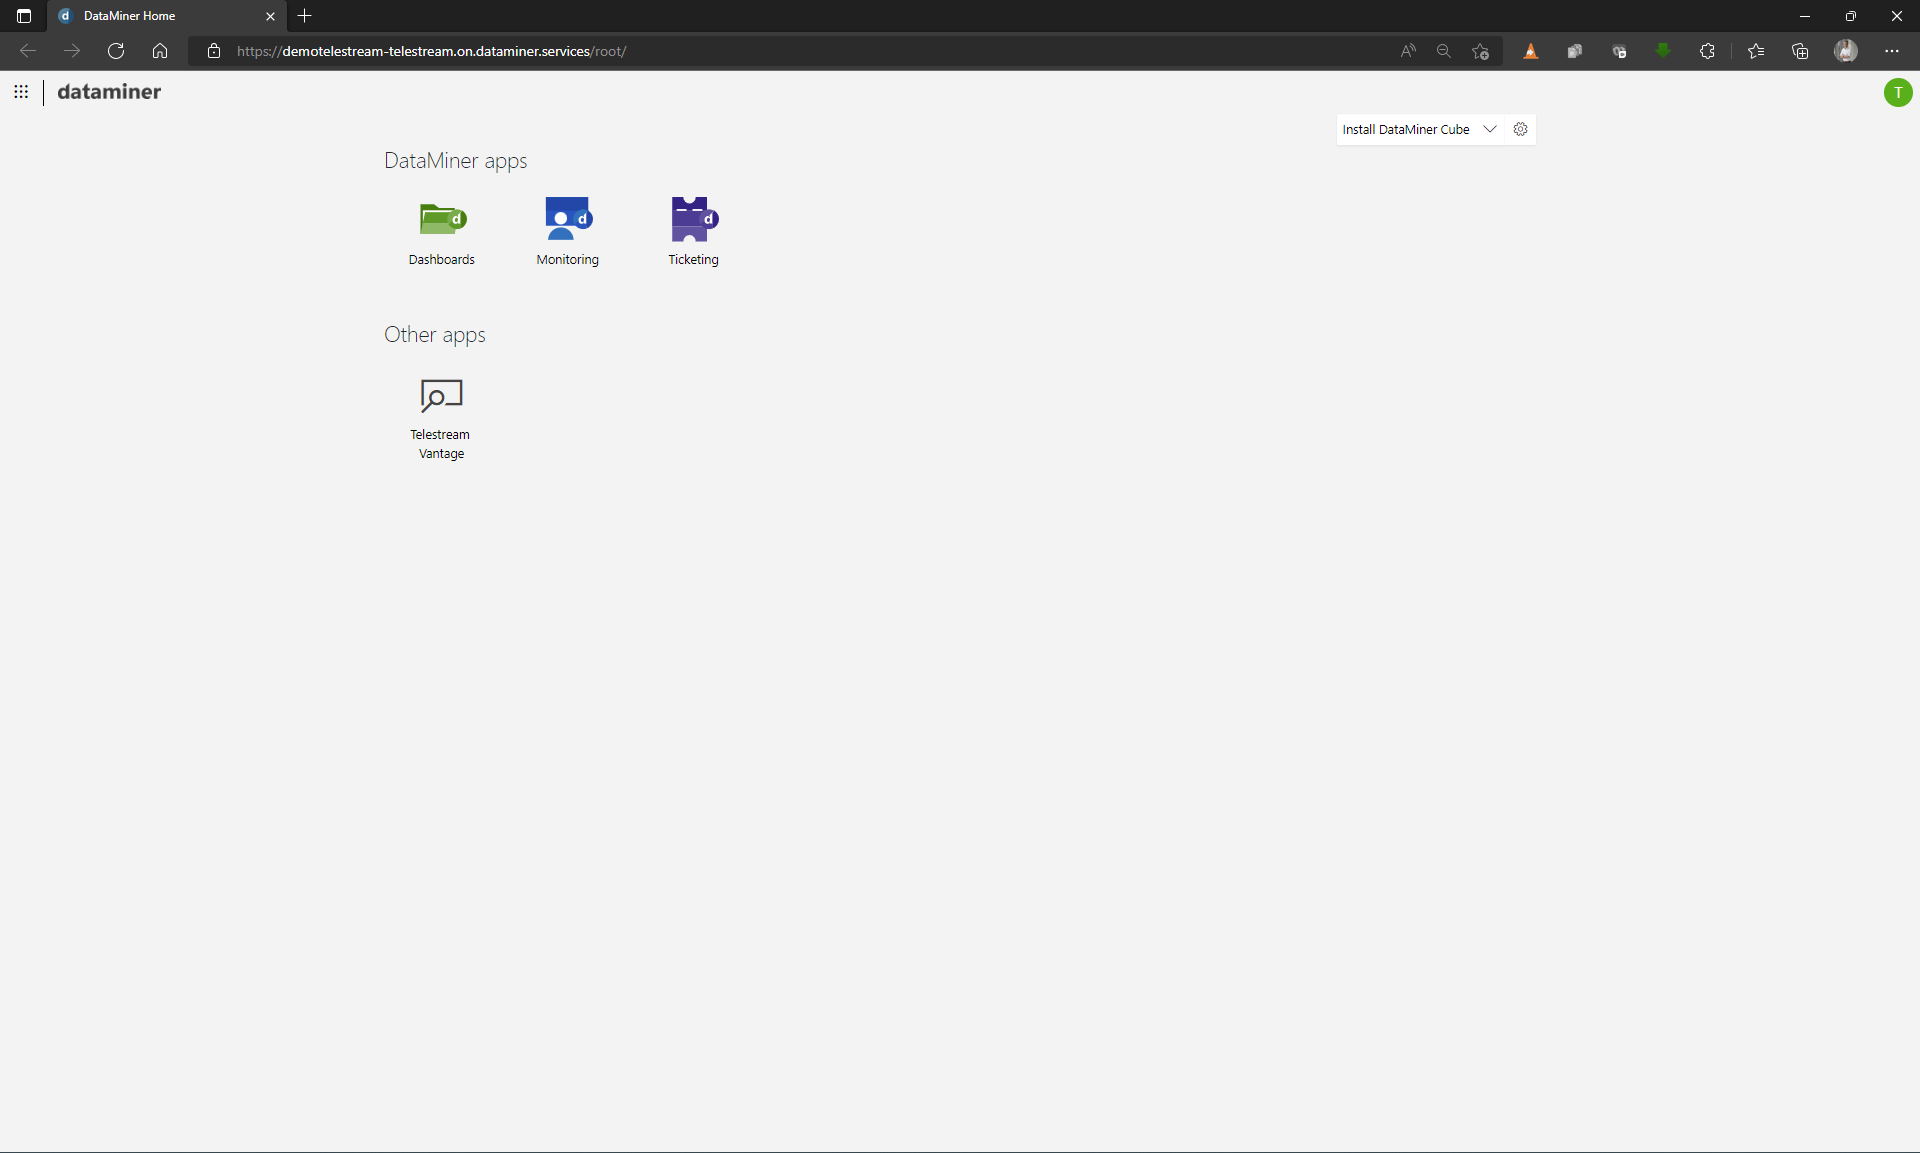 Let's now have a look at how you can use our new DataMiner Low-Code Apps to manage file transcodings via Telestream. Simply access your DataMiner System in a browser, either locally or through the DataMiner Cloud Platform from outside of your local network (like in our example here), and open the Telestream Vantage app.
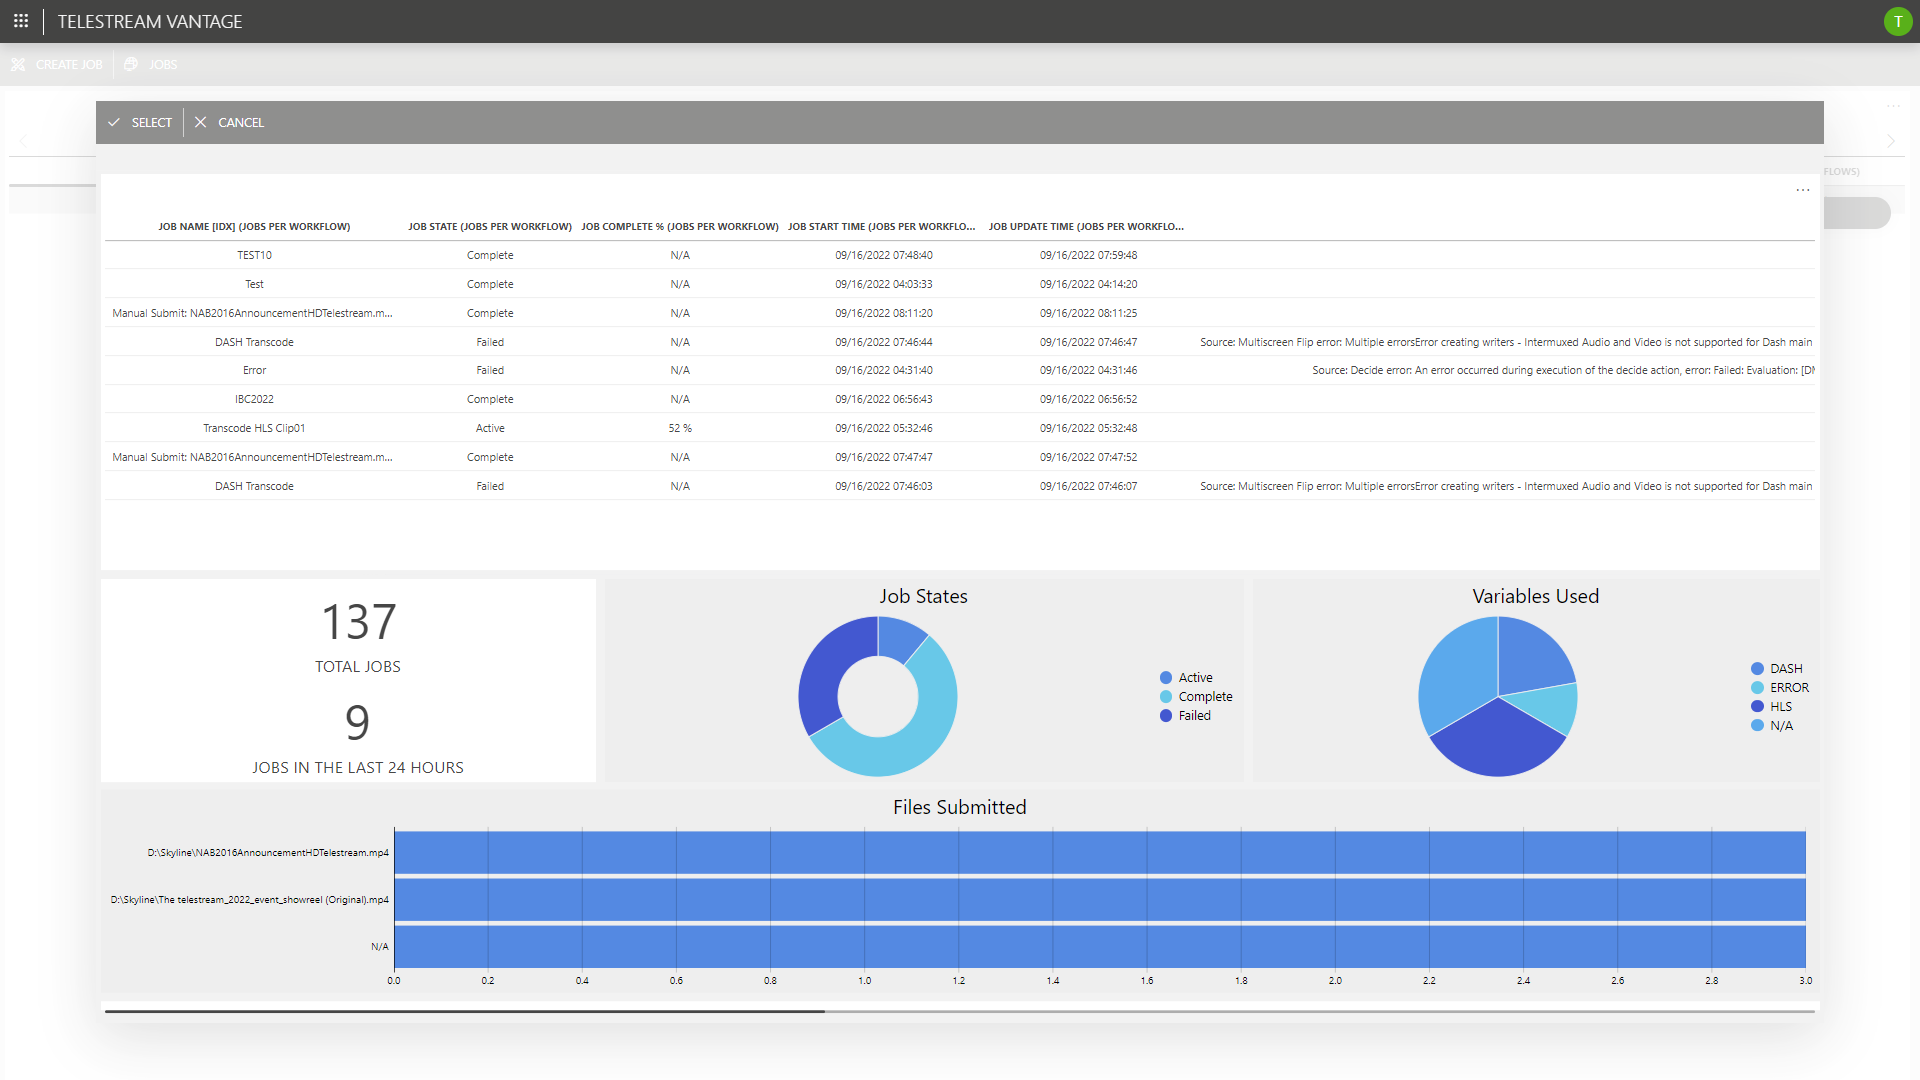
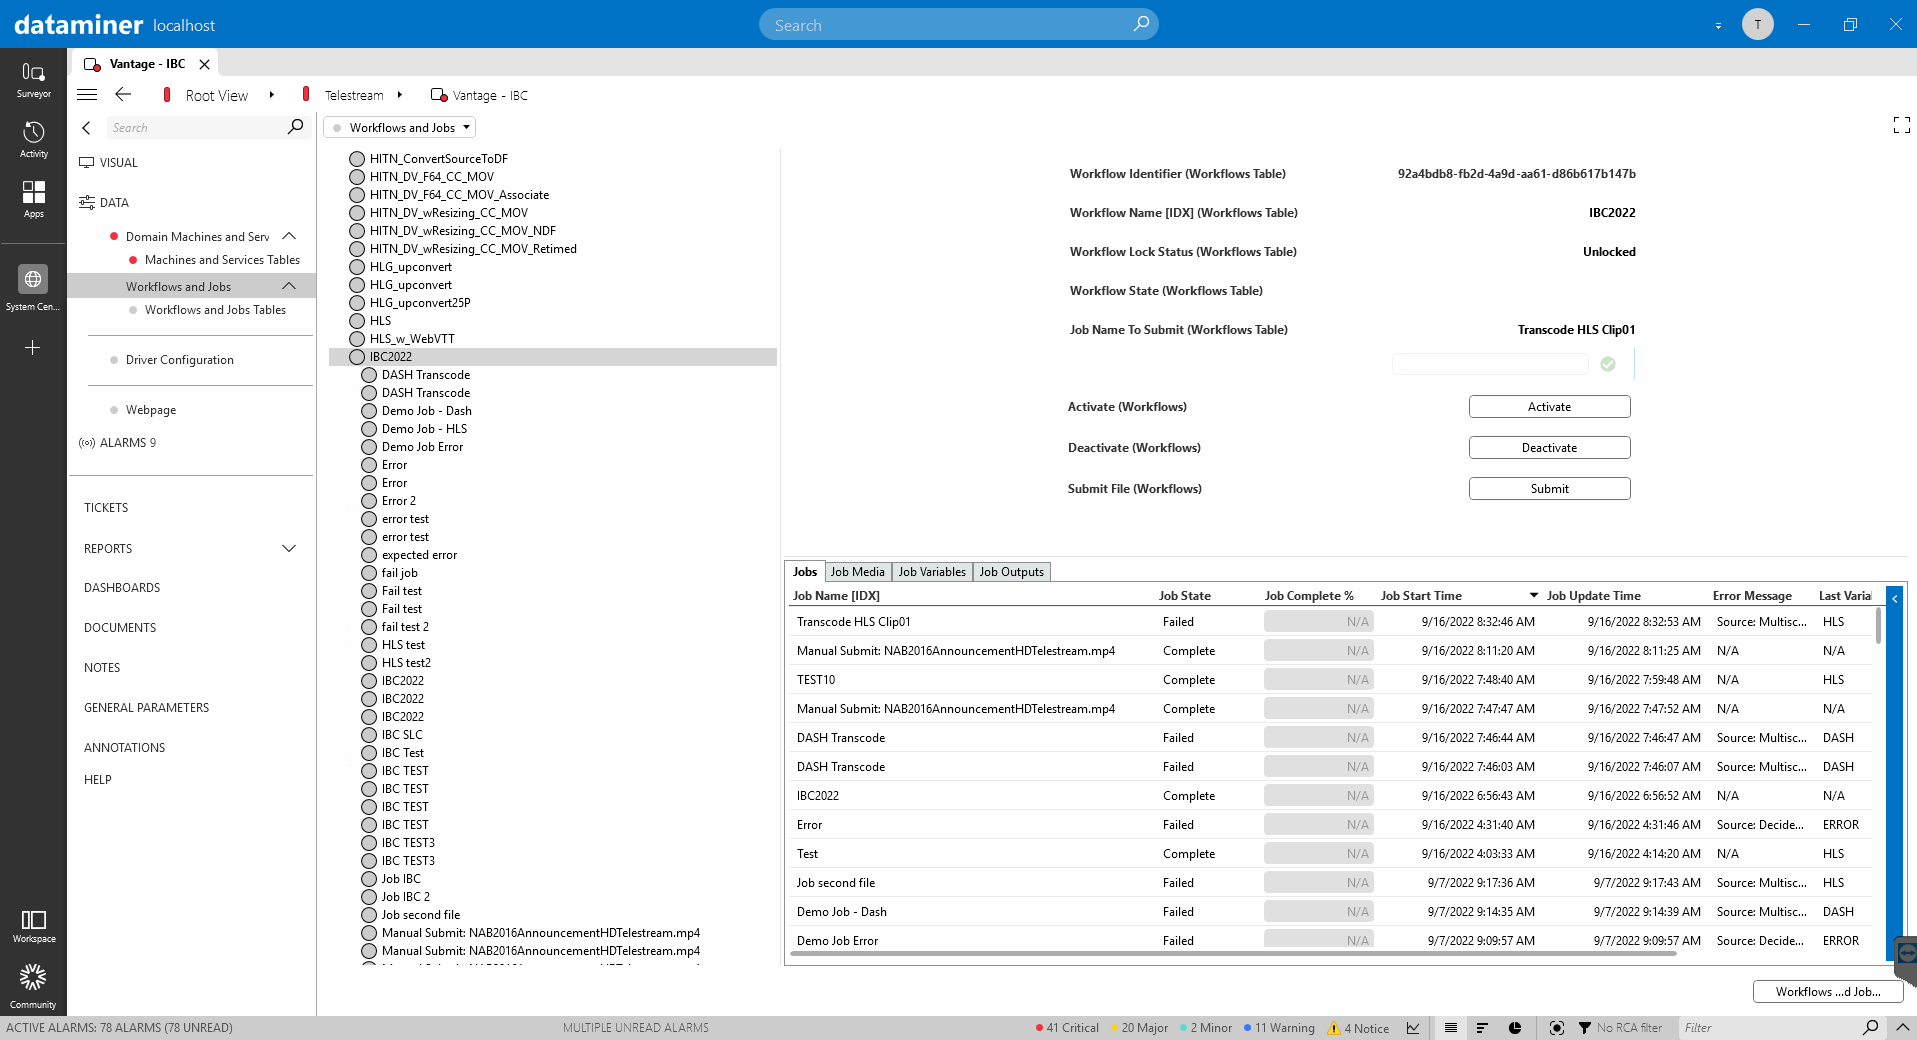
 DataMiner Low-Code Apps are highly customizable. For this demo, a landing page has been created to show all workflows that have been created in Vantage along with their states.
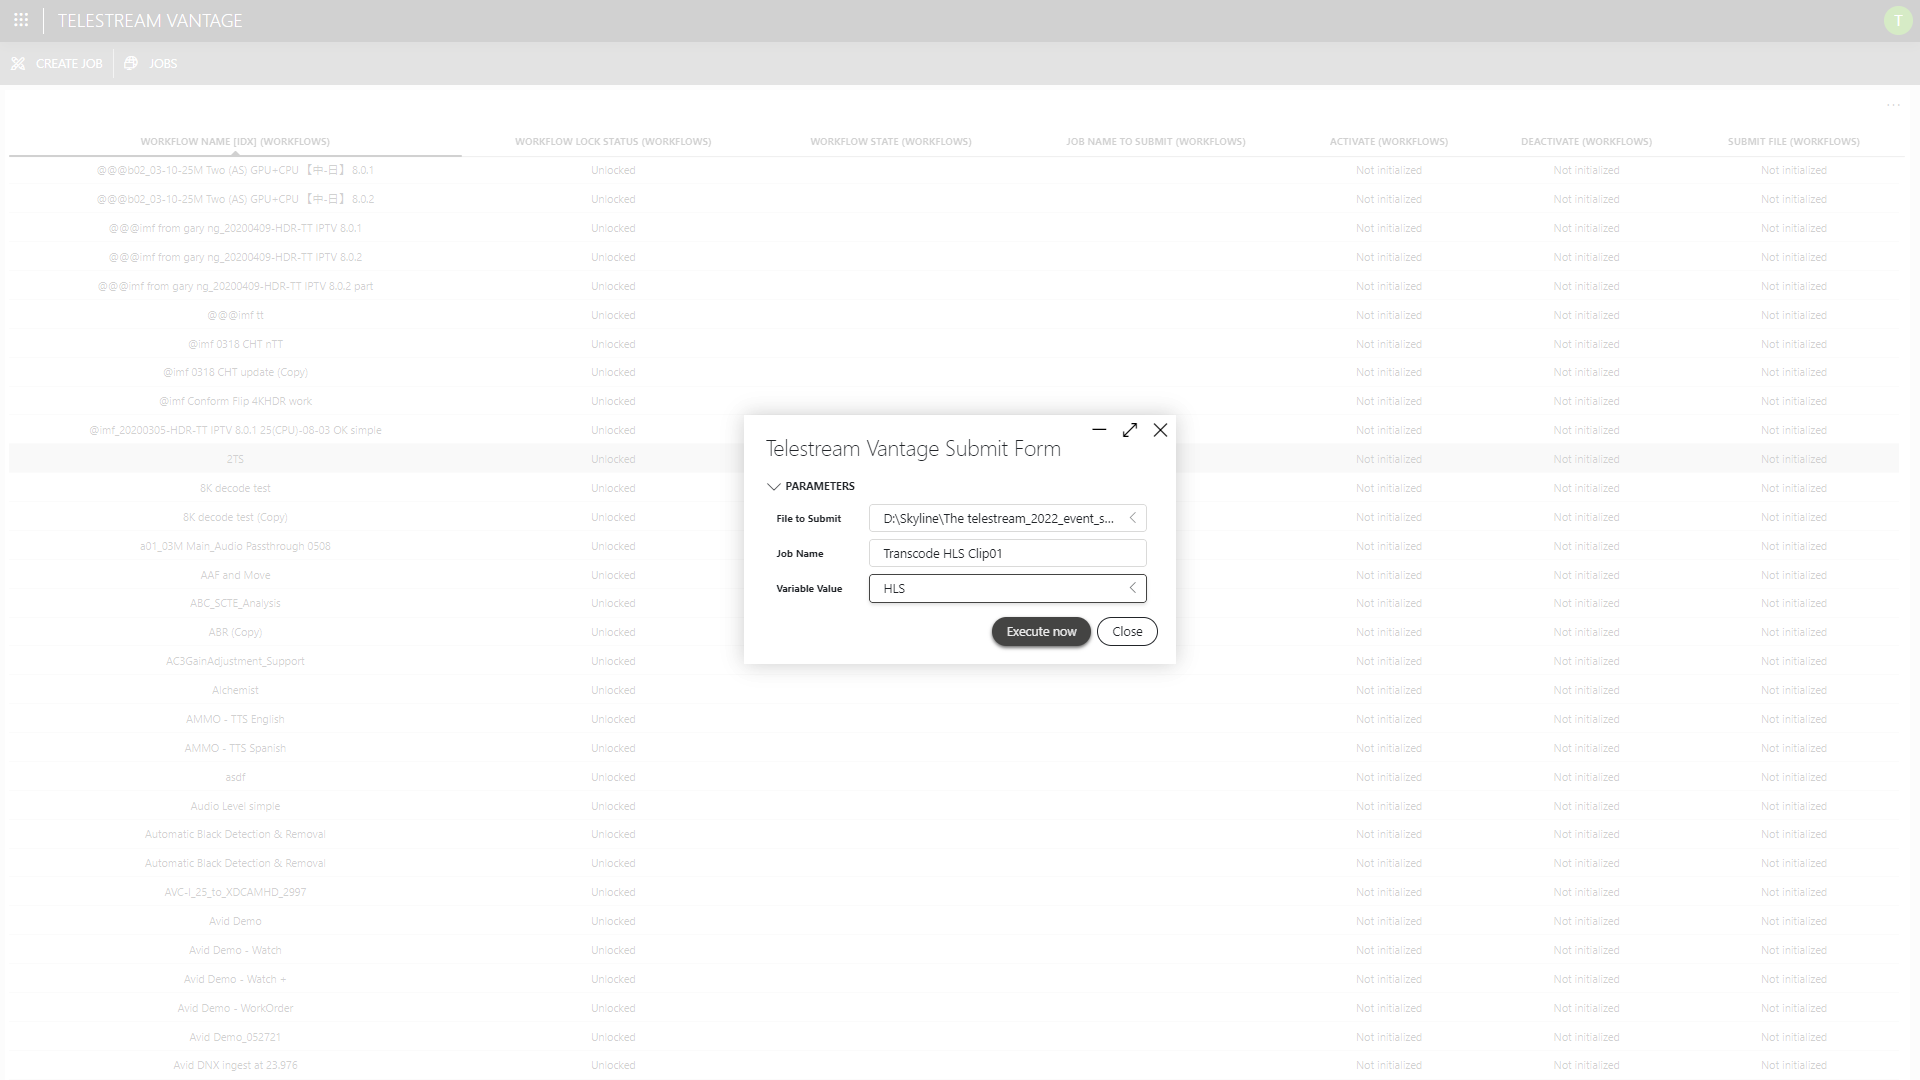 Running a new job could not be easier: Select the workflow you want to run and click the "Create Job" button. You can now select a clip, give the job a name, and select the encode format (HLS, DASH, or CMAF) from a drop-down list. And that's it!
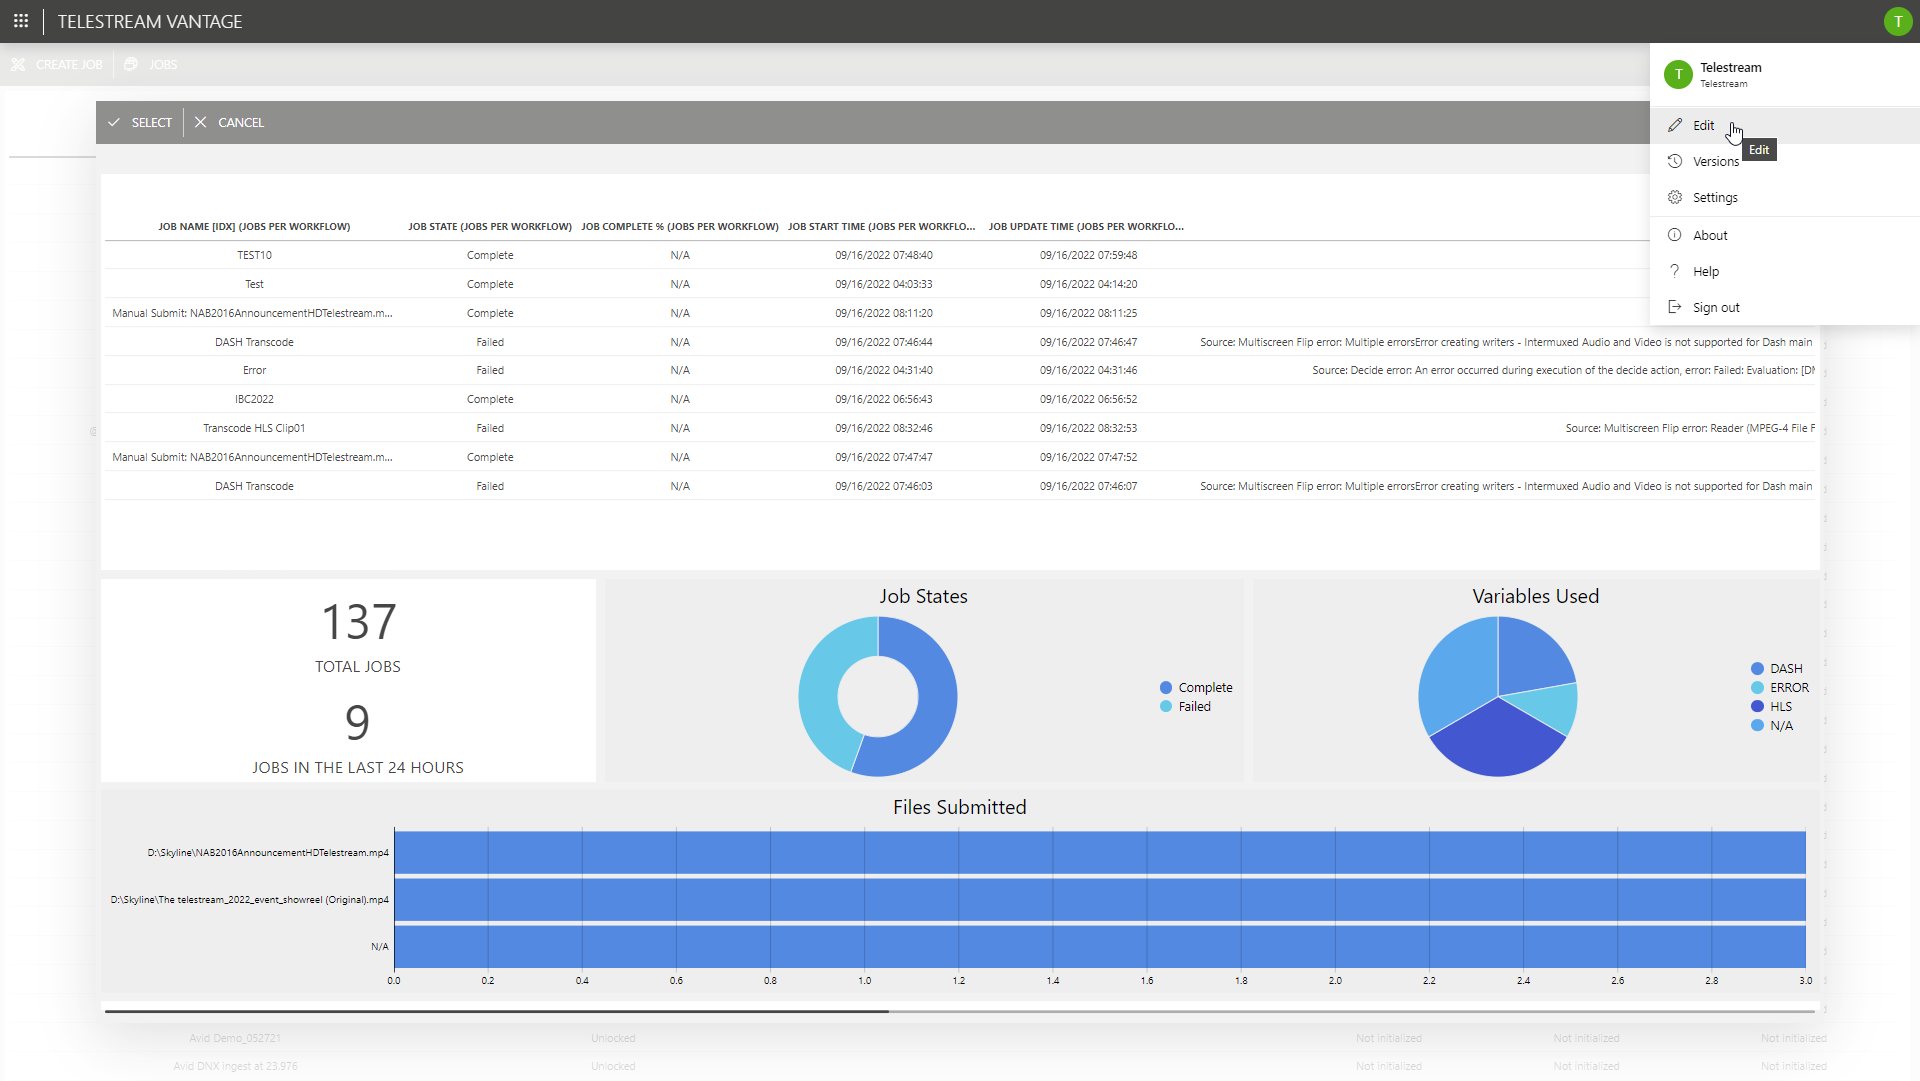
DataMiner now triggers Vantage via its RESTful API, initiates the transcoding, and monitors the progress and job state (e.g. if a job is successfully completed, had a certain error, or failed completely). This interface also shows some simple statistics that can easily be calculated within DataMiner, for example the number of total jobs, the jobs in the last 24 hours, the job states, and the different output formats. Once again, everything is fully customizable to your needs.
Running a new job could not be easier: Select the workflow you want to run and click the "Create Job" button. You can now select a clip, give the job a name, and select the encode format (HLS, DASH, or CMAF) from a drop-down list. And that's it!
DataMiner now triggers Vantage via its RESTful API, initiates the transcoding, and monitors the progress and job state (e.g. if a job is successfully completed, had a certain error, or failed completely). This interface also shows some simple statistics that can easily be calculated within DataMiner, for example the number of total jobs, the jobs in the last 24 hours, the job states, and the different output formats. Once again, everything is fully customizable to your needs.
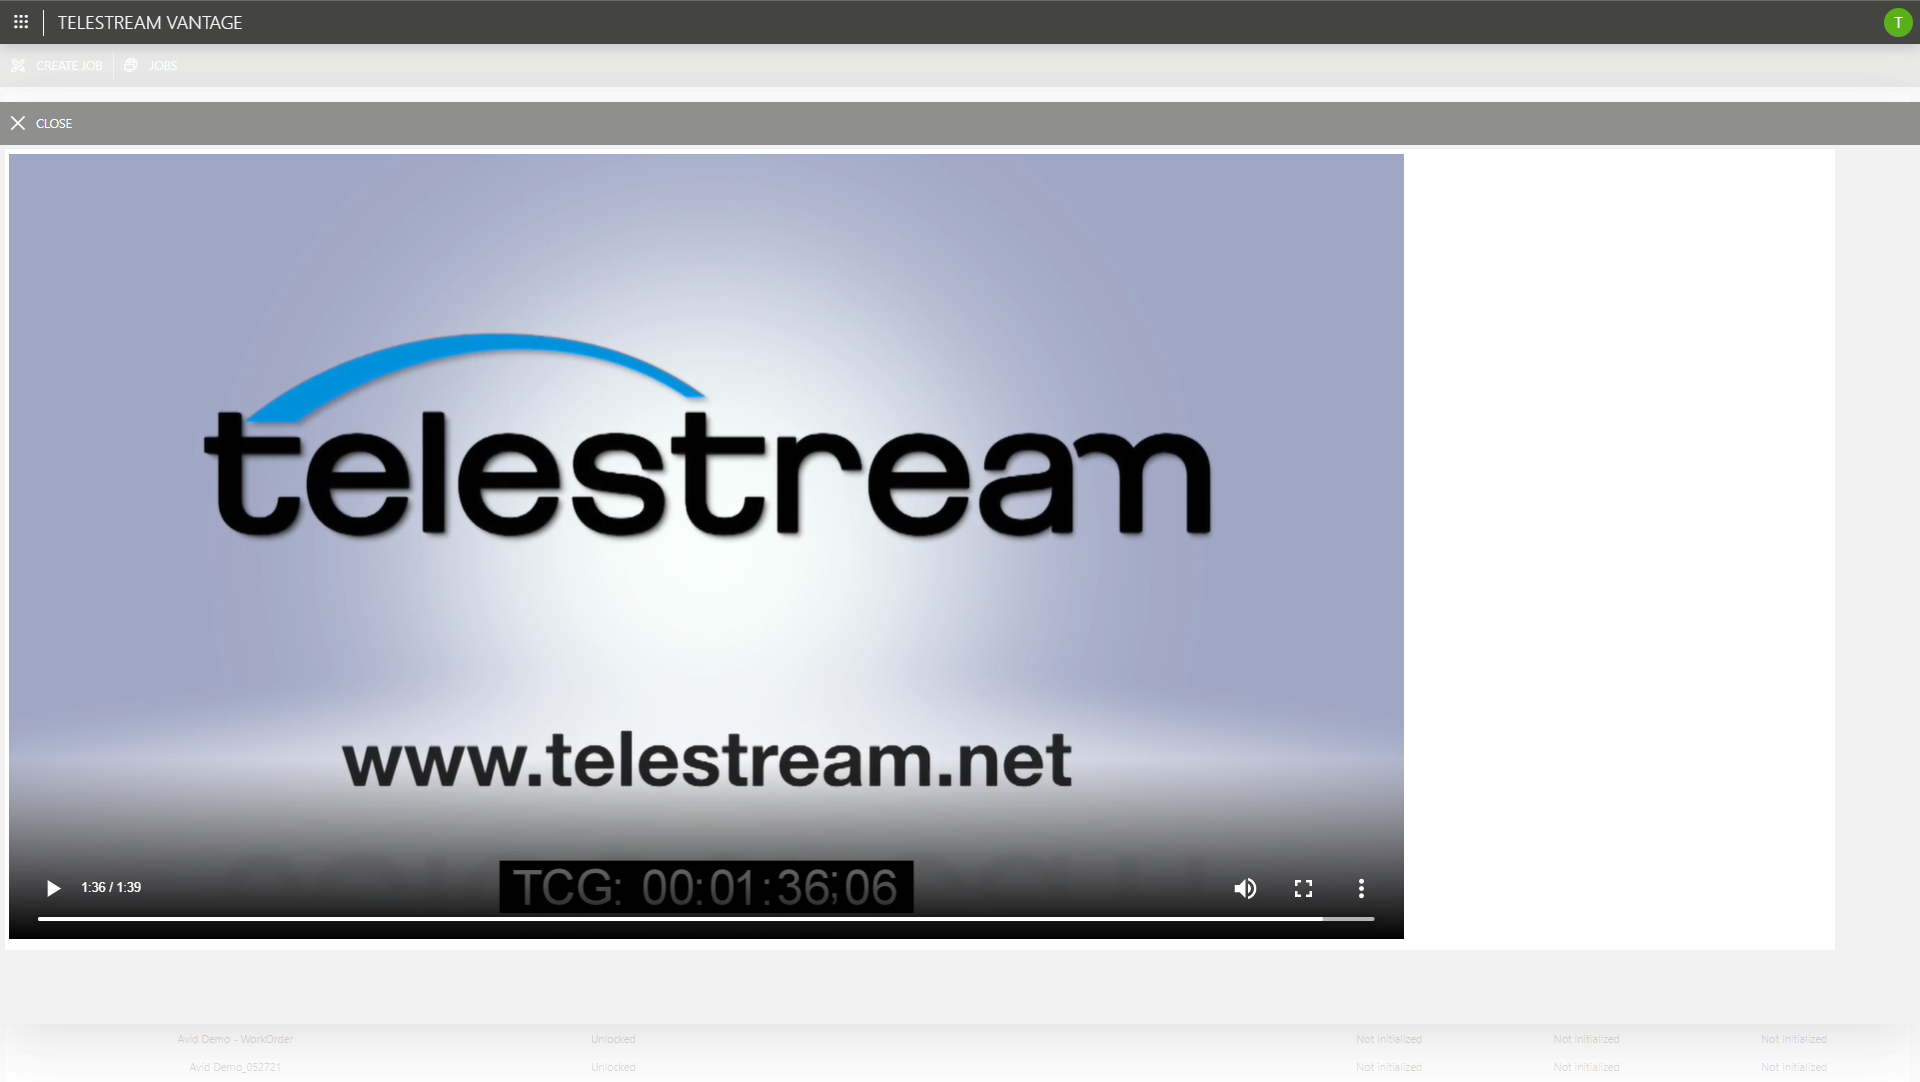 We've also embedded a web player so you can check all transcoded files straight from the DataMiner Vantage app.
 This use case is a very simple example of how you can use DataMiner Low-Code Apps to create targeted web user interfaces: Deploy quickly and easily with no coding experience required. To improve and evolve your app, just click "Edit".
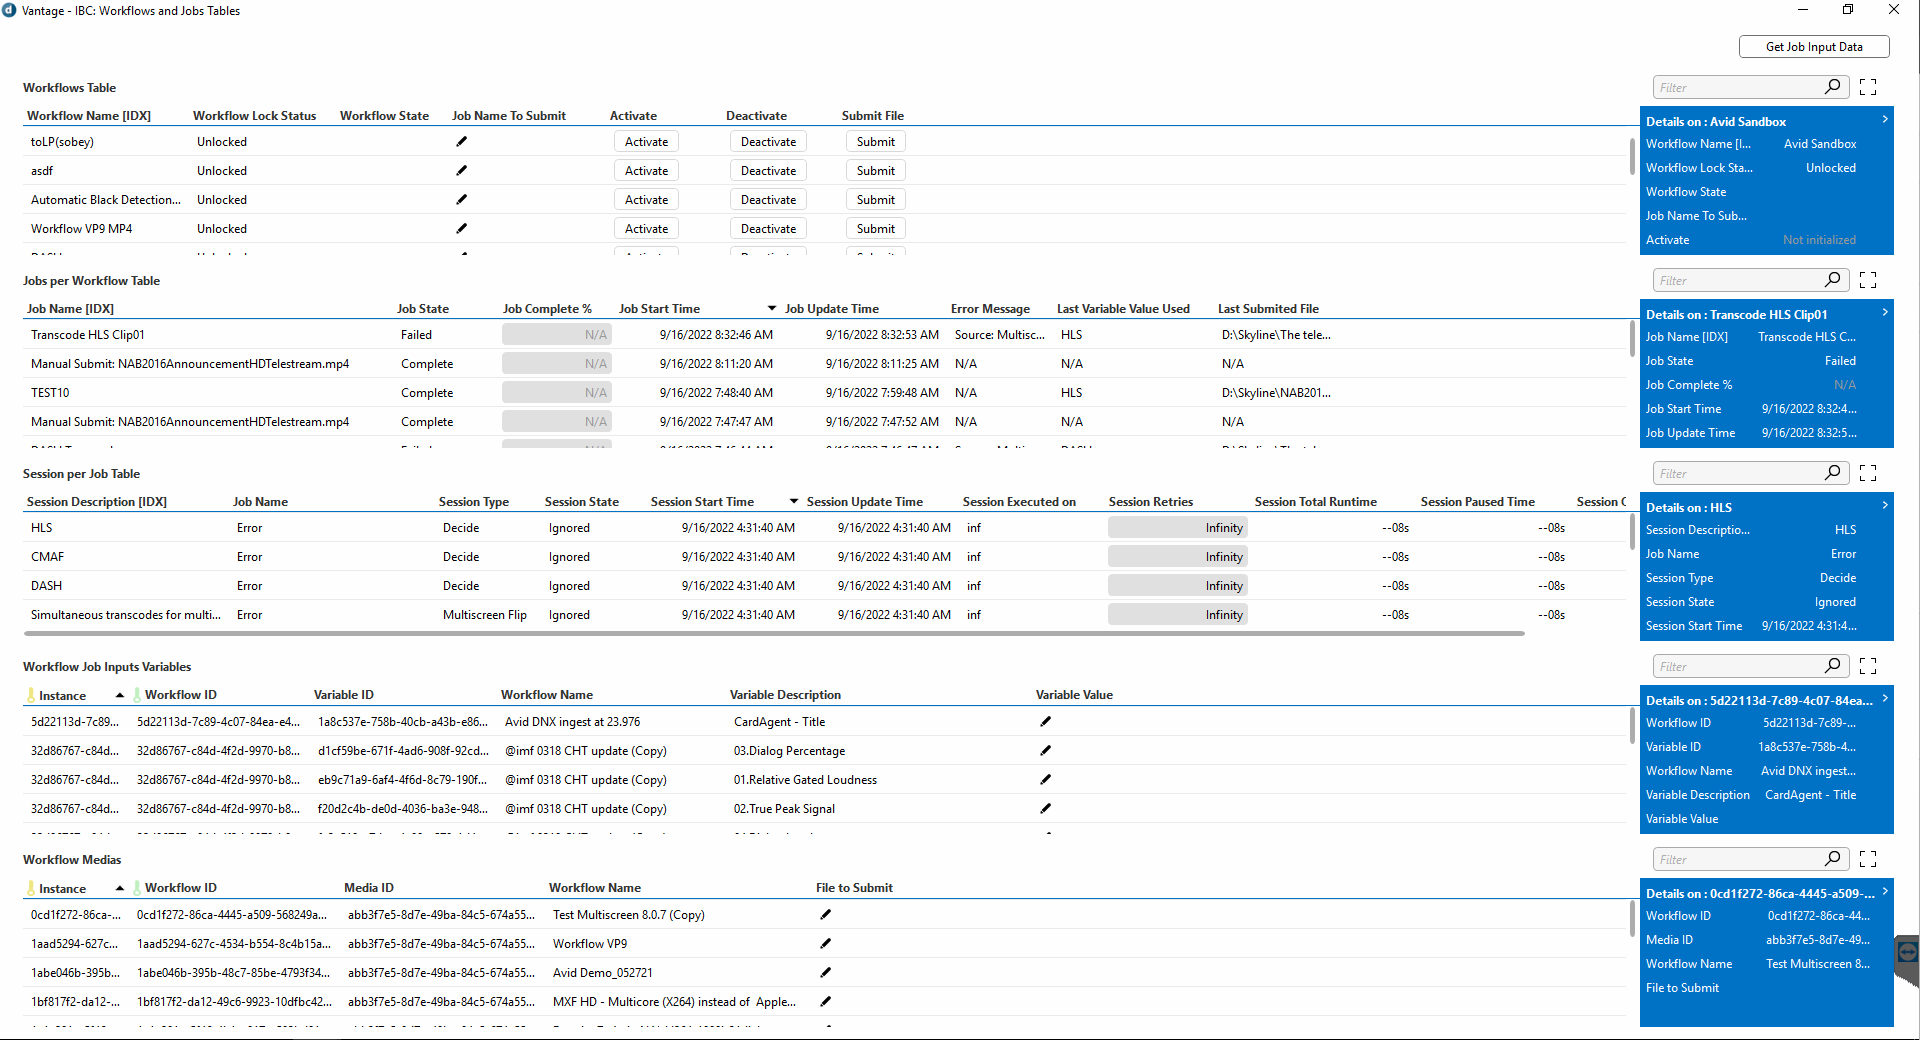
 In the editor, you can change the look and feel of the data on the fly. For example, in this case we'll rename one pie chart to "ABR formats".
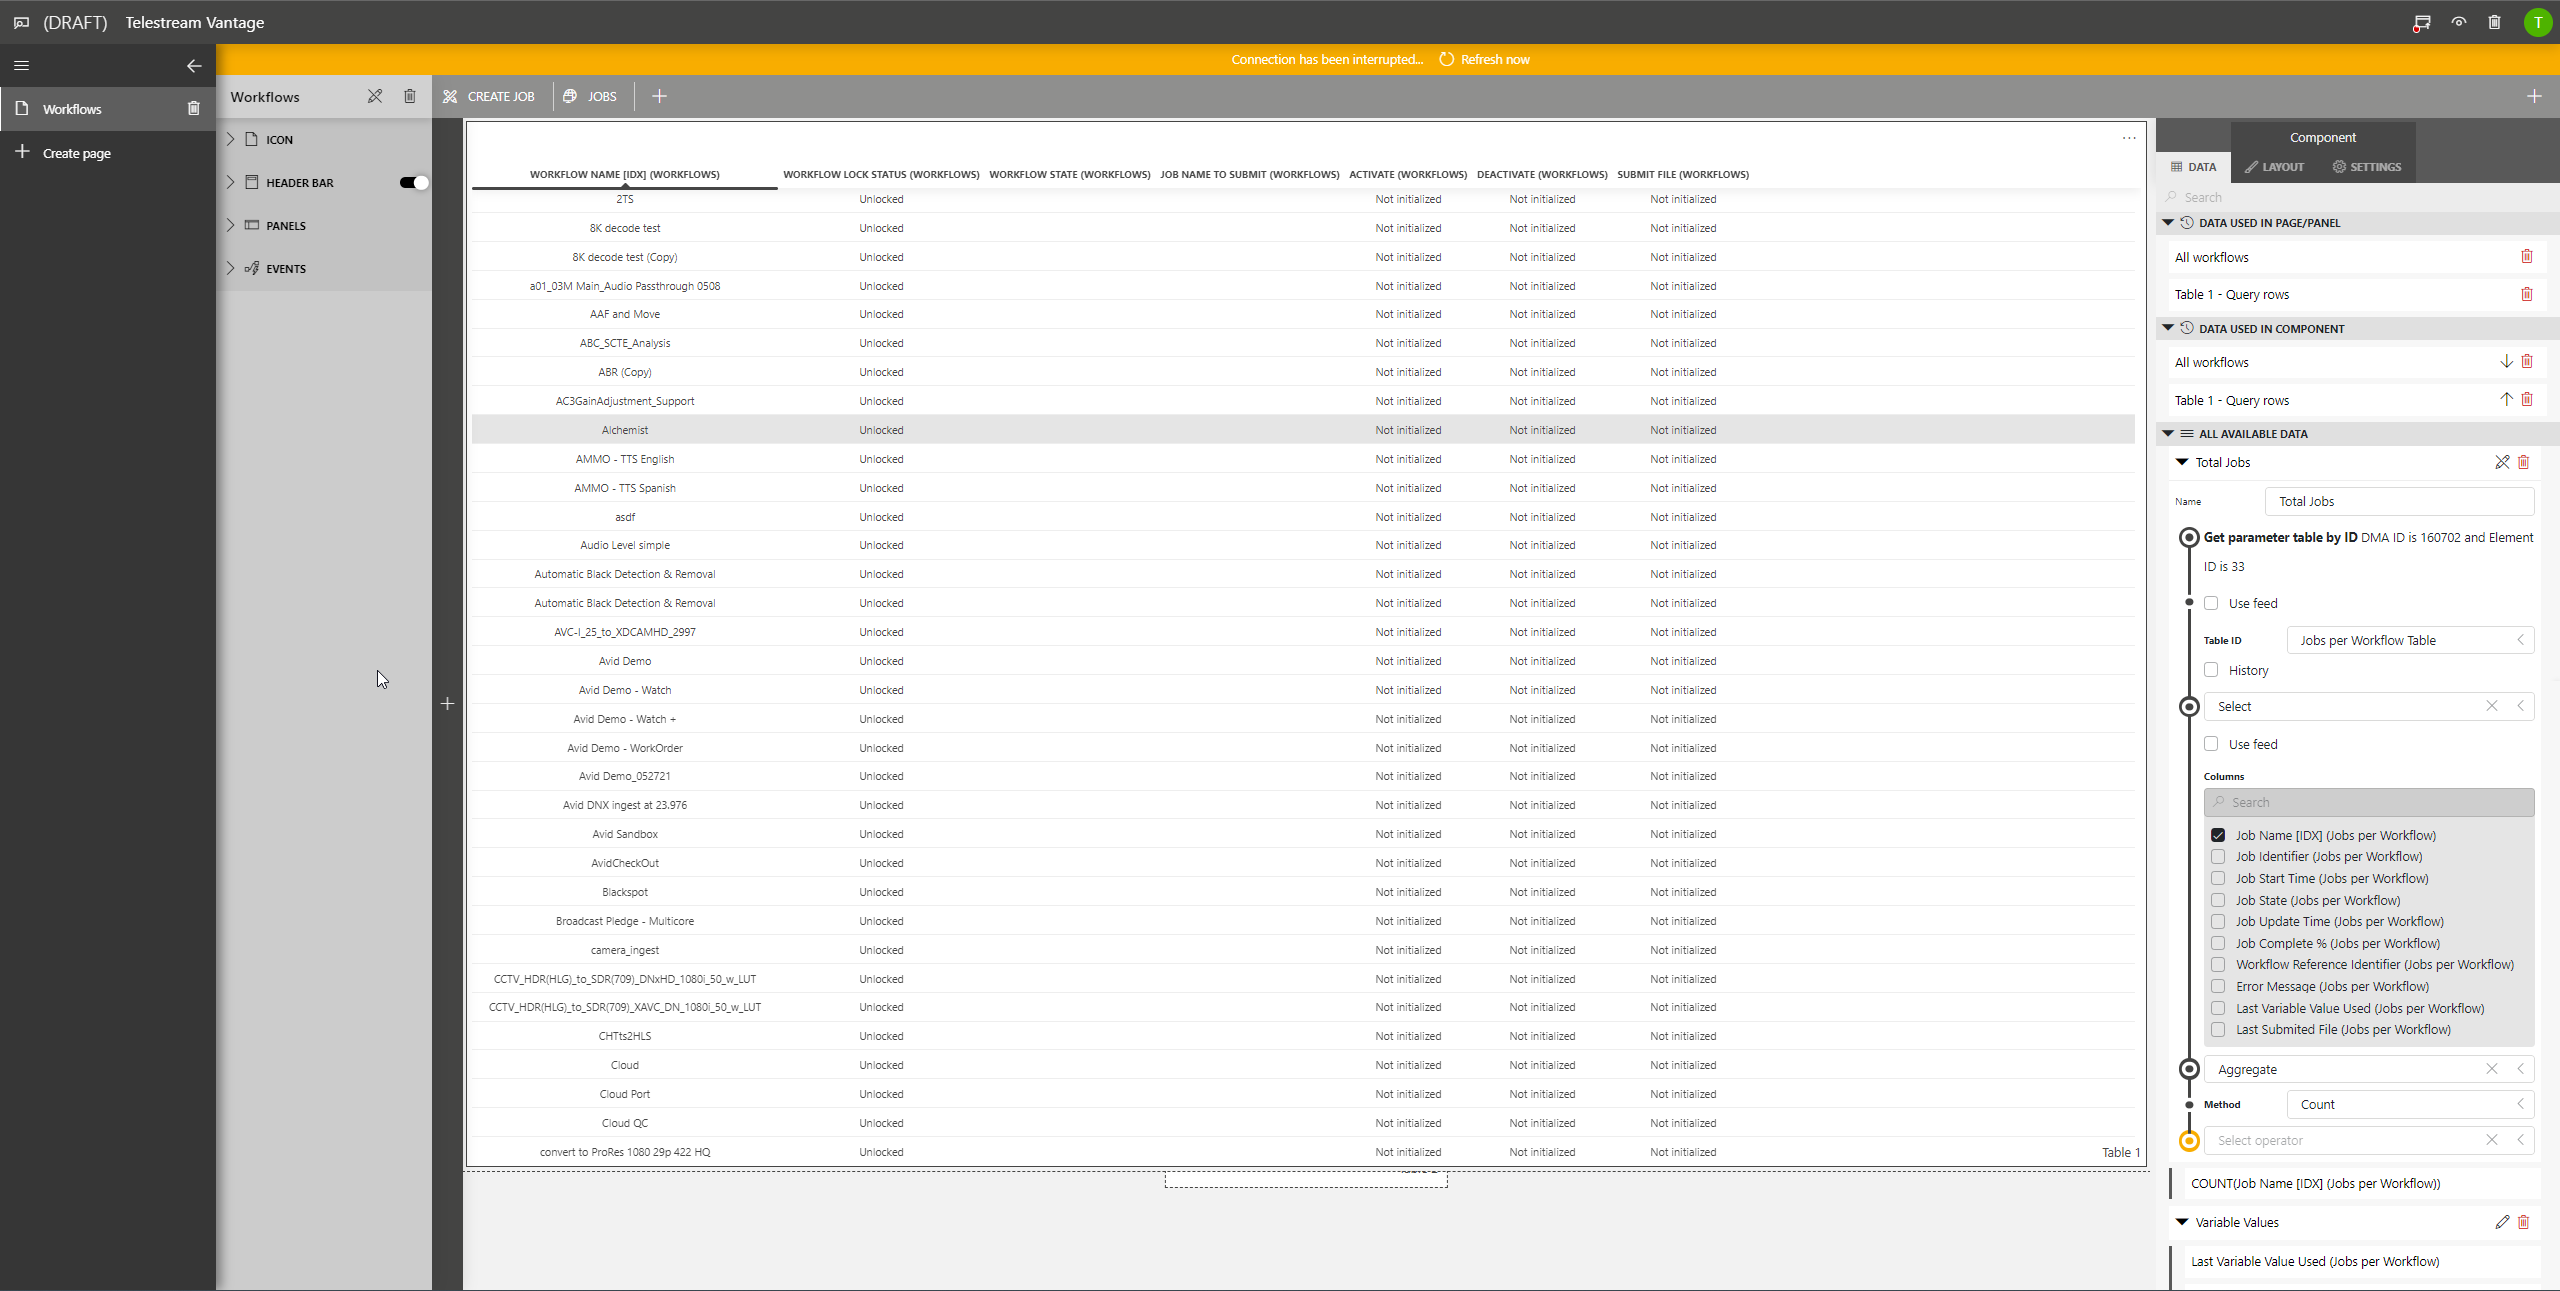 To the right in this screenshot, you can see how the total number of jobs gets calculated. As this metric is not available via the Vantage API, the DataMiner Generic Query Interface (GQI) is used to do this calculation. As you can see, again you don't have to be a developer for this.
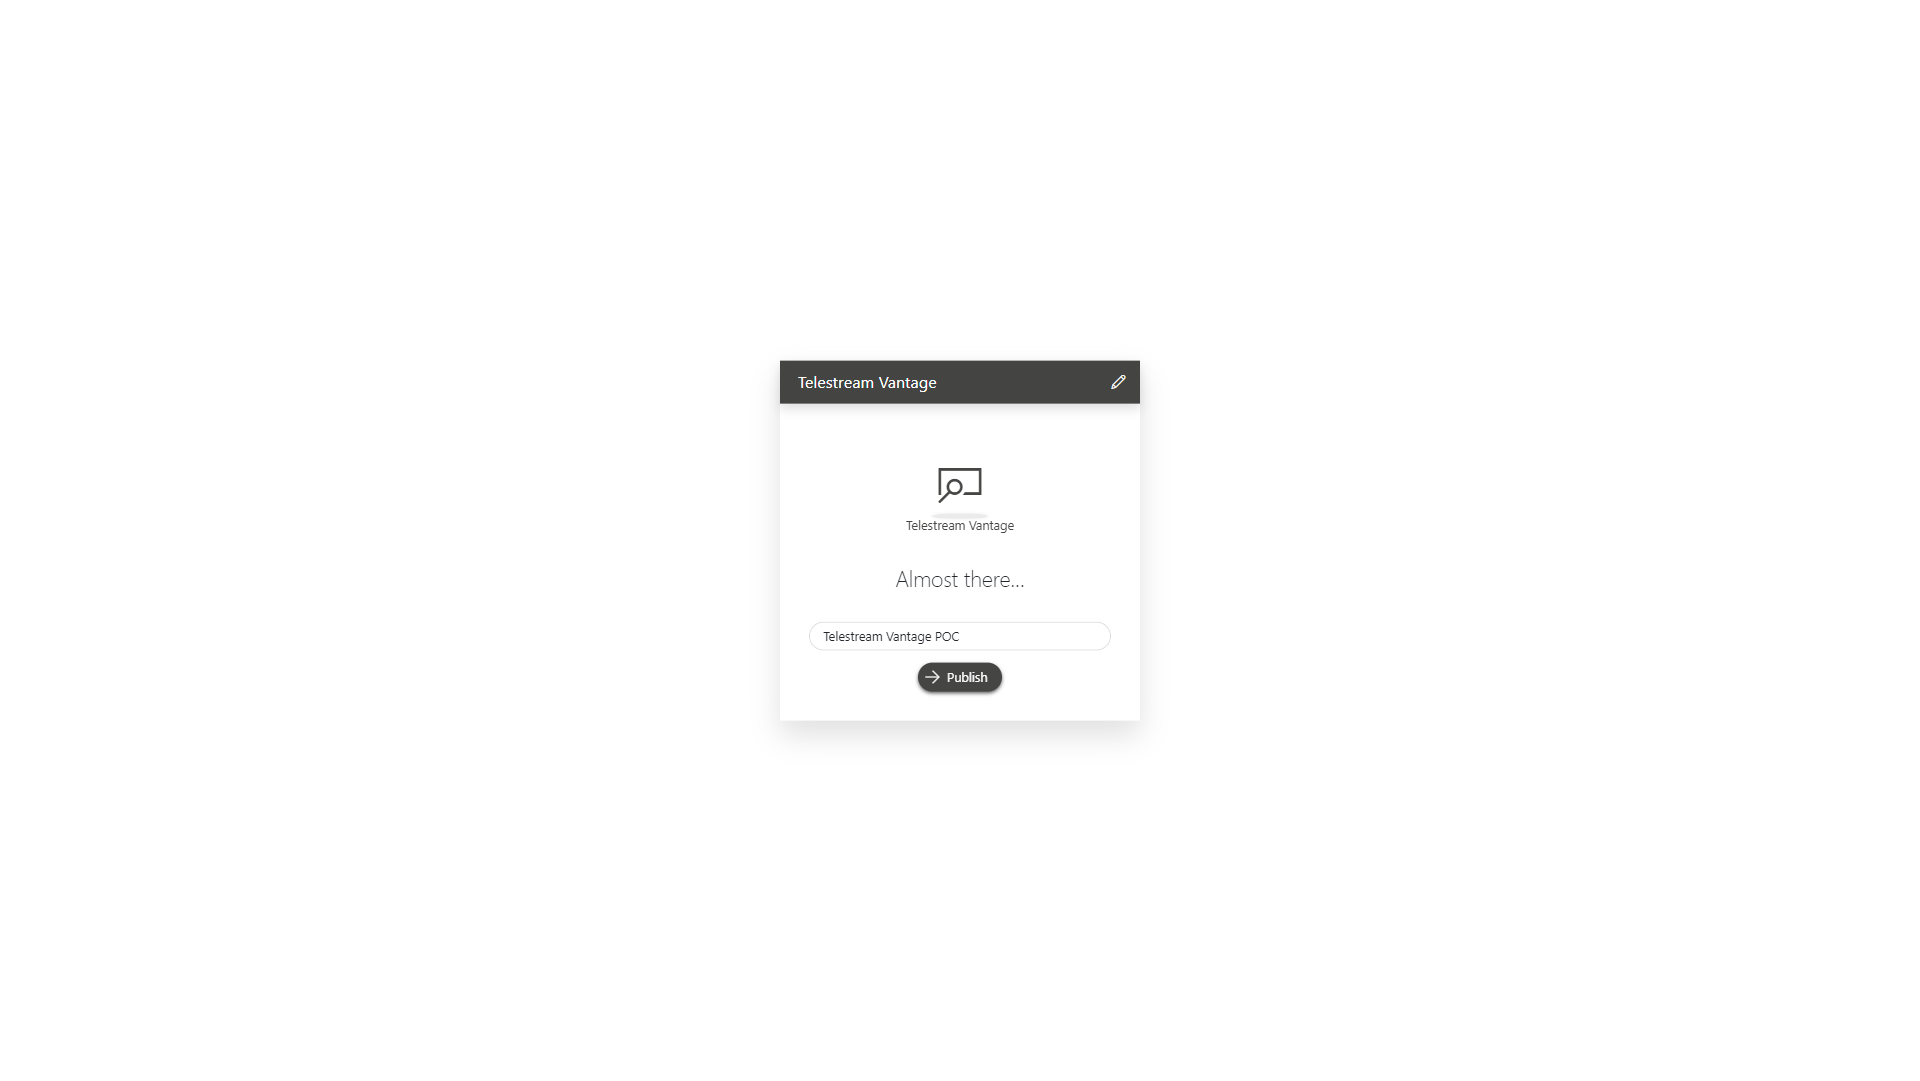 You can save your changes as a draft or click the publish button to immediately have an updated version up and running.
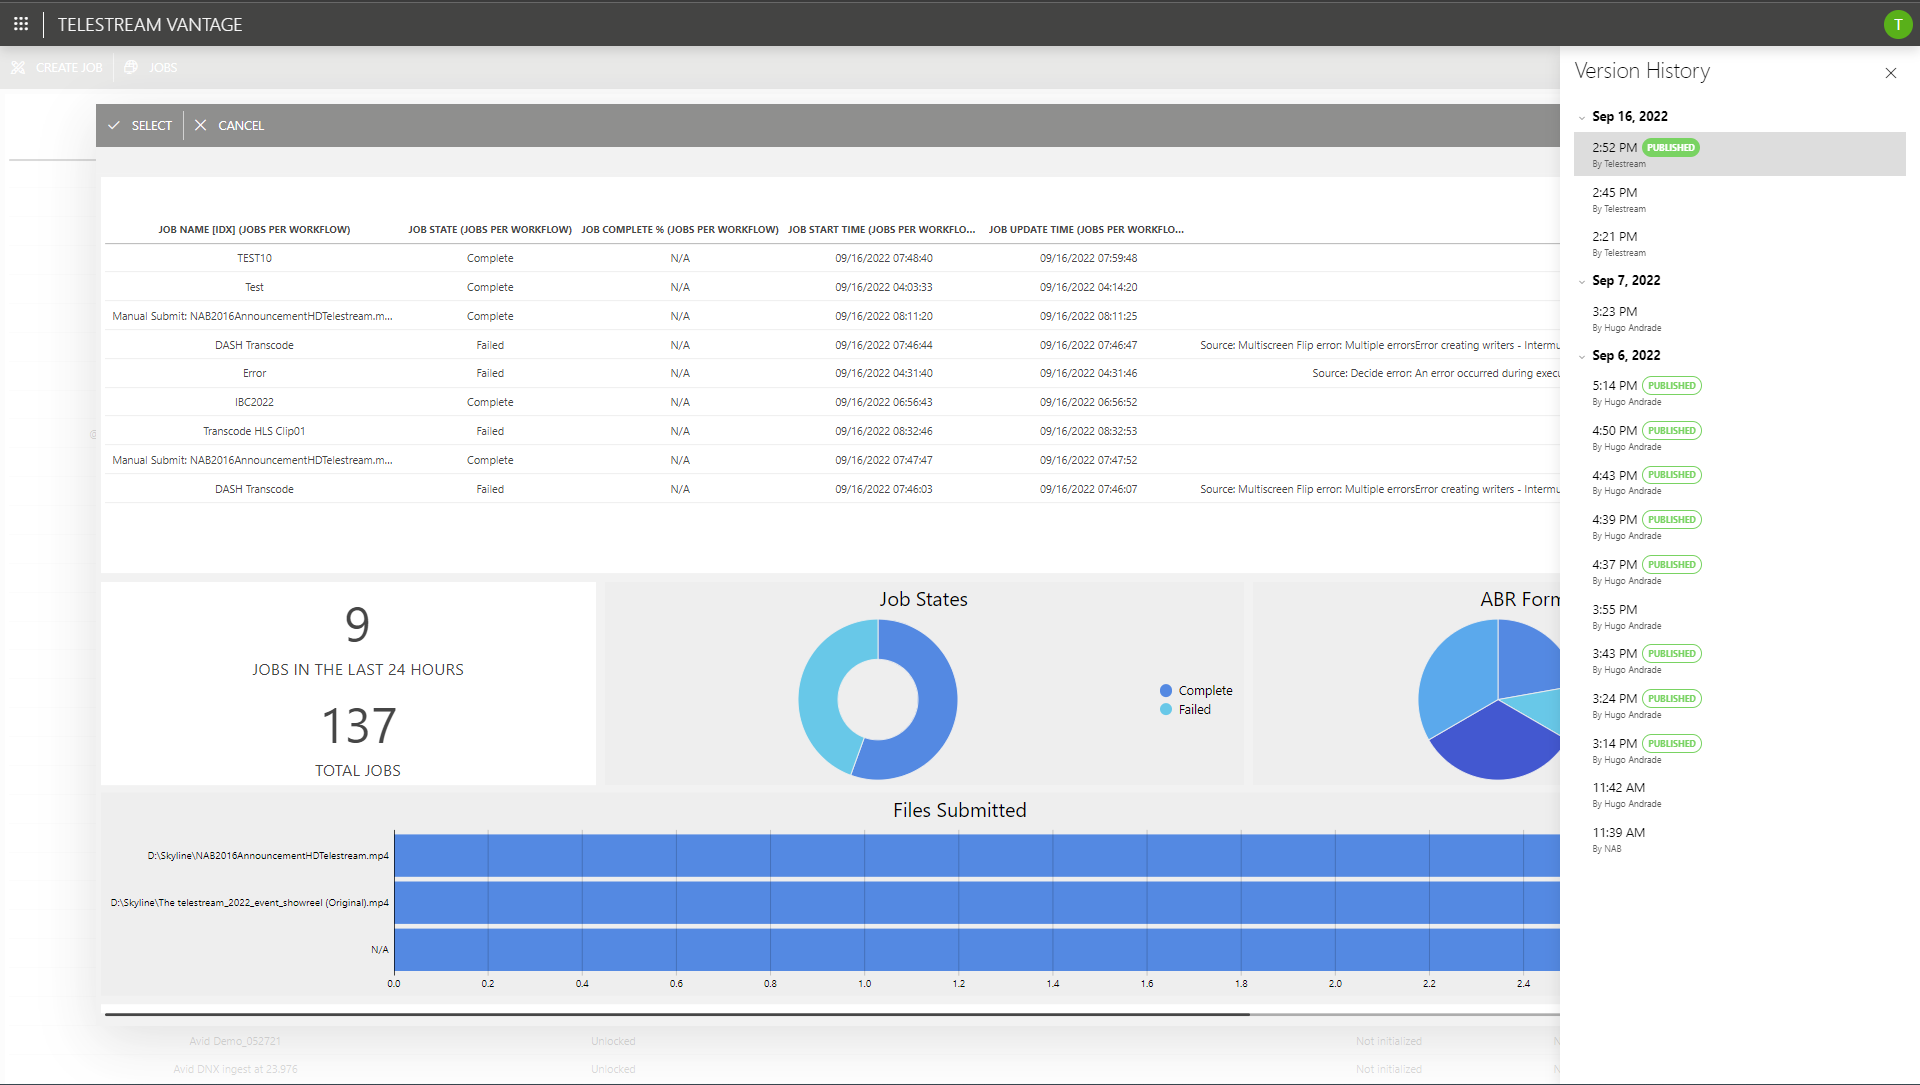 If you ever want to go back to a previous version, you can do this with a single click on the Version History. To learn more about DataMiner User-Definable Apps, DataMiner Object Models (DOM), and DataMiner Process Automation (PA), check out the DataMiner Digital Transformation Suite: https://community.dataminer.services/solution/digital-transformation-suite/
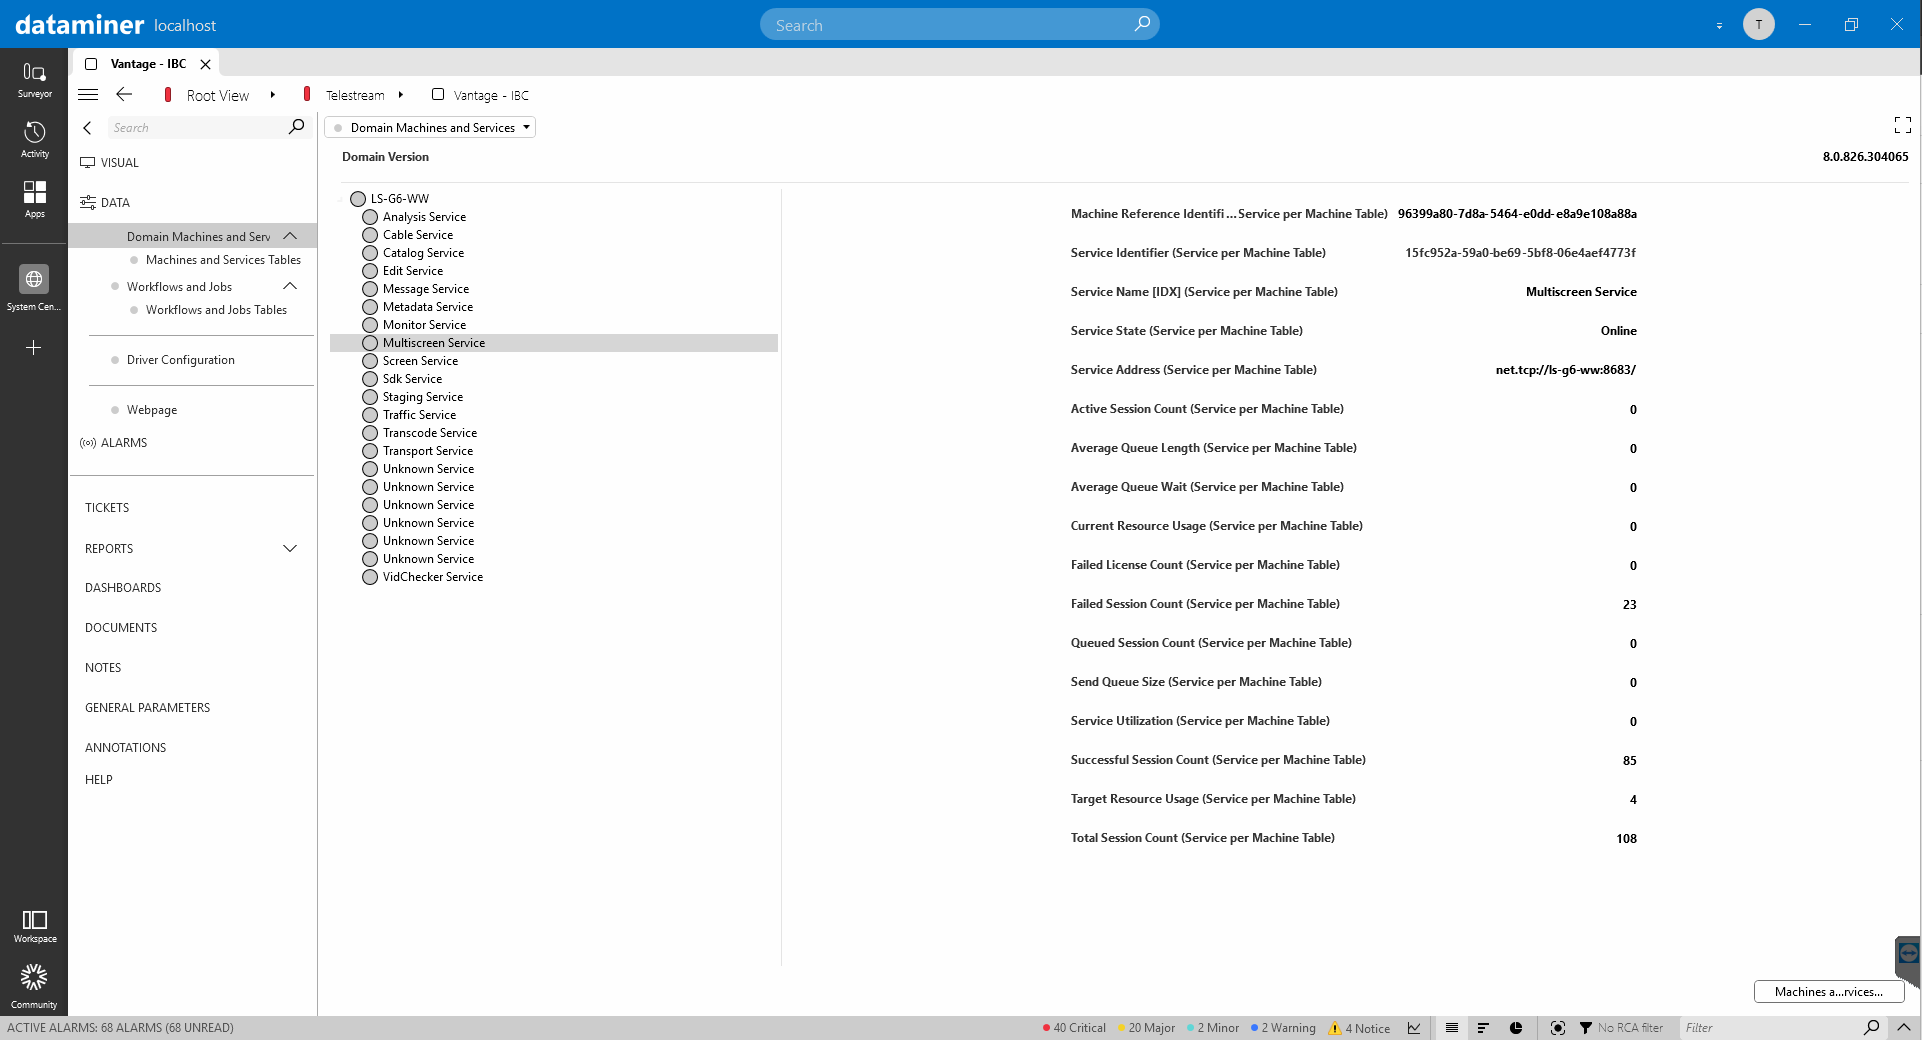 This screenshot and the next ones will give you some insight into the DataMiner Vantage connector. DataMiner not only checks the Vantage workflows but constantly monitors the Vantage application and all its services as well.
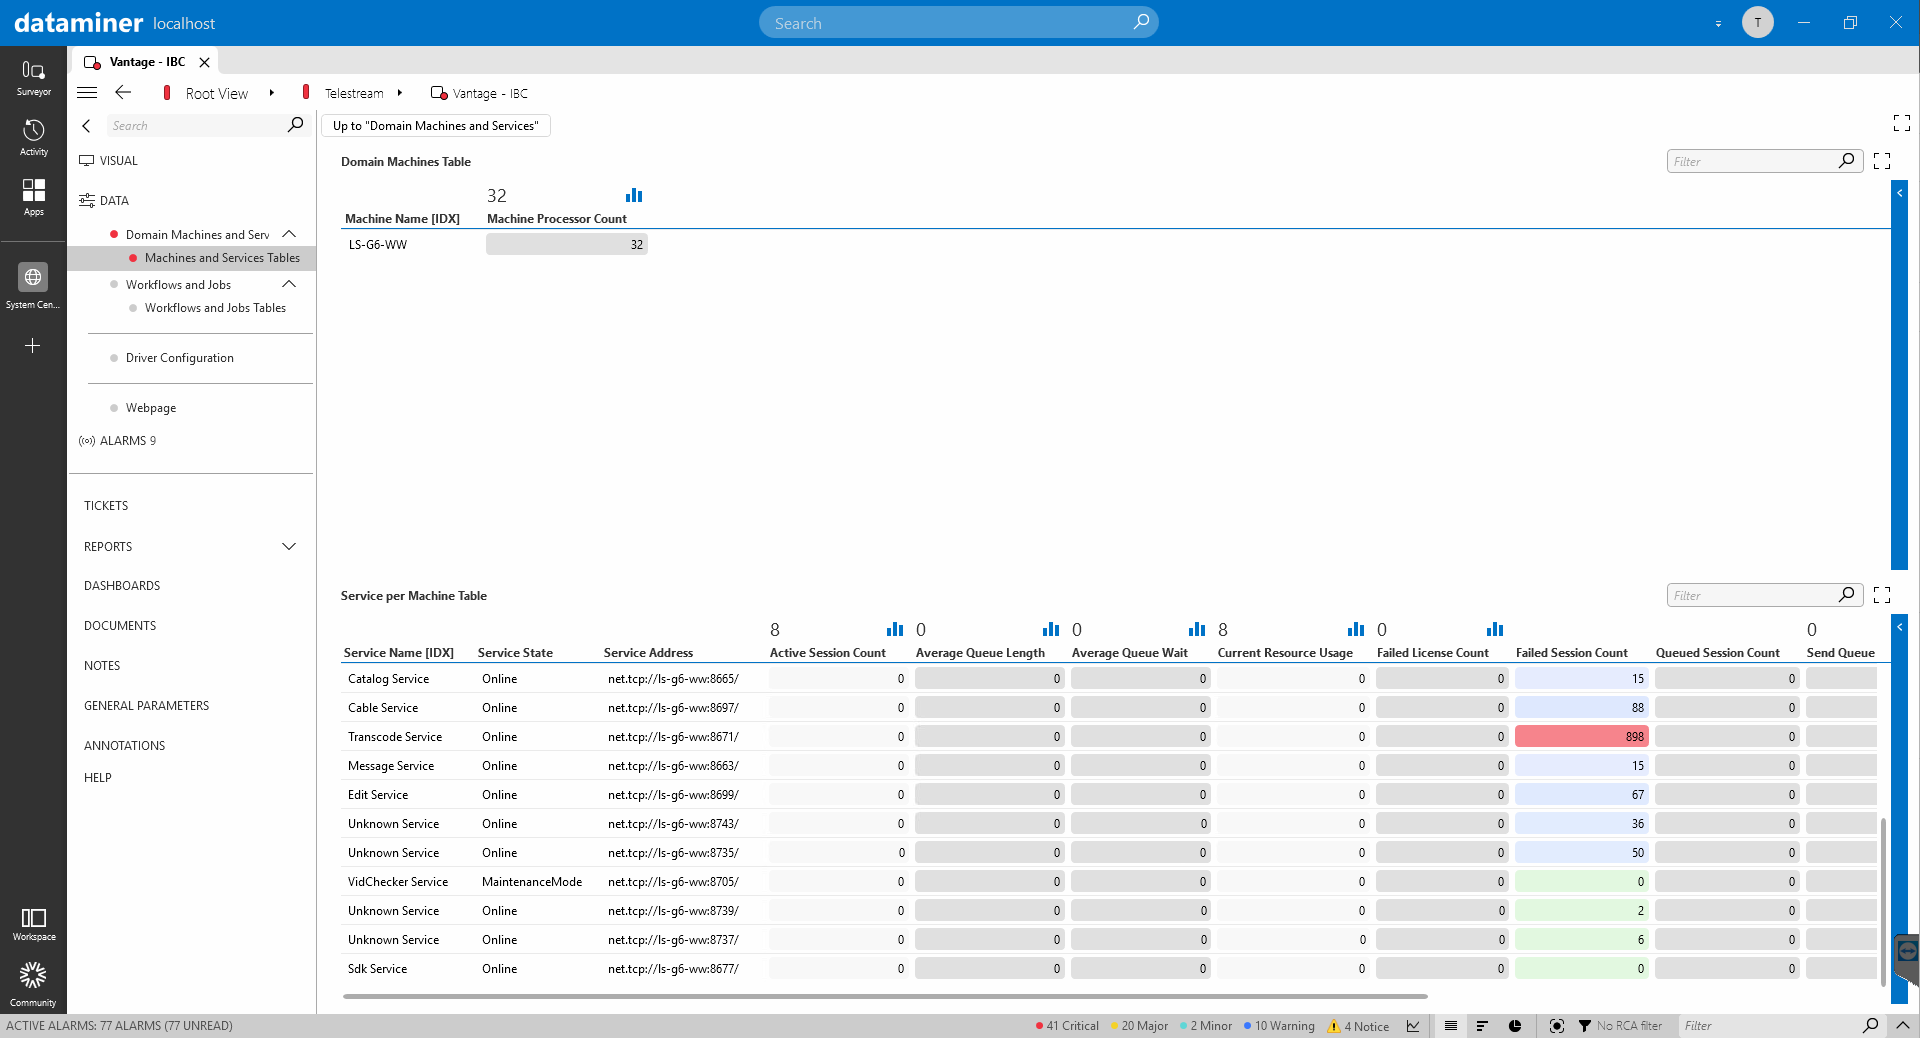 For example, you can track the "Average Queue Wait" times or "Failed Session Counts".
 Or you can check all details of each and every workflow. These are exactly the kinds of data that you can use in the DataMiner Low-Code Apps.
 Workflow details
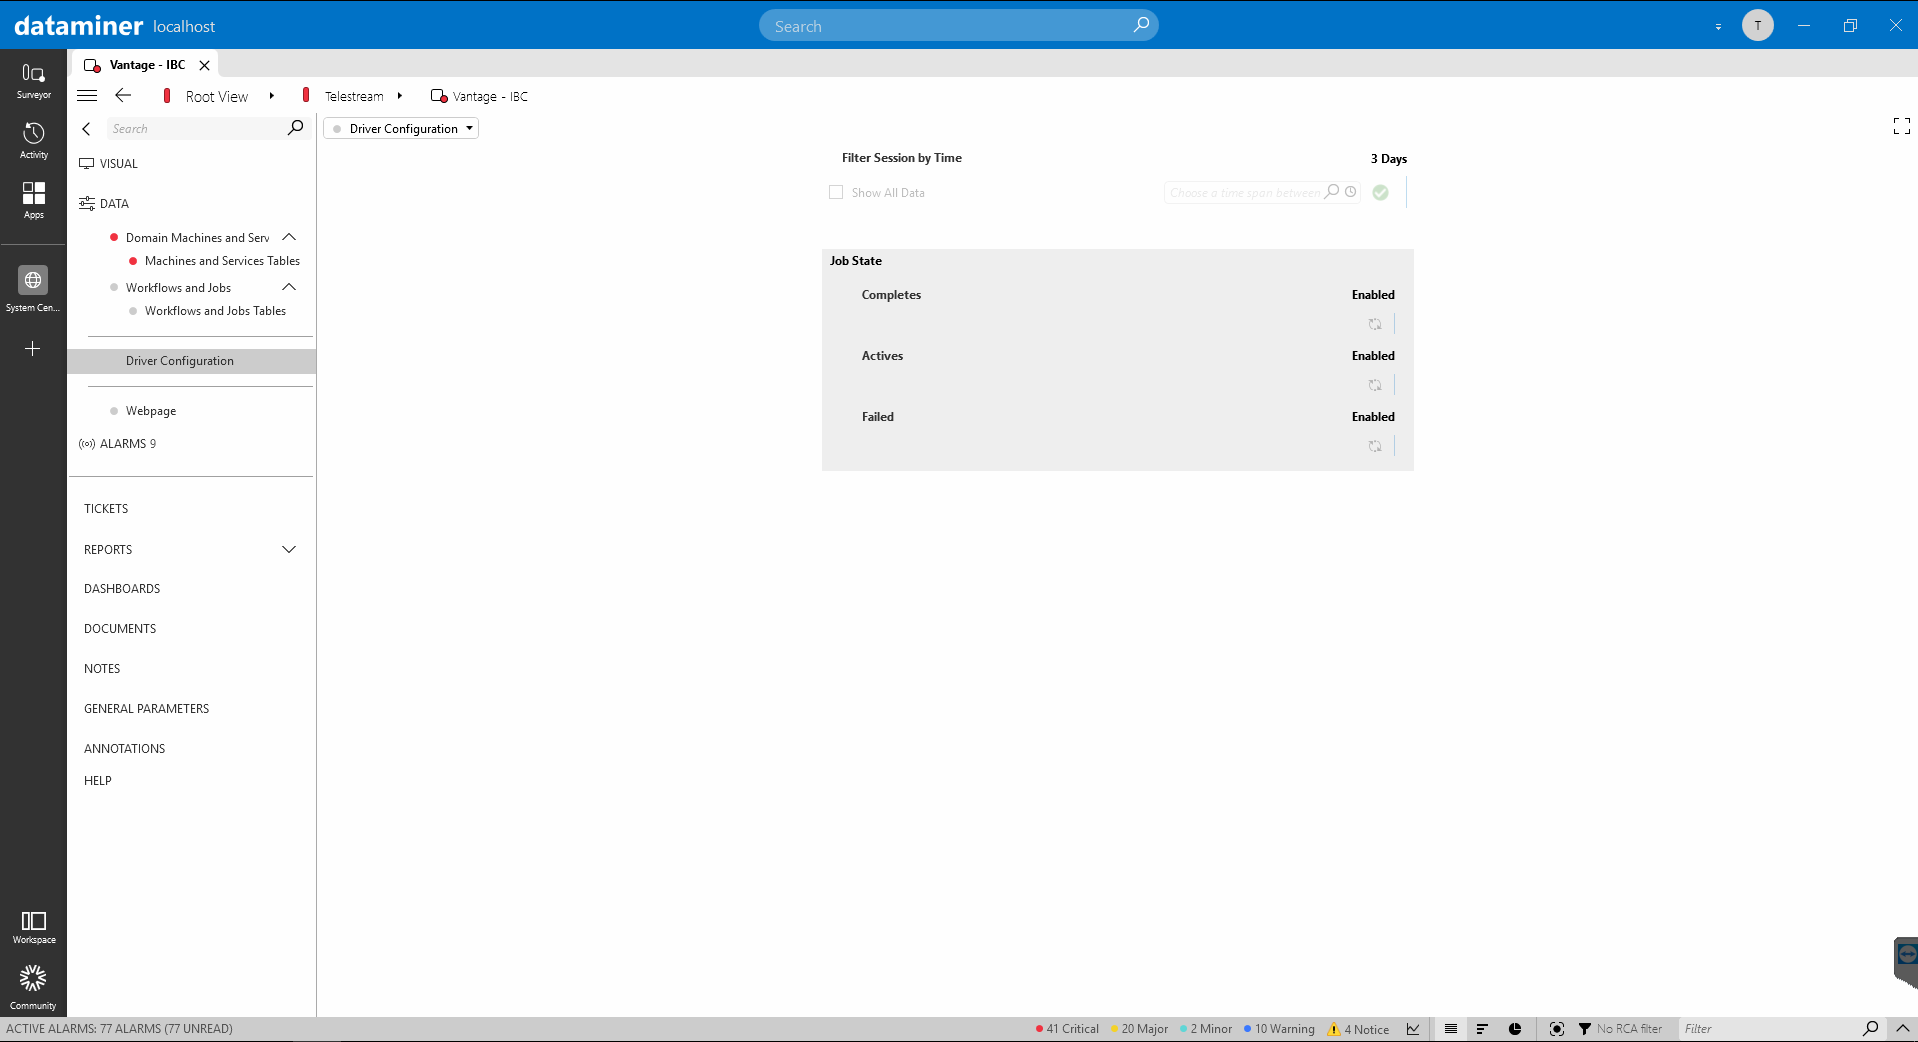 Connector configuration